I was sitting on my workshop floor last Tuesday, staring down at my absolute favorite pair of vintage Levi’s, when I saw it: a gaping hole right at the knee that looked more like a canyon than a minor tear. My first instinct wasn’t to toss them in the donation bin, but to reach for my sewing kit. Most people think that once your denim gives out, it’s game over, but I’ve learned that knowing how to patch jeans is actually the secret to making your wardrobe last a lifetime. Instead of seeing a flaw, I started seeing an opportunity to add a little character and soul to a piece I already love.
In this guide, I’m skipping all the complicated sewing jargon and getting straight to the real-world techniques that actually work. Whether you want a seamless repair that blends right in or you’re feeling a bit more adventurous and want to try some visible mending, I’ve got you covered. I’ll walk you through my favorite foolproof methods using simple tools you probably already have in your junk drawer. We aren’t just fixing clothes here; we are transforming your favorites into something even better than before!
Table of Contents
Guide Overview
Tools & Supplies
- Fabric scissors for trimming frayed edges
- Sewing needle for hand stitching or a sewing machine
- Thimble to protect finger during heavy denim stitching
- Patch fabric (denim or cotton scrap) 1 piece
- Thread (matching or contrasting color) 1 spool
- Pins or fabric clips to hold layers in place 1 pack
Step-by-Step Instructions
- 1. First things first, let’s get your workspace ready and gather your supplies. You’ll need a needle and thread (or a sewing machine if you’re feeling fancy!), some fabric scissors, and most importantly, your patch material. I personally love using scraps from an old pair of denim that didn’t quite fit anymore, but don’t be afraid to get creative with some patterned cotton or even lace if you want to go for a boho-chic vibe.
- 2. Once you have your materials, take a good look at the hole you’re trying to fix. You’ll want to trim away any loose, fraying threads that might get caught in your stitches. I usually grab my small detail scissors from my toolkit to make sure the edges are clean and even, which makes the whole patching process so much smoother in the long run.
- 3. Now, it’s time to prep your patch! Place your scrap fabric underneath the hole, making sure it’s large enough to extend at least a half-inch beyond the damaged area on all sides. This extra bit of “breathing room” is absolutely essential to ensure your patch stays secure and doesn’t just peel away after one wash.
- 4. If you’re working with a sewing machine, I highly recommend using a stabilizer or even a bit of lightweight fusible interfacing on the back of the patch. This keeps the denim from puckering while you work. If you’re doing this by hand—which is such a meditative way to spend an afternoon—just make sure your tension is even so your stitches don’t pull too tight.
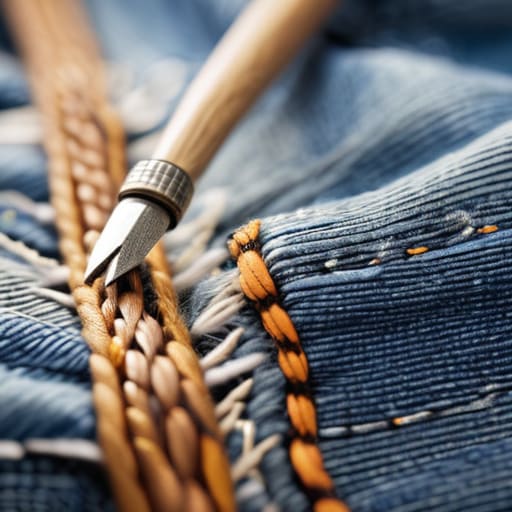
- 5. Let’s get stitching! Start by sewing around the perimeter of your patch first to lock it in place. Once that’s secure, move on to the “filling” part. I love using a running stitch or a whip stitch to cover the actual hole. If you want that authentic, rugged look, try a zig-zag stitch; it looks super professional and really helps distribute the tension across the fabric.
- 6. As you move across the hole, try to mimic the direction of the denim’s weave. This isn’t just about looks; it actually makes the patch much more durable. I always tell my readers to take their time here—there’s no rush! It’s all about the rhythm of the needle and the satisfaction of seeing that gap disappear.
- 7. Finally, give your hard work a little “stress test.” Gently tug on the fabric around the patch to make sure everything feels sturdy and integrated. If you see any loose loops, just trim them back. Once you’re happy with it, you’re ready to wear your masterpiece out into the world with pride!
Mastering Visible Mending Techniques With Love
Now, if you’re feeling a little nervous about those holes being a bit too obvious, I want you to take a deep breath and lean into it! Instead of trying to hide the repair, I’ve fallen head over heels for visible mending techniques that actually turn your “oops” moments into intentional design features. Think of your jeans as a canvas. You can use contrasting colors to make the repair pop, or even use different textures to add some soul to the garment. It’s not about perfection; it’s about the story your clothes tell.
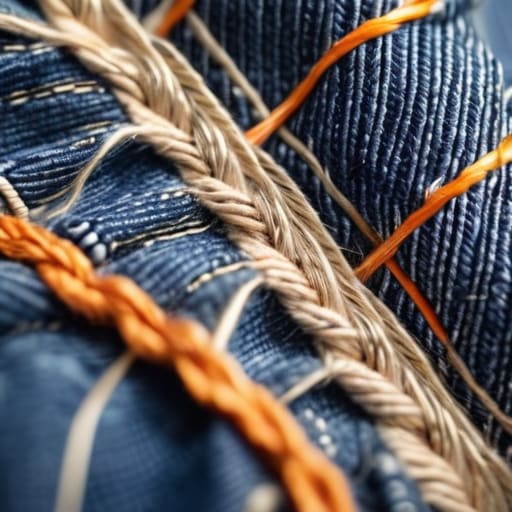
One of my absolute favorite ways to add character is by using various denim fabric scraps for patching. I often dig through my scrap bin to find pieces with unique washes or even some vintage lace to layer underneath. If you aren’t quite ready to dive into full-on embroidery, you might try a simple darning technique for denim to fill in smaller worn areas. It creates this beautiful, woven texture that looks incredibly high-end. Remember, there are no mistakes here—only opportunities to create something one-of-a-kind!
Choosing the Perfect Denim Fabric Scraps for Patching
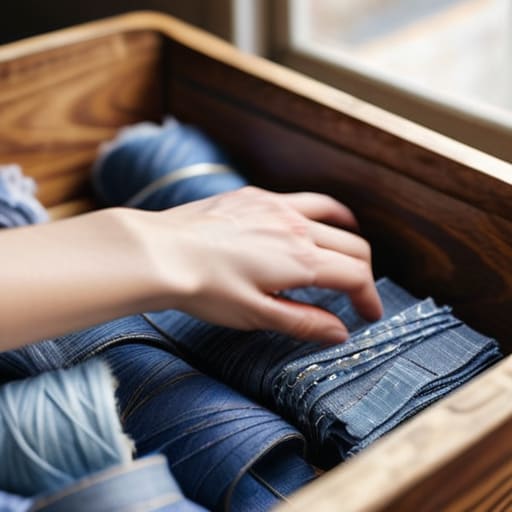
Now, let’s talk about the fun part—picking out your materials! When you’re hunting for the best denim fabric scraps for patching, don’t feel like you have to play it safe by matching the color perfectly. In fact, part of the charm of visible mending is the character that different textures bring to the garment. I love digging through my old bins of leftover fabric to find something with a bit of contrast. If you want a more subtle look, aim for a similar weight and wash, but if you’re feeling bold, grab a piece of dark indigo or even a patterned cotton to make that repair pop!
One thing I learned growing up in my dad’s hardware store is that the strength of the material matters just as much as the look. If you’re dealing with a particularly large tear, I recommend using a slightly heavier weight denim to ensure your repair holds up through every wash and wear. While iron-on denim patches are a super quick fix for those “oops” moments, nothing beats the durability of stitching a real scrap of fabric directly into the weave. It gives you so much more creative freedom to play with different textures and styles!
Pro Tips from My Workbench to Yours
- Don’t skip the pre-wash! Before you even touch a needle, make sure your jeans and your scrap fabric have been washed a few times. This prevents that annoying situation where your patch shrinks differently than the denim, leaving you with a bunch of puckered fabric.
- Think about the “stretch factor.” If you’re working with stretchy skinny jeans, try to find a patch fabric with a bit of spandex or elastane. Using a stiff, non-stretch cotton on stretchy denim can make the repair feel like a scratchy, uncomfortable plate on your leg.
- Get a stabilizer on board. If the denim is feeling a bit thin or worn out around the hole, iron a small piece of lightweight fusible interfacing onto the inside of the jeans. It gives your stitches something sturdy to grab onto so you aren’t just sewing through air!
- Match your thread to your mood, not just the color. While matching the thread perfectly is great for a seamless look, I love using a contrasting color to really celebrate the repair. It turns a “fix” into a design choice!
- Mind your tension. If you’re using a sewing machine, keep your tension a little looser than usual. Denim is heavy, and if your tension is too tight, the fabric will bunch up and look messy rather than laying flat and smooth against your skin.
Quick Tips to Keep Your Denim Looking Fab
Don’t be afraid to let your repairs show! Whether you’re going for a seamless look or a bold, visible mend, the goal is to embrace the history of your favorite jeans.
Always prep your fabric by washing and drying your scraps first; this prevents your beautiful new patch from puckering or shifting after the first wash.
Patience is your best tool—take your time with those small stitches, and remember that even a “messy” mend has its own unique charm and character.
## Embracing the Beauty of the Mend
“I’ve always thought that a patch isn’t just a fix for a hole; it’s a little badge of honor that tells the story of where you’ve been and the care you put into the things you love.”
Emily Carter
You've Got This!
Before you put your needle and thread away, take a second to look at what you’ve just accomplished. We’ve covered everything from selecting the perfect fabric scraps to mastering those gorgeous visible mending stitches that turn a flaw into a feature. Whether you went for a subtle, seamless patch to keep things low-key or leaned into the art of intentional imperfection with some colorful embroidery, you have successfully breathed new life into a garment that might have otherwise ended up in a landfill. Remember, the most important part of the process isn’t achieving a factory-perfect finish; it’s about the careful way you approached the repair and the patience you showed while working through those tricky spots.
At the end of the day, these patched jeans are so much more than just clothing—they are a testament to your growing skills and your commitment to a more sustainable lifestyle. Every little stitch tells a story of a moment you chose to create rather than consume. I truly believe that once you start mending your own pieces, you’ll find a sense of pride that you just can’t get from buying something brand new off a shelf. So, don’t be afraid to make a few mistakes along the way; that’s just part of the creative journey. I can’t wait to see how you transform your wardrobe—now go out there and show the world your unique style!
Frequently Asked Questions
What kind of needle and thread should I actually use so I don't end up making the hole even bigger?
Oh, I have been there! There is nothing more frustrating than watching a tiny fray turn into a giant canyon because of the wrong tools. To keep things safe, grab a sharp embroidery needle or a medium-weight denim needle—they glide through thick fabric without pulling on the weave. For thread, skip the flimsy all-purpose stuff and go for a sturdy cotton or a heavy-duty polyester. It’ll hold up to real wear and tear!
Is there a way to patch my jeans without them looking super bulky or stiff?
Oh, I hear you! There is nothing worse than feeling like you’re wearing a stiff piece of cardboard on your leg. To keep things feeling soft and natural, I highly recommend using a lightweight fusible interfacing on the back of your patch before you sew. It stabilizes the fabric without adding much weight at all. Also, try using a thinner needle and smaller stitches—it keeps the profile slim and much more flexible!
How do I make sure my patch doesn't just pop right off after a few trips through the washing machine?
Oh, I hear you! There is nothing more frustrating than putting in all that heart and soul only to have your hard work vanish in the spin cycle. The secret is all in the tension and the reinforcement. Make sure you’re using a heavy-duty thread—I love a good cotton or upholstery thread—and don’t be afraid to back your patch with a tiny bit of lightweight fusible interfacing. It gives the fabric some extra “grip” so your stitches stay put!