
I remember standing in my first tiny apartment, staring at a blank, beige wall and feeling completely defeated because I didn’t have the budget for high-end custom cabinetry. I kept thinking that professional-looking floating shelves diy projects were only for people with expensive workshops and years of carpentry experience. But honestly? That is a total myth. Growing up in my family’s hardware store, I learned early on that you don’t need a massive studio to create something stunning; you just need the right approach and a little bit of grit.
In this guide, I’m stripping away all the complicated jargon and fancy tools you don’t actually need. I’m going to walk you through my tried-and-true method for crafting custom floating shelves that look like they cost a fortune, even if you’re working with a basic drill and some scrap wood. We’ll cover everything from choosing the perfect timber to ensuring your shelves are sturdy enough to actually hold your favorite books. You’ve totally got this—let’s grab some wood and build something amazing together!
Table of Contents
- Step-by-Step Instructions
- Choosing the Perfect Woodworking Tools for Shelving
- Designing Your Dream Modern Floating Shelf Design
- Pro-Tips from My Workbench: Avoiding Those Common DIY Pitfalls
- Quick Tips to Remember Before You Start Sawing
- Why I Love This Project
- You Did It: Time to Show Off Your Hard Work
- Frequently Asked Questions
Guide Overview
Tools & Supplies
- Drill/Driver for mounting brackets and screws
- Level to ensure shelves are straight
- Stud finder to locate wall supports
- Saw for cutting wood to size
- Sandpaper for smoothing edges
- Wood planks (pine or oak) 1-2 pieces
- Floating shelf brackets/hardware 1 set
- Wood screws 1 pack
- Wood stain or paint 1 can
- Wall anchors (if not hitting studs) 1 pack
Step-by-Step Instructions
- 1. First things first, let’s get our supplies together so we don’t have to keep running back to the garage mid-project. You’re going to need some sturdy wood for the shelves, some 2×2 lumber for the internal brackets, a drill, some wood glue, a level, and of course, some screws. I always like to grab my favorite vintage hammer from my collection to tap everything into place, but a standard mallet works wonders too!
- 2. Next, we need to prep our “skeleton”—those are the internal brackets that make the shelf look like it’s floating. Cut your 2x2s into pieces that will form a series of “fingers” or cleats. You’ll be screwing these into your wall studs, so measure twice and cut once to ensure everything stays perfectly aligned.
- 3. Once your brackets are cut, it’s time to mount them to the wall. This is where that level becomes your absolute best friend! Line up your cleats against the wall, ensuring they are perfectly straight, and drill pilot holes into the studs. Using heavy-duty screws here is non-negotiable because we want these shelves to be sturdy enough to hold your favorite books and decor without any wobbling.
- 4. Now, let’s build the “box” that will slide over those brackets. You’ll want to create a hollow wooden frame that matches the dimensions of your cleats. Use wood glue and a brad nailer to join the pieces together, creating a clean, seamless look. I find that a little extra patience during this stage makes all the difference when it comes to the final finish.
- 5. Before we slide everything into place, give your wooden box a good sanding. Start with a coarser sandpaper and work your way up to a fine grit until the surface feels as smooth as silk. If you’re planning on staining or painting, this is your moment to shine! I love using a warm oak stain, but the choice is entirely yours depending on your home’s vibe.
- 6. For the grand finale, slide your beautiful new shelf box over the wall-mounted cleats. Once it’s seated snugly against the wall, use a few small finishing nails to secure the box to the brackets so it doesn’t shift. Take a quick look, grab a coffee, and admire your handiwork—you just leveled up your space!
Choosing the Perfect Woodworking Tools for Shelving
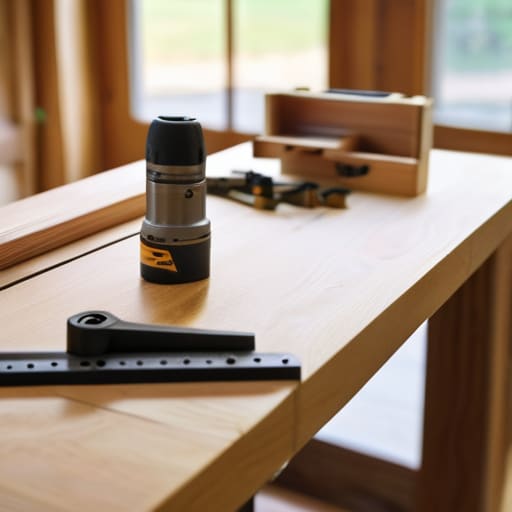
Now, before we get our hands dirty, let’s talk about the gear. I know, looking at a pile of tools can feel a little intimidating if you didn’t grow up in a hardware store like I did, but I promise you don’t need a professional workshop to get this done. When it comes to selecting the right woodworking tools for shelving, my top recommendation is to invest in a decent cordless drill and a high-quality level. There is nothing more heartbreaking than finishing a gorgeous piece of wood only to realize it’s sitting at a slight tilt! If you’re aiming for that sleek, modern floating shelf design, having a precise miter saw will also help you get those crisp, clean edges that make the project look high-end rather than “homemade.”
One thing I’ve learned from years of tinkering is that the real magic happens behind the scenes. To ensure your shelves stay put, you’ll need more than just a hammer (though I’ll probably grab one of my vintage ones just for luck!). You’ll need specific hardware for mounting shelves to studs securely. If you’re planning on displaying heavy ceramic vases or thick art books, don’t skimp on the fasteners. Getting those supports anchored correctly is the secret to a successful project that lasts for years.
Designing Your Dream Modern Floating Shelf Design
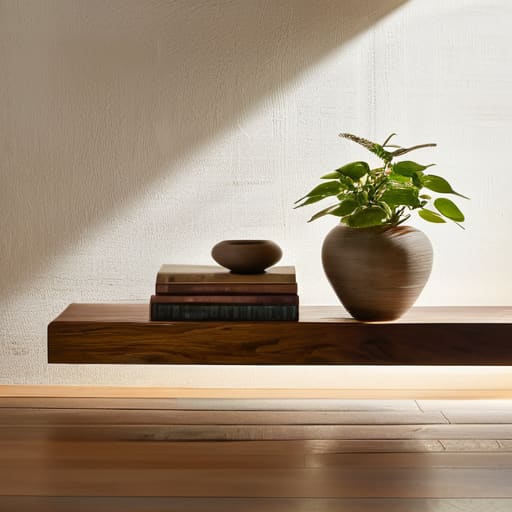
Before you grab your drill, let’s talk about the fun part—the vision! When I’m dreaming up a modern floating shelf design, I always tell my readers to think about the “vibe” of the room first. Are you going for that sleek, minimalist look with thin, light woods like maple, or something a bit more rustic and chunky with reclaimed oak? My biggest tip is to consider the scale; if your shelves are too small for the wall, they’ll look like they’re just hovering aimlessly, but if they’re too large, they can overwhelm the space.
Once you have your aesthetic nailed down, you have to play the math game. You’ll want to consider your shelf weight capacity tips early on so you don’t end up with a pile of broken ceramics on the floor! I always recommend sketching your layout on paper first. This helps you visualize how the lines of the shelves will interact with your furniture and decor. Remember, we aren’t just building storage; we are creating a visual anchor for your entire room. Let’s make it look intentional!
Pro-Tips from My Workbench: Avoiding Those Common DIY Pitfalls
- Don’t skip the stud finder! I know it’s tempting to just use drywall anchors to save time, but if you want those shelves to actually hold your heavy decor without a scary crash, you’ve got to anchor them directly into the studs.
- Level, level, and level again. There is nothing more frustrating than finishing a beautiful project only to realize your books are slowly sliding to one side. Use a good spirit level at every single stage of the installation.
- Mind your thickness. When you’re designing that sleek, modern look, remember that the “floating” magic happens in the gap between the shelf and the wall. If your shelf is too thin, the mounting bracket might peek out and ruin the illusion!
- Sand like your life depends on it. Since we’re going for that high-end designer feel, spend a little extra time with the sandpaper. A smooth, buttery finish makes even a budget piece of wood look like a million bucks.
- Test your weight capacity before you decorate. Before you go out and buy that massive collection of ceramic vases, give your shelf a little “test load” to make sure your mounting hardware and wood choice are up to the task!
Quick Tips to Remember Before You Start Sawing
Don’t rush the prep work—measuring twice and double-checking your level is the secret to avoiding those frustratingly crooked shelves!
Pick a wood species that matches your vibe, but always prioritize something sturdy enough to hold the treasures you plan to display.
Remember that perfection isn’t the goal; it’s the process of building something with your own two hands that truly makes a house feel like a home.
Why I Love This Project
“There is something so incredibly grounding about taking a raw piece of wood and turning it into a functional piece of art that lives in your home; it’s not just about the storage, it’s about the pride you feel every time you set your favorite coffee mug on something you built with your own two hands.”
Emily Carter
You Did It: Time to Show Off Your Hard Work
And just like that, you’ve gone from staring at a blank wall to having stunning, custom-made floating shelves! We’ve covered everything from picking out that perfect piece of timber to getting those brackets perfectly level and secure. I know that seeing all those tools laid out can feel a little intimidating at first, but remember that once you’ve mastered the measurements and the mounting, you’ve unlocked a brand-new skill. Whether you went with a sleek, modern look or something a bit more rustic, the most important thing is that you followed the process and built something functional that actually belongs in your home.
Now comes my absolute favorite part: the styling! This is where your personality really shines through. Whether you’re displaying your favorite vintage finds, a collection of trailing plants, or those cozy coffee table books you can’t stop talking about, these shelves are a canvas for your creativity. Don’t be afraid to experiment and move things around until it feels just right. I truly believe that the magic isn’t just in the finished product, but in the confidence you gained while making it. I am so incredibly proud of you for taking this leap—now go grab a camera and show off those beautiful shelves!
Frequently Asked Questions
How much weight can my DIY floating shelves actually hold before they start to sag or pull away from the wall?
That is such a great question, and honestly, it’s the one I get asked most! It really depends on your bracket style and whether you’re hitting a stud. If you’re mounting into studs with sturdy internal supports, you can usually hold a decent amount of books or decor. But if you’re just using drywall anchors, keep it light—think small plants or trinkets. When in doubt, always aim for those studs to keep everything safe and steady!
What’s the best way to hide the mounting hardware so the shelves look truly seamless and professional?
Oh, I am so glad you asked! That’s the secret sauce to making a DIY project look like a high-end custom installation. To get that “floating” magic, I always recommend using heavy-duty blind shelf supports. You’ll drill deep holes into the back of your wood so the rods slide right in. If you’re using brackets, just make sure they’re tucked far enough back that they’re completely invisible from the side. You’ve got this!
I'm worried about my walls—should I be using different types of anchors if I'm not hitting a stud?
Oh, I totally get that anxiety! Honestly, it’s one of the most common worries I had when I first started out. If you aren’t hitting a stud, you absolutely cannot just use a standard nail or a basic screw—your shelves will end up on the floor! You’ll definitely want to grab some heavy-duty drywall anchors, like toggle bolts, which are absolute lifesavers for holding weight. Let’s make sure those shelves stay exactly where we want them!
