I still remember standing in my parents’ hardware store back in Ohio, watching my dad effortlessly smooth out a bead of silicone like it was second nature. I used to think that mastering how to caulk was some kind of mystical, elite skill reserved only for seasoned contractors with decades of experience. For the longest time, I actually avoided it because I was terrified of making a massive, sticky mess that would look completely amateur in my newly renovated bathroom. But here’s the truth I learned the hard way: it’s not about having a magic touch; it’s just about having the right technique and a little bit of patience.
In this guide, I’m stripping away the intimidation factor and sharing the exact, no-nonsense steps I use in my own home. We aren’t going to get bogged down in overly technical jargon; instead, I’ll show you how to prep your surfaces, choose the right materials, and pull off a perfectly smooth finish every single time. Whether you’re sealing up a leaky bathtub or just freshening up your kitchen backsplash, I promise you’ll walk away feeling totally confident to grab that caulk gun and get to work!
Table of Contents
- Step-by-Step Instructions
- Mastering the Essentials Silicone vs Acrylic Caulk Selection
- Perfecting Your Craft Smooth Caulk Bead Technique Secrets
- Pro Secrets for a Flawless Finish: My Top 5 Caulking Tips
- Quick Wins for a Professional Finish
- A Little Secret from My Hardware Store Days
- You’ve Got This: Final Thoughts on Your Caulking Journey
- Frequently Asked Questions
Guide Overview
Tools & Supplies
- Caulking gun for applying sealant
- Putty knife or scraper for removing old caulk
- Utility knife for precise cutting
- Caulk tube (Silicone or Acrylic depending on surface)
- Caulk remover or chemical stripper if replacing old sealant
- Cleaning solution or rubbing alcohol to prep surface
Step-by-Step Instructions
- 1. First things first, we need to get that surface ready for its makeover! Grab a damp cloth and some rubbing alcohol to wipe down the area you’re about to caulk. It’s super important to remove every bit of old, crusty caulk and any lingering soap scum or dust, because new caulk just won’t stick to a dirty surface. If you’re dealing with old residue, a simple putty knife can work wonders to scrape it away.
- 2. Once everything is clean and—most importantly—completely dry, it’s time to prep your caulk tube. Cut the tip of the nozzle at a slight angle. I always recommend a small, 45-degree cut to start; you can always make the hole bigger if you need a thicker bead, but you can’t make it smaller! Think of it like adjusting your eyeliner—it’s much easier to add more than to fix a mess.
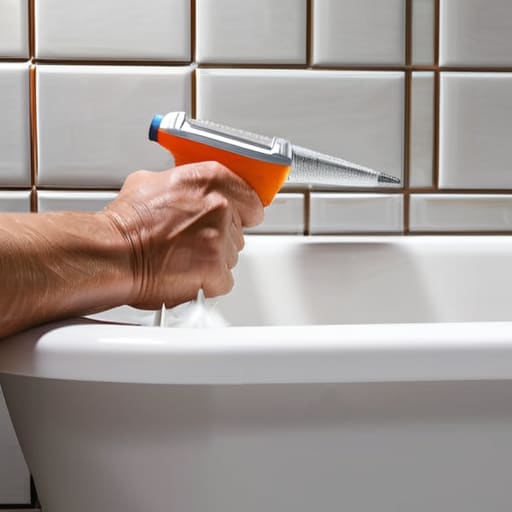
- 3. Now, let’s get that tube into the caulk gun. Slide it in firmly until you feel it click or seat properly against the plunger. Before you start applying it to your beautiful backsplash or tub, do a little practice bead on a piece of scrap cardboard or a paper plate. This helps you get a feel for how much pressure you need to apply to the trigger so you don’t end up with a giant, uncontrollable glob.
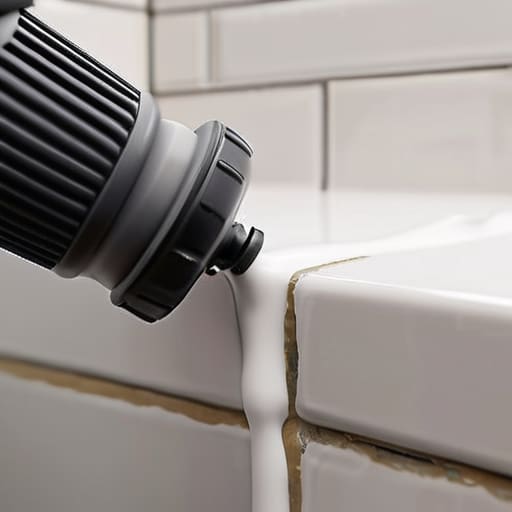
- 4. This is where the magic happens! Hold your gun at a 45-degree angle and move it steadily along the joint. The trick is to apply constant pressure to the trigger while pulling the gun toward you in one smooth, continuous motion. Try not to stop and start frequently, as that can leave little bumps that are a pain to smooth out later. Just keep your hand steady and breathe through it!
- 5. If you’re feeling a little nervous about the look of your bead, don’t panic—this is my favorite part! Take a spray bottle filled with water and a tiny drop of dish soap and lightly mist the line you just laid down. Then, take a damp finger (or a specialized caulking tool if you’re feeling fancy) and lightly run it along the bead to smooth it out. The soap prevents the caulk from sticking to your skin and helps create that perfectly professional finish we’re all after.
- 6. Finally, let’s give it some space to shine. Resist the urge to touch it or use the shower for at least 24 hours, depending on what the tube’s instructions say. I know, I know, it’s hard to wait when you want to see the finished result, but patience is a virtue in DIY! Once it’s fully cured, you’ll have a seamless, waterproof seal that looks like it was done by a pro.
Mastering the Essentials Silicone vs Acrylic Caulk Selection
Now, before you go grabbing the first tube you see at the hardware store, let’s talk about the most important decision you’ll make: choosing your fighter. I remember my dad used to tell me in the shop that using the wrong material is like trying to paint a wall with mud—it just won’t hold up! When it comes to silicone vs acrylic caulk, the choice really depends on where you’re working. If you’re caulking bathroom seams or anything near a tub or shower, you absolutely want to go with silicone. It’s waterproof, flexible, and won’t crack when things get steamy.
On the other hand, if you’re working on baseboards or trim where you might want to paint over the finish later, acrylic is your best friend. It’s much easier to work with for beginners, though it isn’t quite as water-resistant as its silicone cousin. Just a little pro-tip from my years of tinkering: if you’re working on a project that’s seen better days, make sure you’ve mastered removing old caulk completely before applying the new stuff. Starting with a clean slate is the secret to a professional-looking finish that actually lasts!
Perfecting Your Craft Smooth Caulk Bead Technique Secrets
Now, let’s get into the part that usually makes people a little nervous: actually pulling the trigger. I remember the first time I tried caulk gun usage back in my dad’s hardware store; I ended up with more mess on my hands than on the wall! The secret to a professional-looking finish isn’t about having a steady hand like a surgeon; it’s all about consistent pressure. Try to maintain a steady, rhythmic squeeze as you move along the joint. If you go too fast, the bead will look thin and patchy, but if you’re too slow, you’ll end up with a giant, messy glob that’s a nightmare to clean up.
Once you’ve laid down your bead, it’s time for the magic touch. To achieve that dreamy, smooth caulk bead technique, I always keep a small spray bottle filled with water and a tiny drop of dish soap nearby. Lightly misting the bead—and your finger!—prevents the material from sticking to your skin and helps you glide right over the surface. This is especially helpful when you’re caulking bathroom seams where precision is key. Just a gentle swipe is all it takes to level everything out perfectly!
Pro Secrets for a Flawless Finish: My Top 5 Caulking Tips
- Don’t skip the prep work! I know, I know—cleaning out the old, crusty caulk and wiping the area down with rubbing alcohol feels like a chore, but it is the absolute secret to making sure your new bead actually sticks instead of peeling off in a week.
- Master the “finger glide” trick. Instead of just using your bare finger, try dipping it in a little bit of warm, soapy water before you smooth the bead; it prevents the caulk from sticking to your skin and helps you get that professional, sleek line every single time.
- Keep a steady hand by practicing your “pull.” Rather than trying to push the caulk into the gap, try to draw the gun along the joint at a consistent speed—it’s a lot like drawing a line with a pencil, and it keeps your bead from looking lumpy or uneven.
- Always keep a damp rag handy. I learned this the hard way back in my hardware store days! Having a cloth ready to immediately wipe away any excess or “oops” moments will save you from a massive cleanup headache later.
- Less is definitely more when it comes to the initial bead. It’s way easier to add a little more caulk to fill a gap than it is to try and scrape away a massive, overflowing mess that’s gone everywhere!
Quick Wins for a Professional Finish
Remember that choosing the right material is half the battle—use silicone for those wet areas like showers, and stick to acrylic for your baseboards and trim!
Don’t rush the process; a steady hand and a little bit of patience during the smoothing stage make all the difference between a messy line and a flawless bead.
Most importantly, don’t be afraid to make mistakes! If a bead looks a little wonky, just wipe it away and try again—that’s how we all learned.
A Little Secret from My Hardware Store Days
“I know that first squeeze of the caulk gun can feel a little intimidating, but honestly? Don’t sweat the small messes. Even my dad, with all his years in the family hardware store, says the secret isn’t in having a steady hand, but in having the patience to smooth it out as you go. You’ve totally got this!”
Emily Carter
You’ve Got This: Final Thoughts on Your Caulking Journey

I know, I know—staring down a messy gap in your backsplash or a leaky tub can feel a little overwhelming at first. But look at how far you’ve come! We’ve covered everything from picking the right material, whether it’s that flexible silicone for the shower or a sturdy acrylic for your trim, to those little pro-tips for getting a perfectly smooth bead every single time. Just remember that the secret to success really lies in the preparation; taking that extra moment to clean the surface and mask your edges will save you so much frustration in the long run. If you hit a snag or a bead looks a little wonky, don’t sweat it—just wipe it away and try again. It’s all part of the learning process.
At the end of the day, caulking isn’t just about sealing gaps or preventing water damage; it’s about taking ownership of your home. There is something so incredibly satisfying about looking at a finished room and knowing that you were the one who polished those details to perfection. Whether this is your first time picking up a caulk gun or you’re just refining your technique, I am so proud of you for leaning in and trying something new. Your home is your canvas, and every small project like this is a step toward creating a space that truly reflects your hard work. Now, go grab your tools and let’s build something amazing together!
Frequently Asked Questions
How do I know if I should use a caulk remover or just try to scrape the old stuff away?
Honestly, this is such a great question! If you’re dealing with a tiny, thin line of old caulk, a sturdy putty knife or even a fingernail might do the trick. But if that old stuff is thick, stubborn, or really stuck in there, please save your wrists and grab a caulk remover! It’ll make your life so much easier and ensure you’re starting with a totally clean slate for your new bead.
Is it okay to caulk over a surface that isn't perfectly clean, or will that cause it to peel later?
Oh, I am so glad you asked that! It’s tempting to just dive in when you’re in the zone, but please, don’t skip the cleaning step. If there’s even a tiny bit of dust, old soap scum, or oil left behind, that caulk just won’t grab onto the surface. It might look okay for a week, but it’ll eventually peel right off, leaving you to do the whole job twice. Let’s do it right the first time!
How long do I actually need to wait before I can get the area wet or use it again?
This is such a common question, and honestly, I’ve been there—staring at a fresh bead of caulk, dying to turn the shower back on! While you might see “dry in an hour” on some tubes, please be patient. For silicone, I always recommend waiting a full 24 hours before getting it wet. It needs that time to truly cure and bond. If you rush it, you might end up with a messy leak later!