I still remember the absolute chaos of my first attempt at working with epoxy—I had sticky residue all over my kitchen table, a cloud of bubbles that looked like a science experiment gone wrong, and a heart full of doubt. Most people will tell you that you need a professional studio or a mountain of expensive equipment to get started, but let me tell you the truth: that couldn’t be further from reality. You don’t need a fancy workshop to master resin crafts for beginners; you just need a little bit of patience and the right roadmap to avoid those messy, common pitfalls.
In this guide, I’m stripping away all the intimidating jargon and fluff to give you the real-world basics. I’ll walk you through exactly which supplies are actually worth your hard-earned money, how to manage bubbles like a pro, and how to ensure your first piece comes out crystal clear rather than a cloudy mess. My goal is to take the guesswork out of the process so you can stop worrying about the “what-ifs” and start creating something beautiful with your own two hands. Let’s get started!
Table of Contents
- Step-by-Step Instructions
- Gathering Your Essential Resin Art Supplies With Joy
- Mastering Safety Precautions for Epoxy Resin to Work Confidently
- Pro-Tips from My Workbench: A Few Little Secrets for Success
- My Top Tips for Your Resin Success
- ## A Little Encouragement for Your First Pour
- You’ve Got This: Your Resin Journey Starts Now
- Frequently Asked Questions
Guide Overview
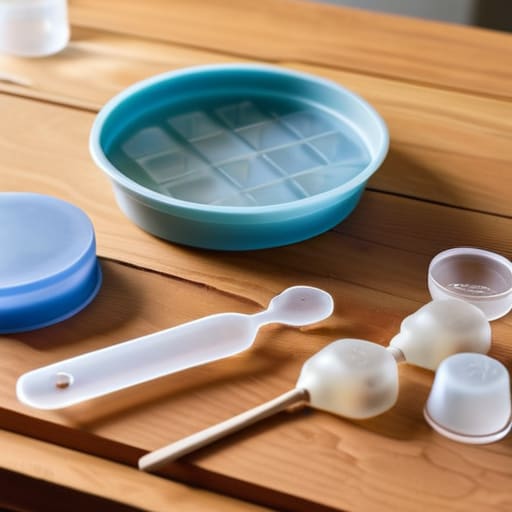
Tools & Supplies
- Silicone molds for shaping the resin
- Mixing cups for combining components
- Wooden stir sticks for blending
- Heat gun or lighter to remove bubbles
- Protective gloves to prevent skin contact
- Epoxy resin kit (2-part resin and hardener)
- Silicone molds (various shapes)
- Liquid pigments or mica powder for color
- Decorative inclusions (glitter, dried flowers, or charms)
- Sandpaper for smoothing edges
Step-by-Step Instructions
- 1. First things first, let’s get your workspace ready! Resin can be a little messy (trust me, I’ve learned that the hard way), so I always recommend laying down a silicone mat or some cheap parchment paper to protect your table. Make sure you’re working in a well-ventilated area near a window, and please, don’t skip the safety gear—grab your gloves and a mask before we get started.
- 2. Next, we need to tackle the mixing process, which is really the heart of the project. Grab your resin and hardener, and check your bottles for the specific ratio—some are 1:1 and others are 2:1, so you’ll want to be super precise here. I like to use small silicone mixing cups because they make cleanup a breeze, and I always stir slowly to avoid creating those annoying air bubbles that can ruin your beautiful finish.
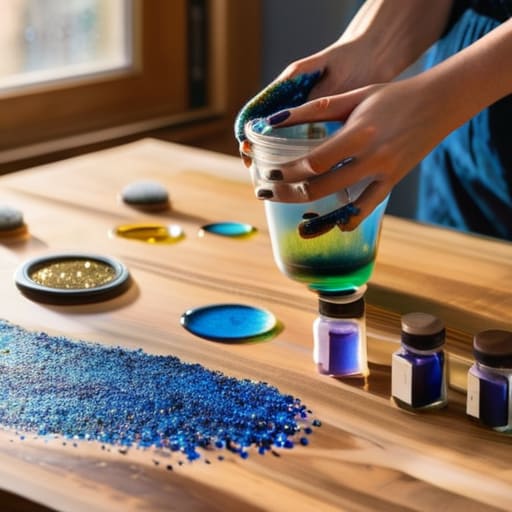
- 3. Once your resin is mixed and looks clear, it’s time to get creative with your color and inclusions! This is my favorite part because it’s where your personal style really shines through. You can drop in some mica powders, dried flowers, or even a little bit of glitter. Just remember to add your pigments gradually so you don’t overwhelm the mixture; you can always add more, but you can’t take it out once it’s in!
- 4. Now, let’s get that liquid magic into your molds. I find it’s easiest to pour the resin in a very thin, steady stream to help minimize bubbles as it hits the silicone. If you see a few tiny bubbles floating to the surface, don’t panic! Just take a quick pass with a small butane torch or a heat gun to pop them instantly—it feels like a little magic trick every single time.
- 5. Once your molds are filled, it’s time for the hardest part of any DIY project: the waiting game. Cover your molds with a cardboard box or a plastic container to keep dust and pet hair from landing in your wet resin. Depending on the brand you’re using, you’ll likely need to let them sit for anywhere from 12 to 24 hours. I know it’s tempting to peek, but patience is a virtue when you want a crystal-clear result!
- 6. Finally, once the resin feels completely hard and isn’t tacky to the touch, it’s time for the “big reveal.” Carefully pop your creations out of the molds, and if you notice any sharp edges, you can easily smooth them down with a bit of fine-grit sandpaper. If you’ve followed these steps, you’ll have a stunning piece of art that you made entirely with your own two hands!
Gathering Your Essential Resin Art Supplies With Joy
Before we get our hands messy, let’s talk about the fun part: gathering your toolkit! I remember when I first started, I felt so overwhelmed by all the options at the craft store, but honestly, you don’t need everything under the sun to make something beautiful. To get started, focus on grabbing a few essential resin art supplies like high-quality silicone molds and a set of measuring cups. I always recommend picking out the best resin molds for starters—usually simple geometric shapes or coasters—because they are much more forgiving while you’re finding your rhythm.
Now, a quick pro-tip from someone who has definitely learned the hard way: don’t skip the safety talk! Even though it feels like magic, please make sure you have a well-ventilated space and a good respirator. Taking proper safety precautions for epoxy resin is the best way to ensure your new hobby stays a joyful one. Once you’ve got your gear set up and your workspace cleared, you’ll feel so much more confident ready to dive in. I’m right here with you, so let’s get this setup looking perfect!
Mastering Safety Precautions for Epoxy Resin to Work Confidently
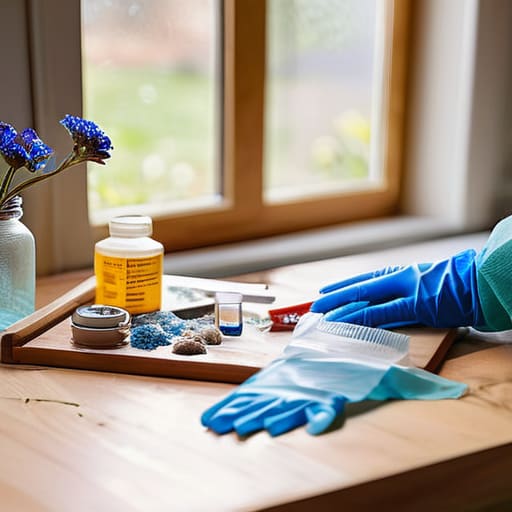
Now, I know that seeing all those chemical bottles can feel a little intimidating, especially if you’re just starting out. But honestly, once you get into a rhythm, it becomes second nature! The most important thing to remember is that we are working with chemicals, so let’s make sure we treat them with respect. I always tell my friends that protecting your lungs and skin is the absolute first step to a successful project. Make sure you’re working in a space with plenty of fresh air—ideally near an open window or even outside if it’s a nice day—and always, always wear your gloves.
Since we are focusing on getting those results just right, being careful with your safety precautions for epoxy resin also helps prevent messy accidents that can ruin your hard work. For instance, if you’re working in a cramped or poorly ventilated corner, you might find it harder to manage your workspace, which leads to spills or accidental contact. Taking those extra few minutes to set up a dedicated, well-ventilated station ensures that you can focus entirely on the creative magic happening in your molds without any unnecessary stress!
Pro-Tips from My Workbench: A Few Little Secrets for Success
- Trust the math, not your eyes! I know it’s tempting to just eyeball the resin and hardener, but getting that ratio exactly right is the difference between a crystal-clear masterpiece and a sticky, never-curing mess. Grab a digital scale if you can—it’s a total game changer!
- Bubbles happen, but don’t let them ruin your vibe. If you see tiny air bubbles popping up, give your resin a gentle heat with a handheld butane torch or even a quick pass with a hair dryer. It’s like magic watching them just vanish!
- Patience is your new best friend. I’ve definitely been guilty of wanting to touch a piece way too soon, but resin needs its beauty sleep. Let your projects cure in a dust-free spot for the full time recommended on the bottle so you get that flawless, glass-like finish.
- Mind your temperature! Resin can be a little finicky about the weather. If your workspace is too chilly, it might get cloudy or stay tacky. Try to work in a cozy, room-temperature environment to keep everything flowing smoothly.
- Start small to build your confidence. Before you dive into a massive tabletop, try out some coasters or small jewelry trays. It’s a low-stakes way to get a feel for how the liquid moves and how your colors blend without the pressure of a huge project!
My Top Tips for Your Resin Success
Don’t rush the process! Resin can be a little finicky, so give yourself plenty of time for everything to cure properly before you start moving your beautiful new creations around.
Precision is your best friend. Whether you’re measuring your resin or mixing in your pigments, being super careful with your ratios is the secret to avoiding those pesky sticky spots.
Embrace the learning curve. You might not get a perfect bubble-free finish on your very first try, and that’s totally okay! Every little mishap is just a stepping stone to becoming a resin pro.
## A Little Encouragement for Your First Pour
“I know that first time you mix the resin, it can feel a little intimidating—but honestly? That’s where the magic starts. Don’t aim for perfection right out of the gate; just focus on the joy of seeing your ideas come to life, one bubble at a time.”
Emily Carter
You’ve Got This: Your Resin Journey Starts Now
We have covered a lot of ground today, from picking out your very first set of supplies to making sure you’re staying safe while you work your magic. I know it can feel a little overwhelming when you’re staring at all those bottles and pigments, but remember that the most important part is simply getting started. Whether you’re perfecting your mixing technique or experimenting with how different glitters settle in the pour, every single mistake is just a stepping stone toward mastering this beautiful medium. Just take it one slow, steady pour at a time, and don’t forget to keep your workspace organized so you can truly focus on the fun part: the creative process.
As you head off to your crafting corner, I want you to remember that there is no such thing as a “perfect” piece of art. The real magic lies in the way a handmade tray or a custom coaster reflects your own unique personality and the effort you poured into it. Don’t be afraid to get a little messy or try a color combination that feels a bit wild! I truly believe that once you see that first cured piece catching the light, you’ll be completely hooked. I am so incredibly proud of you for stepping outside your comfort zone today. Now, go grab your gear and let’s make something beautiful!
Frequently Asked Questions
I'm a little worried about bubbles—what's your favorite trick for getting them out so my piece looks crystal clear?
Oh, I hear you! Bubbles can be such a headache when you’re aiming for that glass-like finish. My absolute favorite trick? A quick pass with a handheld heat gun right after you pour. The heat gently pops those tiny bubbles on the surface like magic! Also, try letting your mixed resin sit in the cup for a few minutes before pouring—it gives those stubborn bubbles a chance to rise to the top and escape. You’ve got this!
How do I know if I've mixed my resin and hardener correctly, or is there a way to tell if it's going to stay tacky?
Oh, I have been there! There is nothing more frustrating than waiting hours only to find your project feels like a sticky mess. Honestly, the best way to tell is to follow your specific brand’s mixing ratio to the letter—even a tiny mistake can leave it tacky. If you’re unsure, do a “test batch” in a small cup first! If it doesn’t cure hard and clear, you’ll know before wasting your good supplies.
Can I reuse my silicone molds, or will the resin eventually stick to them and ruin them?
Oh, I get this question all the time! The short answer is: yes, you can absolutely reuse them! But, I’ll be honest, if you aren’t careful, they can get a little messy. To keep your molds looking brand new, just make sure you’re using a good quality release agent or giving them a thorough cleaning with warm, soapy water after every single pour. Treat your molds with a little love, and they’ll be with you for many beautiful projects to come!