I was halfway through a celebratory glass of wine last Friday when my golden retriever, Cooper, decided that a rogue tennis ball was the perfect projectile to launch straight into my freshly painted living room. As I stared at that gaping, unsightly crater in the drywall, my first instinct wasn’t to call a professional—it was to grab my favorite putty knife and get to work. Most people think you need a massive renovation or a pricey handyman to fix even the smallest dent, but I’m here to tell you that learning how to patch a hole in the wall is actually one of the most empowering little wins you can achieve in your home.
Don’t let a little bit of drywall damage make you feel like your space is falling apart! I’ve spent years tinkering in my family’s hardware store and perfecting my DIY techniques, and I promise you, this is much simpler than it looks. In this guide, I’m stripping away all the confusing jargon to give you my no-nonsense, step-by-step method for achieving a perfectly smooth finish. Whether it’s a tiny nail hole or a larger chunk of missing plaster, we’re going to tackle it together until that wall looks absolutely flawless once again.
Table of Contents
- Step-by-Step Instructions
- Choosing the Perfect Drywall Patch Kit for Small Holes
- Mastering Spackling Compound Application for a Flawless Finish
- Pro Secrets for a Smooth-as-Butter Finish
- Quick Tips for a Pro-Level Finish
- ## A Little Perspective on Imperfections
- You Did It! Now, Let's Celebrate That Smooth Wall
- Frequently Asked Questions
Guide Overview
Tools & Supplies
- Putty knife for spreading compound
- Sandpaper (medium and fine grit) for smoothing
- Spackle knife for small repairs
- Utility knife for trimming edges
- Spackle or joint compound (small tub)
- Sandpaper sheets (120 and 220 grit)
- Wall patch or mesh tape for larger holes
- Interior paint and small brush for touch-ups
Step-by-Step Instructions
- 1. First things first, let’s get our workspace ready. Grab a small bucket, a putty knife, some sandpaper (around 120 and 220 grit), and your choice of spackle. If the hole is a bit larger, you might want to grab a piece of mesh patching tape too. I always like to clear a little space around the area so I’m not accidentally knocking dust onto your favorite rug while we work.
- 2. Now, let’s prep the “wound.” Take your putty knife and gently scrape away any loose bits of drywall or crumbling paint around the edges of the hole. You want a clean, flat surface to work with, so if there are any jagged edges sticking out, give them a little trim so they don’t interfere with the patch.
- 3. If you’re dealing with a tiny little nick, you can go straight to the spackle. But if it’s a real hole, this is where we use that mesh tape. Apply the tape over the hole, pressing it firmly into the wall. This acts like a sturdy skeleton for your patch, making sure it doesn’t crack or sag once it dries.
- 4. Time to get messy! Scoop up a generous amount of spackle with your putty knife and spread it over the hole and the tape. My little secret? Don’t try to get it perfect in one go. It’s much better to apply a thin, even layer and let it dry than to pile on a huge glob that takes forever to harden. Aim to feather the edges out so they blend into the rest of the wall.
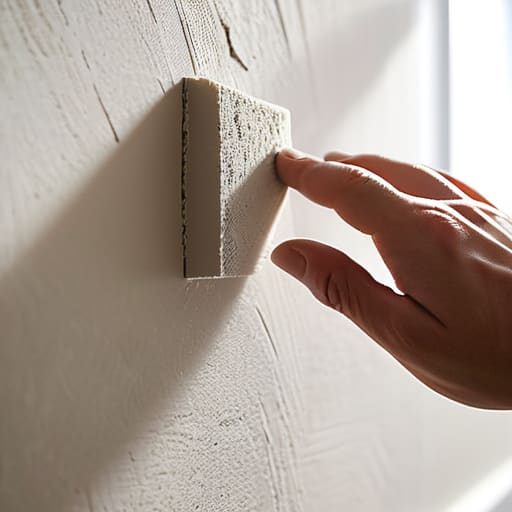
- 5. Once the spackle is completely dry (and trust me, patience is your best friend here!), grab your 120-grit sandpaper. Gently sand the area in a circular motion until the patch feels smooth to the touch. If you see any bumps or ridges, just keep sanding lightly until it’s level with the surrounding wall.
- 6. Now, let’s do a final “smooth check.” Switch to your finer 220-grit sandpaper to buff out any remaining scratches left by the heavier grit. Wipe the area down with a slightly damp microfiber cloth to get rid of all that fine white dust. You want a clean canvas before we move on to the fun part—the paint!
- 7. If you notice any tiny pinholes or imperfections after sanding, don’t panic! Just repeat the spackling process with a very thin layer, let it dry, and sand it back down one more time. Once it’s perfectly seamless, you’re officially ready to prime and paint your way to a flawless finish!
Choosing the Perfect Drywall Patch Kit for Small Holes
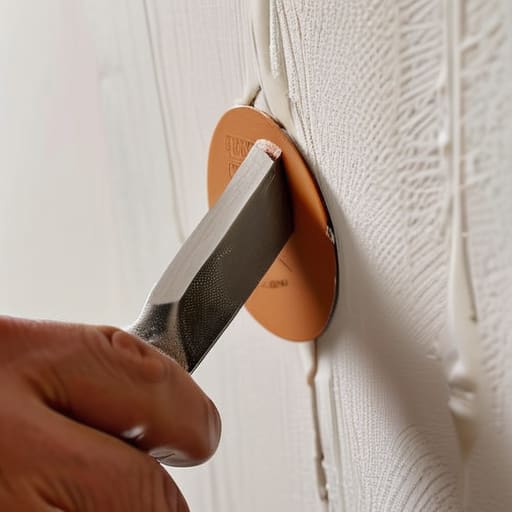
Now, I know what you’re thinking—walking into a big-box hardware store can feel a little overwhelming with all those different tubs and rolls staring back at you. But honestly, when you’re just fixing dents in drywall or dealing with those pesky nail pops, you don’t need to go overboard with heavy-duty construction supplies. I always tell my friends to look for a dedicated drywall patch kit for small holes rather than trying to DIY a solution with random scraps of wood or cardboard. These kits are absolute lifesavers because they usually come with everything you need in one little package, making the whole process feel way less daunting.
If you’re dealing with a hole that’s a bit larger—maybe a doorknob decided to make an uninvited appearance in your hallway—I highly recommend grabbing some wall repair mesh tape to go along with your kit. The mesh acts like a sturdy little scaffold, helping your compound stay put while it dries. It’s much more reliable than just slapping on some putty and hoping for the best! Just remember, the goal isn’t to finish in five minutes; it’s about building up those layers so your final result looks completely seamless.
Mastering Spackling Compound Application for a Flawless Finish
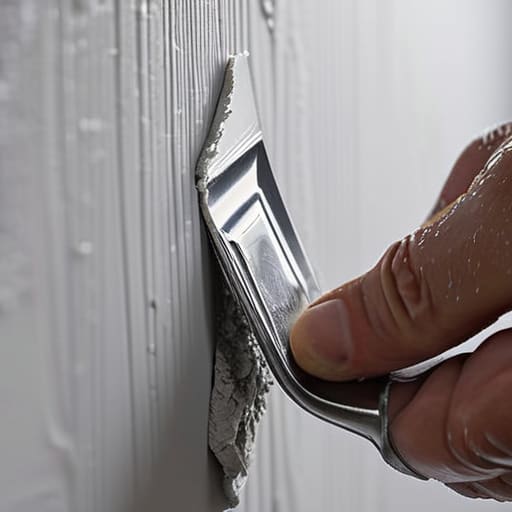
Now that you’ve got your kit ready, let’s talk about the actual magic: the spackling compound application. This is where a lot of people get nervous, but I promise, it’s all about the rhythm! When you’re applying the compound, don’t feel like you need to pack it on thick like frosting a heavy cake. Instead, aim for thin, even layers. If you’re fixing dents in drywall, start by pressing the material firmly into the indentation to ensure there are no air pockets hiding underneath. I always tell my readers to work from the center outward, smoothing the edges so they blend seamlessly into the surrounding wall.
If you find yourself working with a slightly larger gap where you used wall repair mesh tape, you might need a second pass. It’s much better to apply two thin coats than one giant, gloopy mess that takes forever to dry! Once everything is completely bone-dry, that’s when you’ll want to sand drywall smooth using a fine-grit sanding sponge. Take your time here—it’s the secret to a professional-looking finish that won’t show up under your new coat of paint. You’ve got this!
Pro Secrets for a Smooth-as-Butter Finish
- Don’t be afraid to sand a little extra! I know it’s messy, but taking an extra minute to sand those edges until they’re perfectly flush with the wall is what separates a “DIY job” from a professional-looking finish.
- Less is definitely more when it comes to spackle. It’s way easier to add a tiny second layer than it is to scrape off a massive, chunky mountain of compound that’s gone wonky on you.
- Grab a damp sponge for a quick wipe-down before you start painting. If there’s even a speck of leftover dust sitting on that patch, your new paint is going to peel or look bumpy, and we want this to stay beautiful!
- Watch your lighting while you work. I always grab my brightest work lamp and shine it sideways across the wall—it’s like a spotlight that reveals every tiny bump or shadow you might have missed in the regular room light.
- Patience is your new best friend here. I know we’re all itching to get that fresh coat of paint on, but if you try to cover up a patch that’s still even a little bit damp, you’re going to end up with a textured mess. Let it dry completely!
Quick Tips for a Pro-Level Finish
Patience is your best friend when it comes to drying time—don’t rush the process by applying thick layers, or you’ll end up with a headache trying to sand it smooth later!
Always invest in a high-quality sanding sponge rather than just cheap sandpaper; it’ll make smoothing out those edges feel much more effortless and give you that seamless look we’re after.
Before you even think about grabbing the paintbrush, make sure your patch is perfectly smooth to the touch, because any tiny bump will show up once the light hits your fresh coat of paint.
## A Little Perspective on Imperfections
“I know that little hole in the drywall can feel like a glaring eyesore right now, but try to look at it differently: it’s just a tiny opportunity to practice a new skill and prove to yourself that you can make your home exactly what you want it to be.”
Emily Carter
You Did It! Now, Let's Celebrate That Smooth Wall
And just like that, those pesky dents and holes are a thing of the past! We’ve walked through everything from picking out the right patch kit to mastering that tricky spackling technique, and I am so incredibly proud of you for sticking with it. Remember, the secret to a truly professional-looking finish isn’t some magic trick; it’s all about the patience you show during the sanding process and making sure you don’t rush those layers. By taking the time to prep your surface and apply your compound with care, you’ve turned a messy little eyesore into a perfectly smooth, seamless surface that is ready for a fresh coat of paint.
I know that staring at a damaged wall can feel a little overwhelming at first, but I hope this project showed you that you are much more capable than you think. There is something so uniquely satisfying about looking at a room and knowing, “I fixed that myself.” Every little repair you tackle is a building block toward becoming more confident in your own home. So, don’t let a few imperfections hold you back from the space you dream of. Keep grabbing those tools, keep experimenting, and never stop creating the beautiful home you deserve!
Frequently Asked Questions
What if the hole is actually a large crack or a massive chunk missing from the drywall?
Oh boy, okay—take a deep breath! If you’re staring at a massive chunk missing or a long, scary crack, we’ve officially moved past the quick spackle phase. Don’t panic, though; I’ve been there! For big gouges, you’ll likely need a mesh patch or even a fresh piece of drywall to bridge the gap. It’s a bit more heavy-duty, but we can definitely tackle this together. Let’s get your walls sturdy again!
How can I tell if I need to use a mesh patch versus just a little bit of spackle?
Think of it this way: if the hole is just a tiny nick or a little dent from a door handle, a bit of spackle will do the trick! But if you’re looking at a hole where you can actually see through to the other side, or if the drywall is crumbling, you’ll definitely need a mesh patch. That mesh acts like a little bridge to give your spackle something solid to grab onto!
Will my patch be visible once I finally get around to painting the wall?
I know that feeling—you’ve put in all this hard work, and now you’re staring at that patch wondering if it’ll actually disappear. Honestly? If you’ve followed my tips for sanding and feathering those edges, it should be virtually invisible! The secret is all in the blending. Just remember to use a primer before you hit it with your wall color; that ensures the texture and sheen match perfectly. You’ve got this!