I still remember standing in my parents’ hardware store back in Ohio, watching my dad effortlessly measure and cut wood while I sat on a stack of burlap sacks, dreaming of making something of my own. Fast forward to my first apartment, and I was staring at a patch of patchy, uneven grass, feeling completely overwhelmed by the idea of starting a garden. Most people will tell you that learning how to build a raised garden bed requires a massive workshop and a professional-grade toolset, but honestly? That is a total myth. You don’t need a fancy studio or a degree in landscaping to create a beautiful, productive growing space; all you really need is a bit of grit and the right plan.
In this guide, I’m stripping away all the complicated jargon and fancy fluff to give you the real, no-nonsense steps to success. I’ll walk you through selecting the right wood, avoiding the common mistakes that lead to rot, and assembling everything so it actually lasts for years. We are going to tackle this project together, step-by-step, so you can stop dreaming about that homegrown tomato harvest and finally start building it.
Table of Contents
- Step-by-Step Instructions
- Choosing Your Foundation the Best Wood for Raised Beds
- Finding Your Perfect Fit Garden Bed Dimensions for Vegetables
- Pro-Tips from My Toolbox: Little Details That Make a Big Difference
- Quick Tips for Your Garden Bed Success
- A Little Dirt Under Your Fingernails
- Your Garden Journey Starts Now
- Frequently Asked Questions
Guide Overview
Tools & Supplies
- Tape measure for marking wood lengths
- Power drill for driving screws
- Hand saw or miter saw for cutting timber
- Level to ensure even ground
- Untreated cedar or redwood planks (4-6 pieces)
- Galvanized wood screws (1 box)
- Garden soil and compost mix (enough to fill volume)
- Landscape fabric or hardware cloth (optional for weed/pest control)
Step-by-Step Instructions
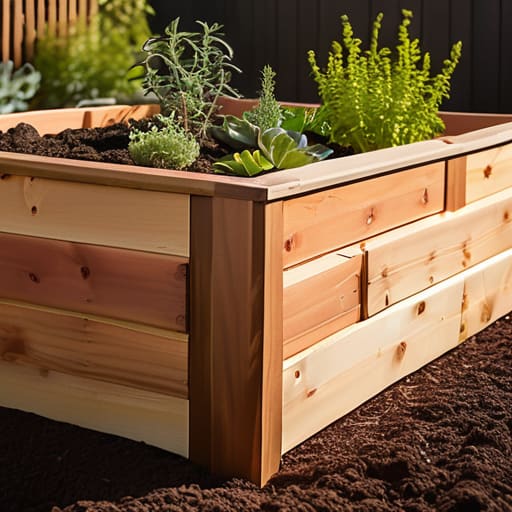
- 1. First things first, let’s head to the hardware store—and if you’re feeling lucky, maybe check the reclaimed wood section! You’ll want to grab some untreated cedar or redwood because they are naturally rot-resistant, which means your hard work will last for years without needing harsh chemical treatments. For a standard medium-sized bed, I usually grab four 2×12 boards that are about 6 or 8 feet long, plus some heavy-duty exterior wood screws to keep everything tight.
- 2. Once you’ve got your wood home, it’s time to get those pieces sized up. If you want a long rectangular bed, you might cut two of your boards down to 4 feet so you have two long sides and two short ends. I always say, measure twice and cut once—it’s a little piece of advice my dad used to yell at me back in the hardware store, and trust me, it saves a lot of heartbreak!
- 3. Now, let’s get to the fun part: the assembly! Lay your boards out on a flat surface (like your driveway or a patio) to form a rectangle. I like to use my favorite mallet to tap the corners into place so they’re nice and flush. Line up the short end boards against the inside edges of the long boards, and then start driving those exterior screws in. Pro tip: Always pre-drill your holes first to prevent the wood from splitting, especially when you’re working with those beautiful cedar grains.
- 4. Before we move this heavy thing into its permanent home, we need to give it a little extra protection from the ground up. I highly recommend stapling a layer of hardware cloth (it’s basically a sturdy metal mesh) to the bottom of the frame. This is a total game-changer for preventing gophers and other sneaky critters from tunneling up and snacking on your precious seedlings.
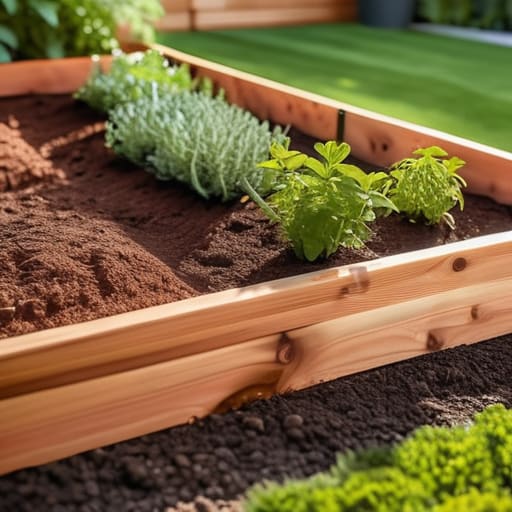
- 5. Now, pick your perfect spot! You’ll want a location that gets plenty of sunlight—at least six to eight hours a day—and is relatively level. Once you’ve cleared the grass or weeds from the area, slide your new bed into place. If you’re building on top of existing grass, you can actually lay down a thick layer of cardboard inside the bed first; it’ll smother the weeds and eventually decompose into amazing compost for your soil.
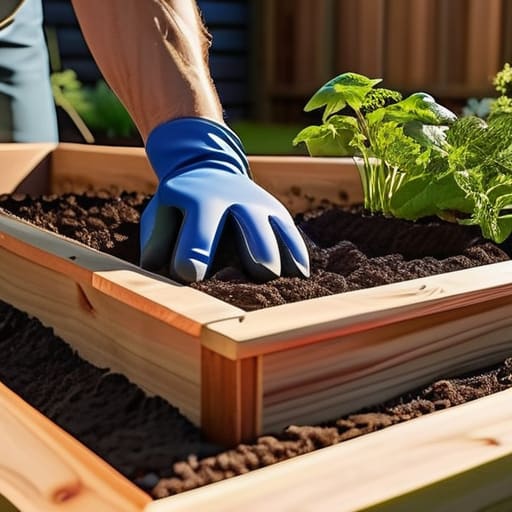
- 6. The final step is the most rewarding: filling it up! Don’t just grab whatever dirt is in your backyard; your plants deserve the best. I love using a “raised bed mix,” which is usually a delicious blend of topsoil, compost, and peat moss or coconut coir. Fill it all the way to the top, give it a good, deep watering, and get ready to get your hands dirty! You’ve officially built something beautiful that’s going to feed you all summer long.
Choosing Your Foundation the Best Wood for Raised Beds
Now, before you head down to the local hardware store—just like I used to do back in my dad’s shop in Ohio—you need to make a big decision: what are you actually building this out of? This is where a lot of people get stuck, but don’t sweat it! When it comes to the best wood for raised beds, you’re really looking at a tug-of-war between longevity and your budget. Cedar is my absolute favorite because it’s naturally rot-resistant and smells amazing, but it can definitely pinch your wallet a bit.
If you’re on a tighter budget, you might be tempted by cheaper options, but you’ll want to do a little research on cedar vs pressure treated lumber before you commit. While modern pressure-treated wood is much safer than it used to be, I always tell my readers that natural rot-resistance is the gold standard for organic gardening. If you choose a softer wood like pine, just be prepared to replace it a few years sooner. Think of it as a trade-off: spend a little more now for a long-lasting sanctuary, or save some cash today and plan for a little more upkeep later!
Finding Your Perfect Fit Garden Bed Dimensions for Vegetables
Now that we’ve settled on the right materials, let’s talk about the actual footprint of your project. When it comes to deciding on your garden bed dimensions for vegetables, my biggest piece of advice is to think about your reach! There is nothing more frustrating than having to step inside the bed to weed, because you’ll end up compacting that beautiful soil you just worked so hard to prep. I always recommend keeping your beds no wider than four feet if you can access them from both sides. This way, you can easily reach the center without breaking your back or hurting your plants.
If you’re working with a smaller backyard or a narrow side yard, don’t feel like you have to go huge right away. It’s much better to have two small, manageable beds that you actually enjoy tending to than one massive one that becomes an overwhelming chore. Keep your length flexible based on your space, but prioritize accessibility above all else. Whether you’re planning for sprawling zucchini or neat rows of lettuces, getting these dimensions right early on will make your gardening journey so much more joyful!
Pro-Tips from My Toolbox: Little Details That Make a Big Difference
- Don’t skip the liner! Even if you’re using cedar, lining the bottom with a bit of landscape fabric helps keep your precious soil from washing away during those heavy summer downpours.
- Level it out or lose it. It might be tempting to just plop your bed on the grass, but taking ten minutes to clear the area and ensure the ground is level will prevent your bed from warping or leaning over time.
- Think about your back! When you’re deciding on the height, remember that you’ll be leaning over this for months. If you can swing a slightly taller bed, your lower back will definitely thank you come weeding season.
- Hardware matters more than you think. I always reach for stainless steel or galvanized screws; there’s nothing more heartbreaking than seeing your hard work start to fall apart because of rust and moisture.
- Plan for your reach. One mistake I made in my early days was building beds that were too wide. Always make sure you can reach the center from either side without having to step inside the bed and compact your soil!
Quick Tips for Your Garden Bed Success
Don’t overcomplicate the wood choice—just make sure you’re picking something durable enough to handle the moisture so your hard work doesn’t rot away by next season!
Remember that reach is everything; keep your beds at a width that lets you tend to your veggies comfortably without having to step inside and compact your beautiful new soil.
Most importantly, embrace the learning curve—even if your first bed isn’t perfectly level, it’s the joy of watching those first sprouts emerge that really counts!
A Little Dirt Under Your Fingernails
Building a raised bed isn’t just about nailing boards together; it’s about carving out a little piece of magic in your own backyard where you can watch something beautiful grow from the ground up.
Emily Carter
Your Garden Journey Starts Now
We’ve covered a lot of ground today, from selecting the perfect rot-resistant wood to figuring out those all-important dimensions that make harvesting your veggies a breeze. Remember, whether you decided to go with cedar for longevity or opted for a more budget-friendly route, the most important part is that you actually built it yourself. You’ve moved past the planning phase and into the real deal, and that is a huge win. Don’t stress if your lines aren’t perfectly straight or if a screw went in a little crooked—that’s just the character of a handmade project, and it’s exactly what makes your garden feel so personal and unique.
As you step back to look at your finished beds, I want you to take a second to really soak in that feeling of accomplishment. There is something so incredibly grounding about working with your hands and creating a space where life can actually grow. You aren’t just building wooden boxes; you are cultivating a sanctuary for your soul and a source of fresh, delicious food for your table. I am so incredibly proud of you for taking this leap and trusting your skills. Now, grab your trowel, get a little dirt under your fingernails, and let’s get growing!
Frequently Asked Questions
Do I really need to line the bottom of my new garden bed with something, or can I just put it straight onto the grass?
That is such a great question, and honestly, it’s one I get asked all the time! While you can put it straight onto the grass, I highly recommend adding a layer of cardboard or several layers of newspaper first. It acts as a natural weed barrier that eventually breaks down, enriching your soil. It saves you so much heartache later when you aren’t fighting stubborn grass growing through your beautiful new veggies!
How often should I be treating or sealing my wood to make sure these beds last more than just a couple of seasons?
That is such a great question! I always tell my readers: if you want your hard work to stand the test of time, don’t skip the protection. If you’ve used cedar or redwood, you’re off to a great start, but I’d recommend giving them a fresh coat of food-safe sealant every two to three years. It keeps the moisture from getting too deep into the grain and prevents that inevitable rot. Happy building!
Will my garden beds need a special kind of soil mix, or can I just use whatever I find in my backyard?
Oh, I am so glad you asked! This is actually one of the most important parts of the whole project. While it’s tempting to just scoop up some dirt from the backyard, I wouldn’t recommend it. Backyard soil can be super heavy and might even lack the nutrients your veggies crave. Instead, let’s aim for a custom mix of compost, peat moss, and topsoil. Think of it as giving your plants a delicious, nutrient-packed buffet!