I was sitting on my living room floor last Tuesday, surrounded by a chaotic sea of tangled wire, mismatched beads, and a pair of pliers that just wouldn’t cooperate, wondering why I ever thought I could do this. We’ve all been there, haven’t we? You see those gorgeous, high-end pieces in boutiques and think, “I could totally make that,” only to end up with something that looks more like a middle school art project than a professional accessory. But here’s the secret I learned growing up around my family’s hardware store: it isn’t about having a massive, expensive studio; it’s about mastering the fundamental mechanics of the tools in your hands. DIY jewelry making shouldn’t feel like a frustrating battle against your own materials.
In this guide, I’m stripping away all the fluff and the intimidating jargon to give you a real, no-nonsense roadmap to success. I’m going to walk you through the essential tool kit you actually need, how to choose quality components that won’t turn your skin green, and those tiny, game-changing techniques that make your handmade pieces look like they came straight from a designer showroom. Let’s roll up our sleeves and start creating something truly beautiful together!
Table of Contents
- Step-by-Step Instructions
- Gathering Your Essential Beadwork Supplies and Tools
- Mastering Jewelry Making Tools for Beginners
- Pro Secrets for Making Your Pieces Look Professional
- Quick Tips for Your Jewelry Making Journey
- My Philosophy on Creating
- You’ve Got This: Your Creative Journey Starts Now
- Frequently Asked Questions
Guide Overview
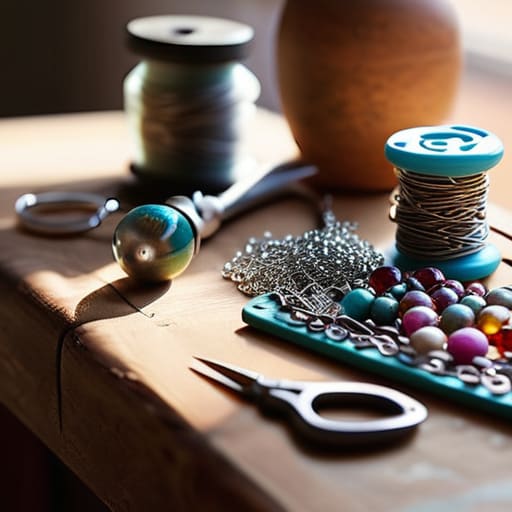
Tools & Supplies
- Needle-nose pliers for gripping and bending wire
- Wire cutters for trimming metal and cord
- Beading mat to prevent rolling
- Assorted glass or wooden beads (50-100 pieces)
- Jewelry wire or elastic cord (1 roll)
- Lobster clasps and jump rings (10-20 pieces)
Step-by-Step Instructions
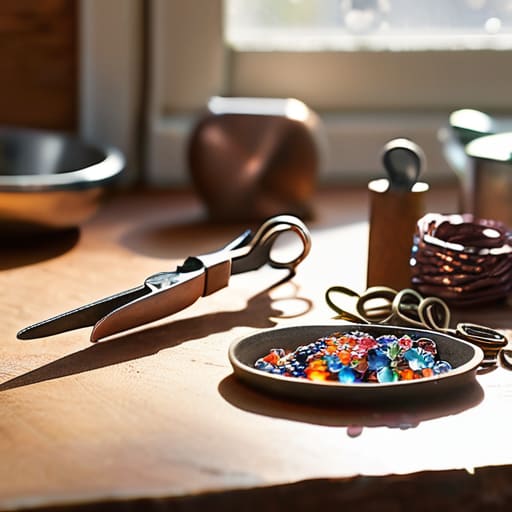
- 1. First things first, let’s clear off a dedicated workspace. Since I grew up around my family’s hardware store, I learned early on that a messy station leads to lost beads and frustrated DIYers! Grab a small tray or even a shallow bowl to hold your components so they don’t roll off the table and disappear into the floorboards.
- 2. Now, let’s get our tools organized. You’ll want to gather your basic jewelry kit: needle-nose pliers, wire cutters, and round-nose pliers. I always like to keep my tools laid out in order of use—it makes the whole process feel much more rhythmic and relaxing once you get into the groove.
- 3. Next, it’s time to pick your “star” element. Whether it’s a vintage gemstone you found at a flea market or a colorful glass bead, this is where your personal style really shines. Lay out your beads on your tray to visualize the pattern before you start stringing; I find that playing with symmetry versus intentional asymmetry can totally change the vibe of the piece.
- 4. Once you’ve mapped out your design, start threading your materials onto your base wire or cord. If you’re working with wire, take your time to ensure the tension is even. You don’t want it too tight, or the jewelry will feel stiff, but you also don’t want it so loose that it looks unprofessional and floppy.
- 5. Now, let’s talk about securing everything. This is where your round-nose pliers come in handy to create those tiny, beautiful loops. If you are using jump rings to connect charms, make sure you use your pliers to twist the ring open sideways rather than pulling it apart, which keeps the metal from stretching out and losing its shape.
- 6. For the final touch, attach your clasp or extender chain. This is the “finish line” of your project! Double-check that every connection feels sturdy by giving it a very gentle tug. There is honestly no better feeling than that final click of a well-made clasp, knowing you built this entire thing from scratch.
Gathering Your Essential Beadwork Supplies and Tools
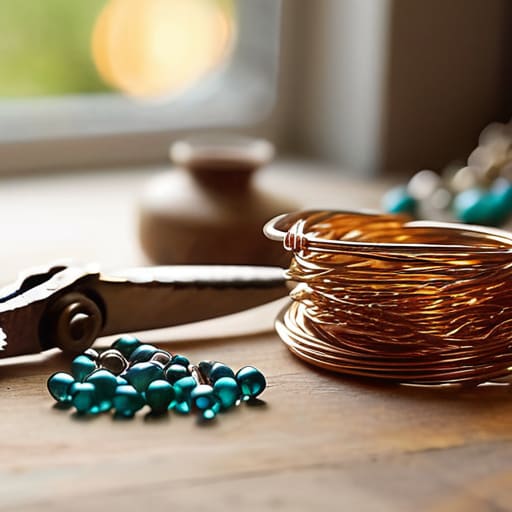
Before we dive into the fun part, let’s talk about setting up your little creative corner. One thing my dad taught me back at the hardware store was that having the right tools makes all the difference between a fun afternoon and a total headache! When you’re first starting out, don’t feel like you need to buy every gadget in the catalog. Instead, focus on a few high-quality jewelry making tools for beginners, like a solid pair of needle-nose pliers and some wire cutters. I personally love a set that feels ergonomic; your hands will definitely thank you after a few hours of crafting handmade necklaces.
As you begin collecting your essential beadwork supplies, I highly recommend grabbing a few different types of bead trays or even just some small muffin tins from your kitchen. It keeps everything organized and prevents those tiny, precious glass beads from rolling off the table and disappearing into the floorboards! Also, if you’re feeling a little adventurous, try picking up some copper wire early on. Getting a feel for basic wire wrapping techniques is such a game-changer for adding that professional, custom touch to your pieces.
Mastering Jewelry Making Tools for Beginners
Now, I know looking at a tray full of metal gadgets can feel a little intimidating, but I promise it’s way more intuitive than it looks! When you’re first starting out with jewelry making tools for beginners, the real secret is getting comfortable with the “big three”: your round-nose, chain-nose, and side-cutters. I remember the first time I tried to bend a wire; I was so nervous I nearly snapped it! The trick is to let the tool do the heavy lifting. If you’re wondering how to use jewelry pliers effectively, always remember to grip the wire close to the working end for maximum control. It’s all about that steady hand and a little bit of muscle memory.
As you get more adventurous, you might find yourself gravitating toward more intricate wire wrapping techniques to secure your stones or beads. This is where the real magic happens, turning a simple string of beads into a professional-looking piece of art. Don’t be discouraged if your first few loops look a bit wonky—even my vintage furniture restorations had a few crooked edges when I started! Just take a breath, adjust your grip, and keep experimenting. You’re building a skill set that will last a lifetime.
Pro Secrets for Making Your Pieces Look Professional
- Don’t skip the “test run”! Before you commit to your full design, lay your beads out on a bead board or even just a piece of felt to play with different patterns. It’s so much easier to move a bead two inches to the left now than it is to unstring a whole necklace later!
- Invest in a decent pair of crimping pliers. I know, I know, it feels like just another tool to add to the collection, but using the right tool to secure your crimp beads makes a world of difference between a piece that looks homemade and one that looks boutique-quality.
- Mind your tension! When you’re stringing beads, try not to pull the wire or thread too tight. If you’re too aggressive, your jewelry will end up feeling stiff and awkward against the skin instead of having that lovely, natural drape we all love.
- Always keep a “safety stash” of extra components nearby. I always keep a little bowl of extra jump rings, clasps, and a few spare beads from my current project within arm’s reach. There is nothing more frustrating than being mid-flow and realizing you’re one tiny loop short!
- Think about the “wearability” factor. Before you call a project finished, hold it up to your neck or wrist. Is the clasp easy to reach? Is it too heavy? I always want to make sure my creations aren’t just pretty to look at, but actually comfortable enough to wear every single day.
Quick Tips for Your Jewelry Making Journey
Don’t be afraid to experiment! Your first few pieces might not look exactly like the Pinterest photos, but that’s all part of the magic of learning.
Invest in quality basics early on—having the right pliers makes a world of difference and will save you so much frustration in the long run.
Take your time and enjoy the process; jewelry making is as much about the relaxation of the craft as it is about the beautiful finished product.
My Philosophy on Creating
“There is something so incredibly soulful about wearing a piece of jewelry that you built from scratch; it’s not just about the beads and the wire, it’s about the confidence you gain every time you look in the mirror and remember, ‘I made this myself.'”
Emily Carter
You’ve Got This: Your Creative Journey Starts Now
We have covered so much ground today, from getting your beadwork supplies organized to finally feeling comfortable with those essential jewelry-making tools. I know that staring at a pile of loose beads and pliers can feel a little overwhelming at first, but remember that every expert started exactly where you are right now. By mastering these foundational techniques and understanding how your tools work, you have already laid the perfect groundwork for a lifetime of creativity. Don’t worry if your first few necklaces aren’t absolutely flawless; even I had to practice my wire-wrapping a dozen times before I stopped feeling like I was tangling myself in a knot! The most important part is that you now have the practical knowledge to turn a simple vision into something tangible.
As you head off to your craft table, I want you to remember that jewelry making is about so much more than just the finished product. It is about that quiet, meditative moment when you’re lost in the rhythm of your work, and the incredible rush of pride when you finally clasp that piece around your neck. Never be afraid to experiment, to mix colors that shouldn’t work, or to try a brand-new pattern that scares you just a little bit. Your hands have the power to transform simple materials into wearable art that tells your unique story. So, grab your favorite beads, clear off your workspace, and let’s build something amazing together!
Frequently Asked Questions
I'm worried about tangling my strings—what's the best way to keep my beads and thread from turning into a giant knot while I'm working?
Oh, I have been there! There is nothing more frustrating than reaching for your thread only to find a giant, tangled bird’s nest. Trust me, I’ve spent many a late night untangling beads! My best tip? Invest in a small bead organizer with individual compartments, and always use a bead mat—it keeps everything from rolling away. Also, try winding your thread onto a small bobbin or even a piece of cardboard to keep it neat and snag-free!
Since I'm just starting out, should I invest in real sterling silver components, or is it okay to stick with gold-filled or plated pieces for now?
Oh, I totally get that hesitation! When I first started tinkering in my parents’ hardware store, I was always worried about overspending. For now, I’d say stick with gold-filled pieces. They offer a much better balance of durability and cost than plated items, which can flake pretty quickly. Save those sterling silver investments for when you’ve really found your rhythm and are ready to create those heirloom-quality pieces!
How do I know if I'm using the right tension when crimping my beads so the necklace doesn't snap the first time I wear it?
Oh, I have been there! There is nothing more heartbreaking than a necklace snapping mid-errand. To get that perfect tension, you want the crimp bead to be snug against the wire, but not so crushed that it deforms or pinches the wire. A good rule of thumb? Give the strand a gentle, firm tug. If it feels secure and doesn’t slide, you’re golden! Just remember: steady pressure is better than brute force.