I remember standing in my dad’s hardware store back in Ohio, watching him sand down a heavy oak tabletop, and thinking that I’d need a massive professional workshop just to get started. For the longest time, I fell for the myth that you need expensive, industrial-grade machinery to create a solid workspace, but let me tell you: that is a total lie. You don’t need a fancy studio to master how to build a workbench that can actually handle a real project. Whether you’re restoring a vintage chair or just tackling a weekend craft, the heart of your creativity shouldn’t be limited by a lack of “professional” gear.
In this guide, I’m stripping away all the complicated jargon and high-end fluff to give you a straightforward, no-nonsense plan. I’ll walk you through every single step, from selecting the right lumber to securing a tabletop that won’t wobble when you’re working hard. My goal is to show you that with a few basic tools and a little bit of patience, you can craft a sturdy, reliable workspace that feels like it was made by a pro. Let’s grab our tools and build something amazing together!
Table of Contents
- Step-by-Step Instructions
- Finding the Perfect Woodworking Workbench Plans
- Choosing Your Essential Woodworking Tools for Beginners
- Pro Tips from My Workshop to Yours: Making Your Workbench Last
- Quick Tips to Keep You Moving Forward
- ## The Heart of Your Workshop
- You’ve Got This: Time to Get Making!
- Frequently Asked Questions
Guide Overview
Tools & Supplies
- Circular saw or miter saw for cutting lumber
- Power drill for driving screws
- Tape measure for accurate dimensions
- Speed square for marking straight lines
- Level to ensure a flat surface
- 2×4 lumber (approx. 8-10 boards)
- 4×4 lumber (2 posts for legs)
- 3/4 inch plywood (1 sheet for top)
- Wood screws (various lengths)
- Wood glue for joint stability
Step-by-Step Instructions
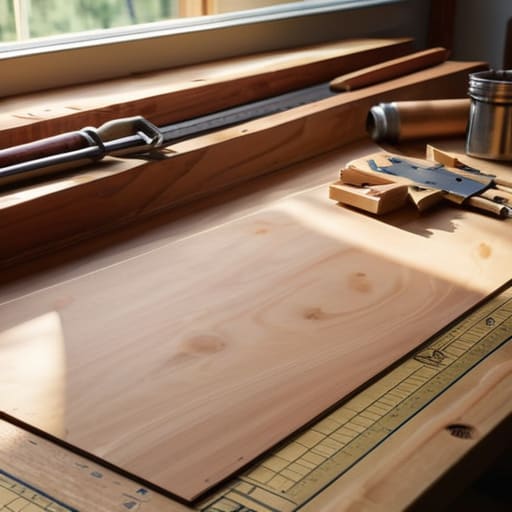
- 1. First things first, let’s head over to the lumber yard and grab our materials. For this build, I recommend using standard 2x4s for the frame and a thick piece of plywood or even some butcher block for the top. Since I grew up in my family’s hardware store, I can tell you from experience: don’t skimp on the quality of your wood! You want something sturdy that won’t wobble the moment you start sawing or sanding.
- 2. Once you’ve got your wood home, it’s time to break out the measuring tape and your favorite pencil. We’re going to mark out our legs and our frame pieces according to our blueprint. I always suggest measuring twice before you make that first cut—it’s a tiny habit that saves a ton of frustration later on. Grab your saw and let’s get those pieces sized up!
- 3. Now, let’s get to the fun part: assembly! We’re going to build the outer frame of the workbench first. I like to use a combination of wood glue and long, heavy-duty screws to ensure everything stays rock solid. If you’re feeling a bit intimidated by the power tools, just take it slow; you’ve totally got this!
- 4. Next, we’ll attach the legs to that frame we just built. This is where the workbench really starts to take shape. Make sure you’re using a square to ensure every corner is perfectly flush before you tighten those screws down. A sturdy workbench is all about structural integrity, so don’t be afraid to give it a little wiggle test to make sure it’s stable.
- 5. With the base all set, it’s time to install the tabletop. Whether you’re using a beautiful piece of reclaimed wood or a fresh sheet of plywood, make sure it’s perfectly level across the frame. I like to use a few extra screws around the perimeter to keep it from shifting while you’re working on your next big project.
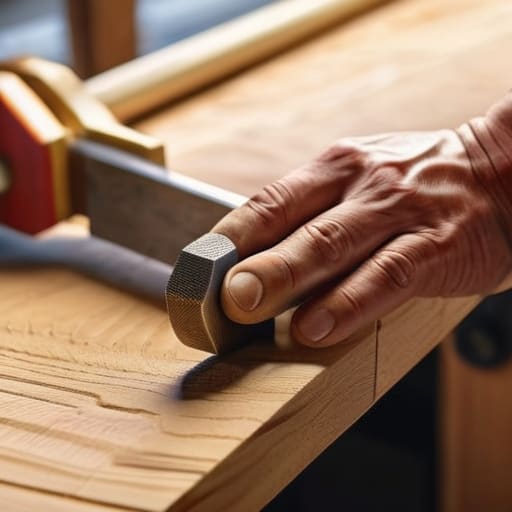
- 6. Finally, we need to give our new workspace a little TLC. Grab some sandpaper and smooth out any rough edges or splinters—I know, it’s not the most glamorous part, but it’s essential for safety. Once it’s smooth as silk, you can apply a bit of sealant or even a fun coat of paint if you want to match your studio’s aesthetic.
- 7. Now that the heavy lifting is done, it’s time to organize! I love using the underside of my workbench to screw in some small bins or even a magnetic strip for my tools. Since I have a bit of an obsession with my hammer collection, I always make sure my favorite tools are within arm’s reach. Now, go ahead and claim your space—you earned it!
Finding the Perfect Woodworking Workbench Plans
Now, before you go running to the local lumber yard, we need to talk about the blueprint. I know, I know—looking at a pile of raw wood can feel a little overwhelming, but that’s where finding the right woodworking workbench plans comes in. I always tell my readers: don’t just grab the first free design you see on Pinterest! You really need to think about what you’ll be doing most. Are you planning on heavy sanding, or maybe some delicate furniture restoration like I do? If you’re planning on some serious sawing or assembly, you’ll want to look for a heavy duty workbench design that won’t wobble every time you pick up a hammer.
I’ve spent way too many hours in my shop trying to make do with a wobbly table, and trust me, it’s not worth the headache. When you’re browsing plans, pay close attention to the workbench lumber list provided. It’ll save you those annoying mid-project trips back to the hardware store. My best advice? Pick a plan that matches your current skill level and the space you actually have available. Once you have that solid foundation, everything else becomes so much easier!
Choosing Your Essential Woodworking Tools for Beginners
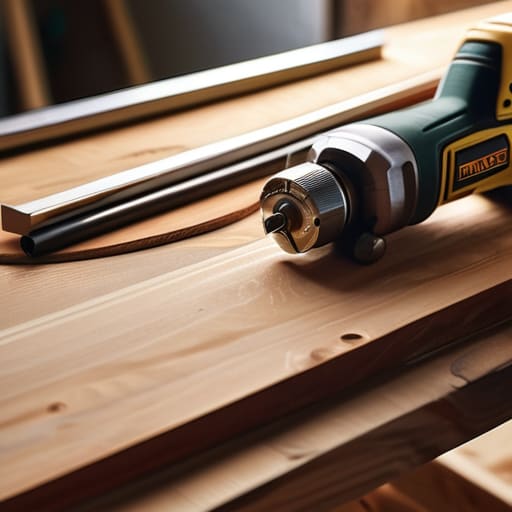
Now, before we dive into the sawdust, let’s talk about the gear. I know it can feel a little overwhelming when you walk into a hardware store and see a million different options, but don’t panic! When you’re starting out, you don’t need a professional-grade shop filled with expensive machinery. Instead, focus on gathering the essential woodworking tools for beginners that will actually get the job done. A reliable drill/driver, a sturdy tape measure, a speed square, and a good quality saw (even a simple circular saw works wonders!) are your best friends here. Honestly, if you have these basics, you’re already halfway to a successful build.
One thing I learned growing up in my dad’s hardware store is that the quality of your tools often dictates the smoothness of your assembly. Since we are aiming for a sturdy workbench assembly, I highly recommend investing a little extra in a solid drill and some high-quality wood screws. You want something that won’t strip easily when you’re driving them into thicker lumber. Remember, we aren’t just building a table; we’re building the foundation for all your future projects!
Pro Tips from My Workshop to Yours: Making Your Workbench Last
- Don’t skimp on stability! There is nothing more frustrating than trying to saw a piece of wood while your entire workbench is wobbling like it’s on a boat. I always recommend using heavy-duty construction adhesive in addition to your screws to keep everything rock-solid and shake-free.
- Think about your height before you start drilling. I used to make the mistake of building everything at a standard table height, only to realize I was hunching over and killing my back! Measure yourself while standing comfortably to find that “sweet spot” for your specific height.
- Leave room for mistakes (and tools). It’s tempting to build a massive, heavy top, but remember you need space to actually move around. I like to build in a little extra “overhang” on the edges so I can easily clamp projects to the side of the bench without hitting the legs.
- Plan for your power needs. This is a big one! Instead of hunting for extension cords every time you need the drill, consider mounting a power strip directly to the side or underside of your workbench frame. It’s a total game-changer for keeping your workspace organized and safe.
- Embrace the “unfinished” look, but protect it. Since we’re likely using construction-grade lumber to keep costs down, the wood might be a bit thirsty. I love applying a simple coat of wipe-on poly or even just a bit of wax to keep the dust from getting trapped in the grain and to make cleanup a breeze.
Quick Tips to Keep You Moving Forward
Don’t get stuck in “analysis paralysis” when picking your plans; the best workbench is the one you actually start building!
Focus on stability over fancy aesthetics—a rock-solid surface is way more important for your projects than a perfect finish.
Remember that your toolkit will grow with you, so start with the basics and don’t feel like you need every gadget in the hardware store to get the job done right.
## The Heart of Your Workshop
“A workbench isn’t just a collection of lumber and screws; it’s the foundation of every project you’ll ever dream up. When you build it with your own two hands, you aren’t just creating a workspace—you’re building the very place where your creativity finally gets to take flight.”
Emily Carter
You’ve Got This: Time to Get Making!
Now that we’ve walked through everything from selecting the right plans to gathering your essential tools, it’s time to pull all those pieces together. Remember, building your first workbench is about more than just having a sturdy surface to work on; it’s about creating a foundation for your creativity. We’ve covered how to pick the perfect wood, how to prep your workspace, and how to assemble everything with precision. Even if you hit a little snag during the assembly—and trust me, even with my hardware store upbringing, I’ve definitely made a few mistakes!—just take a breath, grab a measuring tape, and keep going. The most important part is that you’ve taken the leap from dreaming about a workshop to actually building one with your own two hands.
As you stand there looking at your finished workbench, I want you to take a second to really appreciate what you’ve accomplished. That isn’t just a pile of lumber and screws anymore; it’s a testament to your hard work and your growing skill set. Every scratch and dent that comes from future projects will just be a badge of honor, telling the story of your journey as a maker. I truly believe that once you have your own dedicated space, the possibilities are absolutely endless. So, clear off that new surface, grab your favorite hammer (maybe even one from a collection like mine!), and let’s start making something beautiful. I can’t wait to see what you create next!
Frequently Asked Questions
I don't have a huge garage, so what's the best way to build a workbench that won't take up my entire workspace?
Oh, I totally feel your pain! When I first started out, my “workspace” was basically a corner of my parents’ old hardware store garage, and space was tight. If you’re working with a smaller footprint, I highly recommend a folding workbench or one on heavy-duty locking casters. That way, you can roll it into the center when you’re working and tuck it against the wall when you’re done. Maximizing vertical storage helps too!
Should I stick to budget-friendly construction lumber, or is it worth splurging on something more durable like hardwood right from the start?
Honestly, if you’re just starting out, I’d say stick to budget-friendly construction lumber like pine or Douglas fir. It’s much more forgiving while you’re learning the ropes, and let’s be real—you might accidentally dent it while practicing! Save that hardwood splurge for a special furniture piece later. For a workbench, a sturdy, inexpensive build is perfect for getting those sawdust-covered hands moving without breaking the bank!
If I'm working in a small apartment or a shared space, how can I make my workbench more mobile so I can tuck it away when I'm done?
Living in a smaller space is something I totally get—I actually did a lot of my early projects in a tiny studio! To make your workbench mobile, the absolute best move is to install heavy-duty locking casters on the legs. Just make sure they’re rated for the weight of your tools! If you’re really tight on space, consider a folding workbench or a wall-mounted design that folds flat when you’re finished. You’ve got this!