I remember standing in my first tiny apartment, staring at those sad, thin, store-bought blinds and feeling like my space just lacked soul. I spent a small fortune trying to find the perfect fabric, only to realize that the high-end designer look I craved was actually just a few yards of linen and a little bit of grit. Most people think you need a professional sewing studio or a degree in textile design to get that high-end, breezy look, but that is a total myth. Creating your own diy curtains is honestly one of the most rewarding ways to inject your personality into a room without breaking the bank.
I’m not here to give you any complicated, intimidating tutorials that leave you with a pile of wasted fabric and a headache. Instead, I’m going to walk you through my tried-and-true, no-nonsense methods for crafting beautiful window treatments that look like they cost hundreds of dollars. Whether you’re working with a heavy velvet or a light, airy cotton, I’ll show you how to handle the measurements, the cutting, and the finishing touches with confidence. Let’s grab our fabric shears and start building something amazing together!
Table of Contents
- Step-by-Step Instructions
- Finding Your Perfect Fabric Selection for Window Treatments
- Mastering the Art of Measuring Windows for Custom Curtains
- Pro Secrets for That Professional, High-End Look
- Quick Tips for Curtain Success
- The Magic in the Making
- You Did It: Your Windows Are Transformed!
- Frequently Asked Questions
Guide Overview
Tools & Supplies
- Measuring tape for window dimensions
- Fabric scissors for clean edges
- Sewing machine or needle and thread for stitching
- Iron and ironing board for crisp hems
- Fabric (2-3 yards depending on width)
- Thread (1 spool matching fabric color)
- Pins or clips for holding fabric in place
- Curtain rod or tension rod for hanging
Step-by-Step Instructions
- 1. First things first, we need to grab our measuring tapes! Don’t just eyeball it—I learned the hard way back in my design days that even a half-inch mistake can make your windows look wonky. Measure the width of your curtain rod and add about 6 to 10 inches to that number so your curtains have some lovely, soft fullness when they’re closed. Then, decide how long you want them to hang; I personally love the look of a “puddle” where the fabric hits the floor, but a clean, cropped look works beautifully too.
- 2. Once you’ve got your measurements, it’s time to head to the fabric store. Since I grew up around my family’s hardware store, I’ve always been a fan of sturdy materials, so look for something with a bit of weight and quality like a heavy linen or a cotton canvas. When you’re picking your pattern, remember to account for the “repeat” if it’s a large print, so your designs don’t look cut off awkwardly once they’re hanging.
- 3. Now, let’s get to the fun part: the cutting! Lay your fabric out flat on a large table—or even a clean spot on the floor—and use tailor’s chalk to mark your dimensions. Make sure you add an extra inch or two to your length and width for the seam allowances. I always tell my readers to double-check their math before the scissors touch the fabric; there’s nothing more heartbreaking than realizing you cut a panel too short!
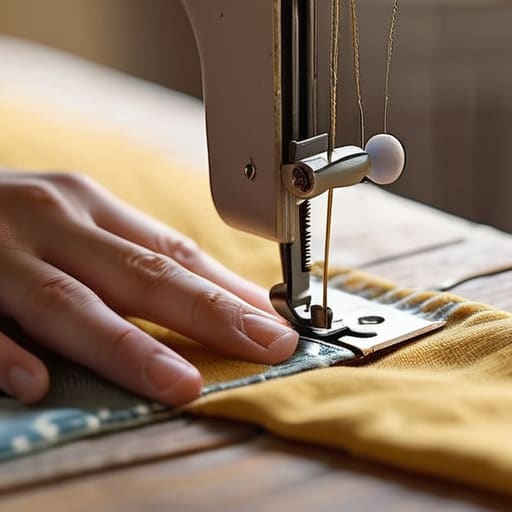
- 4. Grab your sewing machine and let’s start creating those hems. I find it easiest to fold the edge of the fabric over twice—once to the desired width and then again to hide that raw, fraying edge. Use plenty of straight pins to keep everything from shifting while you work. If you’re feeling a little nervous about sewing in a perfectly straight line, don’t sweat it; even a tiny wobble is part of the handmade charm.
- 5. Next, we need to decide how these beauties are actually going to hang. You can sew a “rod pocket” by folding the top edge over and stitching a channel for the rod to slide through, or you can create a more modern look by sewing on some fabric loops. If you want to keep it super simple and avoid the sewing machine altogether, you can always use iron-on hem tape, which is a total lifesaver for those of us who are feeling a bit less “crafty” that day.
- 6. Before you hang them up, give your curtains a good steam or a quick press with the iron. This is the secret step that makes DIY projects look like they came straight out of a high-end boutique rather than a craft room. Smoothing out those fold lines will make the fabric drape beautifully and give your entire room that polished, intentional feel we’re all striving for.
- 7. Finally, it’s time for the big reveal! Slide your new creations onto the rod and adjust them until they sit just right. If they feel a little lopsided, don’t panic—just shift the rod or adjust the pleats. Take a step back, grab a cup of coffee, and soak in that feeling of accomplishment; you just transformed your space with your own two hands!
Finding Your Perfect Fabric Selection for Window Treatments

Now that we’ve got our steps down, let’s talk about the absolute heart of this project: the fabric! Choosing the right material is where your personal style really shines through. If you’re looking for something breezy and casual for a sunroom, a lightweight linen is your best friend. However, if you’re aiming for a more dramatic, high-end look in your living room, I always suggest leaning toward heavier velvets or thick cotton blends. When you’re navigating fabric selection for window treatments, don’t forget to hold the material up to your window to see how much light it actually lets through—it makes a world of difference!
Another thing I’ve learned from years of designing is that texture is just as important as color. A subtle weave can add so much depth to a room without feeling overwhelming. If you’re feeling a little nervous about the scale of your project, remember that even a simple cotton voile can look incredibly expensive if you choose a beautiful print. Just make sure you’ve spent some time measuring windows for custom curtains before you head to the fabric store; there is nothing more heartbreaking than running out of yardage right when you’re nearing the finish line!
Mastering the Art of Measuring Windows for Custom Curtains
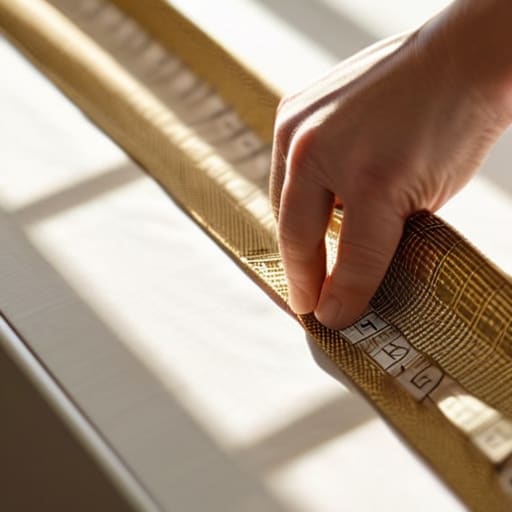
Now, I know what you’re thinking—measuring sounds like the most tedious part of this whole project. But trust me, coming from an interior design background, I can tell you that precision is your best friend here! There is nothing more heartbreaking than spending hours on your fabric selection for window treatments only to realize your finished panels are two inches too short. Grab a metal measuring tape (please, skip the flimsy sewing tapes for this part!) and always measure from the top of the rod to the floor, not just the window frame.
When you’re measuring windows for custom curtains, I always recommend taking three different measurements: one at the top, one in the middle, and one at the bottom. Houses are rarely perfectly square, and knowing those slight variances will prevent any awkward gaps. Also, don’t forget to account for “fullness.” You don’t want your curtains to look like a flat sheet when they’re closed; you’ll want to multiply your window width by two or even two-and-a-half to get that lush, high-end look we’re all dreaming of. Let’s get those numbers right so the rest is a breeze!
Pro Secrets for That Professional, High-End Look
- Don’t skip the pre-wash! I know it feels like an extra step, but washing your fabric before you even touch your scissors prevents those heartbreaking “oops, they shrank” moments after you’ve already sewn them up.
- Always aim for more fullness than you think you need. For a lush, designer look, I usually recommend choosing fabric that is two to two-and-a-half times the width of your window—it makes all the difference between looking skimpy and looking expensive.
- Invest in a really good steam iron. Even the most perfect stitching can look a little messy if the fabric is wrinkled, so a quick press along your seams will give your curtains that crisp, boutique finish we’re all dreaming of.
- Mind your hem depth! A wider, heavier hem at the bottom of your curtains adds a beautiful weight that helps them hang straight and prevents them from fluttering too much every time someone walks by.
- Test your hardware before you commit. Before you start sewing, hold your fabric up against your curtain rod to make sure the scale feels right; you don’t want your gorgeous new creations to look tiny and lost against a massive window.
Quick Tips for Curtain Success
Don’t skip the measuring part—measure twice, cut once, and always add a little extra fabric for that gorgeous, flowing fullness we all love!
Trust your gut when picking fabrics; whether it’s a heavy linen for cozy vibes or a breezy cotton for a summer feel, the texture is just as important as the color.
Remember that it’s okay if things aren’t absolutely perfect on the first try; the real magic is in the process and the pride of saying, “I made this myself!”
The Magic in the Making
“There’s something so incredibly soulful about hanging curtains you’ve sewn yourself; it’s not just about covering a window, it’s about weaving your own personality into the very fabric of your home.”
Emily Carter
You Did It: Your Windows Are Transformed!
I am so incredibly proud of you for sticking with this project from start to finish! We’ve covered a lot of ground together, from the initial excitement of picking out that perfect, dreamy fabric to the precision work of measuring your windows and following those crucial sewing steps. Remember, even if your first few stitches weren’t perfectly straight, it’s all part of the learning process. The most important thing is that you didn’t just buy something off a shelf—you actually made something that fits your home and your style perfectly. Whether you went with a heavy velvet for coziness or a light, airy linen to catch the breeze, you have successfully mastered the fundamentals of custom window treatments.
As you step back and look at your beautiful new curtains, I hope you feel that same rush of pride I get every time I finish a furniture restoration or a new room makeover. There is something truly magical about looking around your living space and knowing that you played a direct role in its beauty. Don’t let this be the end of your creative journey! Take what you’ve learned here and let it fuel your next big idea, because you have the power to transform any space just by picking up a needle and thread. Keep experimenting, keep getting your hands a little messy, and most importantly, keep building a home that reflects your unique heart. Let’s keep creating!
Frequently Asked Questions
I'm a bit nervous about the sewing machine—do I really need a professional-grade one, or can I get away with a basic model for these?
Oh, I totally hear you! Honestly, please don’t let a fancy sewing machine intimidate you. I grew up around my dad’s hardware store, and if there’s one thing I learned, it’s that you don’t need the most expensive tool to get a great result. A basic, reliable model is more than enough for these curtains. Just take it slow, use a good needle, and remember: we’re making these to feel like home, not for a runway show!
How do I make sure my DIY curtains don't look "homemade" in a bad way? Any tips for getting those crisp, professional edges?
Oh, I have been there! Nothing kills the vibe like a curtain that looks a little… wonky. To get those high-end, designer edges, my biggest secret is a heavy-duty steam iron. Seriously, don’t skip the pressing! Press your seams flat as you go, not just at the end. Also, consider using iron-on hem tape for a super clean look if sewing feels too daunting. It’s all about those sharp, intentional lines!
What’s the best way to hang them if I’m renting and can't go drilling huge holes into my walls?
Oh, the renter’s dilemma! I’ve been there more times than I can count. Don’t worry, you don’t need to lose your security deposit to have beautiful windows. I highly recommend tension rods if you’re working with recessed windows—they stay put with just a little pressure! For anything else, heavy-duty Command hooks or even specialized no-drill curtain rod brackets work wonders. It’s all about finding that perfect balance between style and being a good neighbor!