I still remember being ten years old in my dad’s hardware store back in Ohio, standing on a milk crate just to reach the top shelf of the tool aisle. I watched him organize everything with such precision, and even then, I knew that a messy workspace wasn’t just an eyesore—it was a barrier to actually getting things done. There is nothing more frustrating than having a brilliant idea for a project but losing all your momentum because you’re hunting through a mountain of clutter for that one specific screwdriver. We’ve all been there, staring at a chaotic closet or a cluttered countertop, wondering if we’ll ever truly feel in control of our space. That’s exactly why I’m obsessed with finding functional diy storage solutions that don’t just hide the mess, but actually work with the way you live.
I’m not here to sell you on those overpriced, flimsy plastic bins you see in big-box stores that crack the moment you actually use them. Instead, I’m going to share my personal, tried-and-true methods for building custom, sturdy organizers that fit your home perfectly. We’re going to skip the fluff and dive straight into practical, hands-on projects that use real tools and honest materials. Whether you’re a seasoned maker or you’ve never even held a hammer, I promise to guide you through every single step. Let’s stop fighting the clutter and start building something beautiful together!
Table of Contents
Custom Shelving Diy for a Beautifully Organized Space
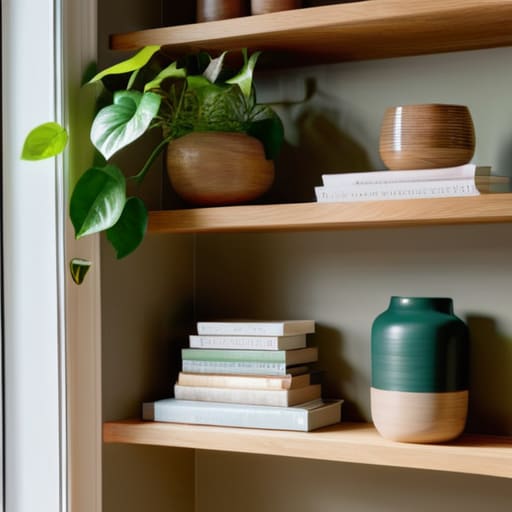
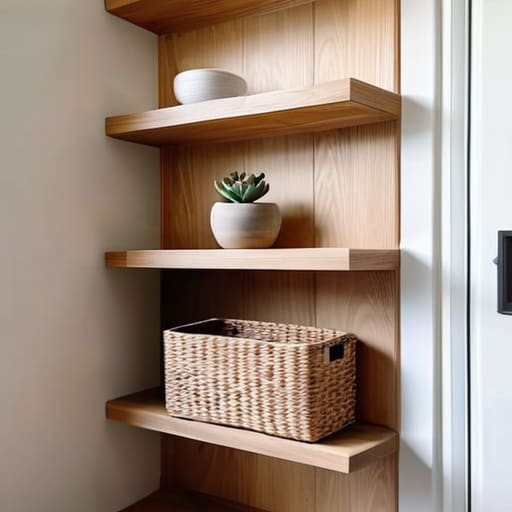
If you’re looking to make a real impact on the flow of a room, nothing beats a little custom shelving diy project. I remember back when I was working in interior design, clients would always come to me frustrated by “dead space”—those awkward gaps above doorways or empty corners that seem to serve no purpose. Instead of letting that square footage go to waste, we can turn it into a stunning focal point. Whether you’re opting for chunky, rustic floating shelves or something sleek and modern, building your own allows you to tailor the height and depth to your exact needs.
When you’re working with limited square footage, these kinds of small apartment storage hacks are absolute lifesavers. I love using reclaimed wood to add a bit of soul to a room, but even simple pine boards can look high-end with the right stain. The key is to measure twice (trust me, I’ve learned that the hard way!) and ensure your brackets are anchored securely into the studs. It’s not just about tidying up; it’s about creating a functional piece of art that makes your home feel truly curated and intentional.
Small Apartment Storage Hacks for Every Tiny Corner
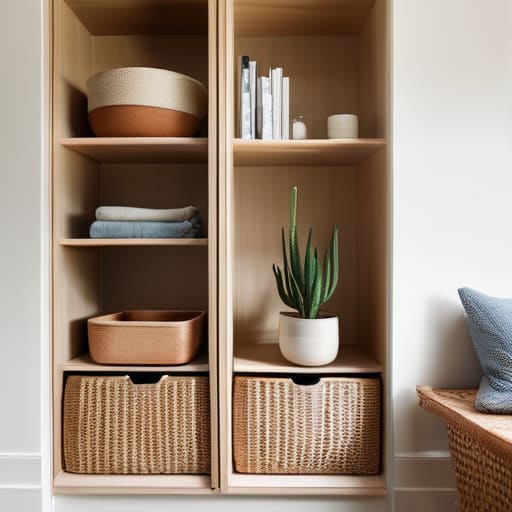
If you’re living in a cozy studio or a tiny one-bedroom, I know exactly how overwhelming it can feel when your belongings start to swallow up your living area. It’s easy to feel like you’ve run out of room, but I promise you, there is always a hidden corner waiting to be utilized! One of my favorite small apartment storage hacks is to look upward. When floor space is at a premium, use your vertical real estate. I love installing slim, floating ledges above doorways or even utilizing the space between the top of your wardrobe and the ceiling to house seasonal items in pretty, uniform bins.
Another way to reclaim your sanity without breaking the bank is through repurposed container ideas. Instead of buying expensive, bulky organizers, look around your kitchen or even your recycling bin. I once used vintage wooden crates I found at a local flea market to create a modular cubby system that fit perfectly under my coffee table. It was a total game-changer for my living room! Remember, it’s not about how much square footage you have; it’s about how cleverly you use every single inch.
My Top 5 Pro-Tips for Tackling Your Own Storage Projects
- Measure twice, cut once, and then measure a third time! I know it sounds like something my dad used to nag me about back at the hardware store, but nothing kills the excitement of a new project like realizing your beautiful new cubbies are two inches too wide for that nook.
- Think vertically, not just horizontally. When we run out of floor space, our instinct is to just keep adding more bins, but the real magic happens when you look up. Using wall-mounted rails or floating shelves can clear up so much visual clutter and make a room feel much bigger.
- Don’t be afraid to upcycle what you already have. Before you run out to the store for expensive new organizers, check your attic or even your local thrift shop. A vintage wooden crate or an old ladder can be sanded down and turned into the most charming, character-filled storage piece you’ve ever seen.
- Group your “like with like” before you even start building. I always tell my readers to do a massive decluttering session first. There’s no point in building a custom spice rack if you’re only going to use half the jars you currently own!
- Invest in good quality fasteners. It might be tempting to grab the cheapest screws you can find, but if you want your DIY storage to actually hold the weight of your books or kitchenware, go for the sturdy stuff. Your future self (and your heavy ceramic mugs) will definitely thank you!
Quick Tips to Keep Your Projects on Track
Always measure twice and cut once—it sounds like a cliché, but trust me, your future self (and your floorboards) will thank you!
Don’t be afraid to mix high-end finishes with budget-friendly materials; the best-looking spaces are the ones that feel personal and resourceful.
Remember that perfection isn’t the goal—functionality and the joy of creating something yourself are what truly make a house feel like a home.
## My Philosophy on Organizing
“At the end of the day, DIY storage isn’t just about clearing the clutter or finding a place for your extra linens; it’s about reclaiming your space and building something that actually fits the way you live, one handmade piece at a time.”
Emily Carter
Let's Get Building!
Whether you decided to tackle those custom floating shelves to show off your favorite books, or you’re diving into some clever hacks to make a tiny apartment feel a little more breathable, remember that the goal isn’t perfection—it’s functionality. We’ve covered everything from maximizing vertical space to squeezing utility out of those awkward, overlooked corners. It might feel a little overwhelming when you first look at a pile of lumber or a messy closet, but once you break it down into these manageable steps, you’ll realize that creating your own storage is much more achievable than it looks on Pinterest.
At the end of the day, I want you to look around your home and feel a sense of pride knowing that you didn’t just buy a solution, you built one. There is something so incredibly grounding about the smell of sawdust and the satisfaction of a tool working exactly the way it should. Don’t be afraid to make a mistake or try a new technique; that’s honestly where the best learning happens! So, grab your favorite hammer (pick a good one from the collection!), clear off your workbench, and let’s start making your dream space a reality. I can’t wait to see what you create with your own two hands!
Frequently Asked Questions
I'm a total beginner—what are the absolute must-have tools I should grab from the hardware store before I start my first project?
Oh, I am so excited you’re starting your first project! Honestly, don’t let the massive aisles at the hardware store intimidate you. Growing up in my family’s shop, I learned that you don’t need every gadget under the sun. For now, just grab a reliable cordless drill, a tape measure, a level (trust me, you’ll need it!), a hammer, and a good set of screwdrivers. That’s your perfect starter kit to build something amazing!
If I'm working with older, more delicate walls, how can I make sure my DIY shelves are actually sturdy and won't fall down?
Oh, I am so glad you asked! Dealing with those older, more delicate walls can definitely feel a little intimidating—I remember struggling with my first vintage fixer-upper. My biggest tip? Skip the standard plastic anchors and go for heavy-duty toggle bolts instead. They spread the weight behind the drywall, which is a total lifesaver. Also, always try to hit a stud whenever you can! It’s all about that extra bit of security.
I'm on a super tight budget; are there ways to repurpose old items I already have around the house instead of buying new materials?
Oh, I hear you! Honestly, some of my favorite projects started because I didn’t want to spend a dime at the hardware store. You’d be surprised what’s hiding in your garage or junk drawer. Old wooden crates make stunning rustic shelving, and even those empty glass pasta jars can become chic organizers for your desk or craft room. Let’s get creative with what we’ve already got—it’s more sustainable and way more fun!