
I remember standing in my parents’ hardware store back in Ohio, watching my dad carefully select the perfect cedar planks, and I realized something early on: you don’t need a massive budget or a professional workshop to create something stunning. There’s this huge myth floating around that you need expensive, designer ceramic pots to make a room look polished, but I’m here to tell you that some of the most beautiful greenery I’ve ever displayed came from my own diy planters. Honestly, some of my favorite pieces were born from a little bit of sawdust, a few scrap pieces of wood, and the sheer joy of making something from scratch.
In this guide, I’m stripping away all the complicated jargon and fancy tools to give you the real, no-nonsense way to build your own vessels. We’re going to walk through a few different styles—from rustic wooden boxes to more modern, sleek designs—so you can find the perfect fit for your home’s personality. I’ll be sharing my best tips on drainage, material selection, and how to ensure your creations actually last through the seasons. Let’s roll up our sleeves and get to work!
Table of Contents
- Step-by-Step Instructions
- Magic From Scraps Upcycled Container Gardening and Recycled Plastic Bottle
- Rustic Charm Building Wooden Planter Boxes and Indoor Herb Garden Diy
- Pro Tips for Planter Success: My Little Secrets for Happy Plants
- Quick Tips to Keep Your Greenery Growing
- Why I Love DIY Planters
- Bringing Your Vision to Life
- Frequently Asked Questions
Guide Overview
Tools & Supplies
- Drill and drill bits for creating drainage holes
- Measuring tape for accurate sizing
- Sandpaper to smooth rough edges
- Upcycled containers (tin cans, wooden crates, or plastic tubs) 2-4 units
- Potting soil 1 large bag
- Small stones or gravel for drainage 1 small bag
- Paint or outdoor sealant for decoration 1 can
Step-by-Step Instructions
- 1. First things first, you’ve got to gather your supplies. Since I grew up around my family’s hardware store, I’m a bit of a sucker for a good organized toolkit! You’ll need your chosen containers (think old tin cans, wooden crates, or even those vintage ceramic bowls you find at thrift stores), a drill with a masonry or wood bit, some sandpaper, and of course, high-quality potting soil. If you’re going for a more polished look, grab some non-toxic outdoor paint or a wood stain that matches your home’s vibe.
- 2. Once you have your containers, it’s time to talk about the most important part: drainage. I cannot stress this enough—nothing kills a plant faster than “wet feet” from sitting in stagnant water. Take your drill and carefully create three to four small holes in the bottom of your planter. If you’re working with a metal tin, just go a little slower so you don’t dent the sides. Don’t skip this step, even if the container looks pretty, because your plants will thank you later!
- 3. Now, let’s get those surfaces smooth and ready for some personality. If you’re using reclaimed wood or a thrifted metal can, grab a piece of medium-grit sandpaper and give it a good once-over. You want to remove any rough edges or rust that might snag your hands (or your clothes!) while you’re working. It’s a little bit of extra effort, but it makes the final product look so much more professional and intentional.
- 4. This is where you can really let your creativity run wild and make the planter truly yours. If you’re feeling artistic, grab a brush and apply your paint or stain. If you’re more into the “shabby chic” look, you can even do some light distressing once the paint is dry. I personally love using a hammer to lightly tap around the edges of metal planters to give them a perfectly imperfect vintage feel that fits right in with my furniture restoration projects.
- 5. Before we bring the greenery in, let’s prep the base. If you’re using a particularly large container, I like to place a thin layer of small pebbles or even some broken terracotta shards at the very bottom. This helps create an extra pocket for drainage and keeps the soil from washing out of those holes we drilled earlier. It’s a tiny detail that makes a massive difference in how your soil stays aerated and healthy.
- 6. Now for the best part—the planting! Fill your container about two-thirds full with fresh potting soil, gently nestle your plant into the center, and then add more soil around the sides until it’s nice and snug. Give the soil a very light press with your fingers to settle it, but don’t pack it down too tight; you want those roots to be able to breathe and grow freely.
- 7. Finally, give your new green friends a good, deep watering to help them settle into their new home. I always like to take a quick photo of my finished project before I put it on the shelf—it’s so rewarding to see a pile of random materials turn into something absolutely beautiful!
Magic From Scraps Upcycled Container Gardening and Recycled Plastic Bottle
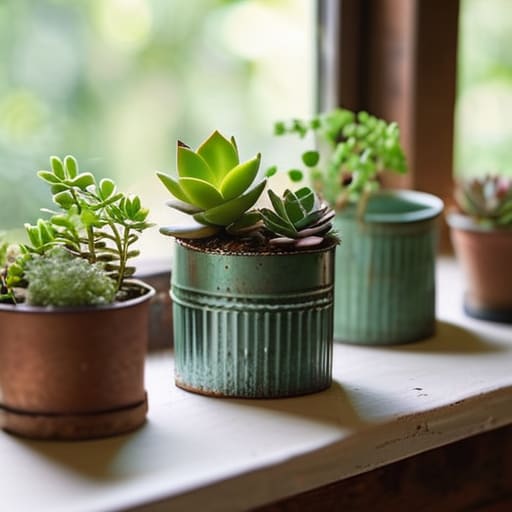
Now, if you’re like me and always scavenging for “treasures” at thrift stores or even just looking through your recycling bin, you are going to love this part. One of my favorite ways to save a little cash while adding character to my home is through upcycled container gardening. You don’t need fancy, expensive pots from a boutique to make a statement. I’ve had so much fun transforming old tin cans, vintage tea tins, or even cracked ceramic bowls into something completely new. It’s all about seeing the potential in what others might call “junk.”
If you’re working with even tighter constraints, don’t overlook the power of recycled plastic bottle planters. It sounds simple, but with a little bit of paint and some twine, a soda bottle can become a stunning vertical garden for your kitchen windowsill. This is a fantastic way to start an indoor herb garden DIY without spending a dime! Just remember to poke some drainage holes in the bottom—trust me, your plants will thank you. Whether you’re going for a polished look or something a bit more eclectic, there is so much magic to be found in the scraps!
Rustic Charm Building Wooden Planter Boxes and Indoor Herb Garden Diy
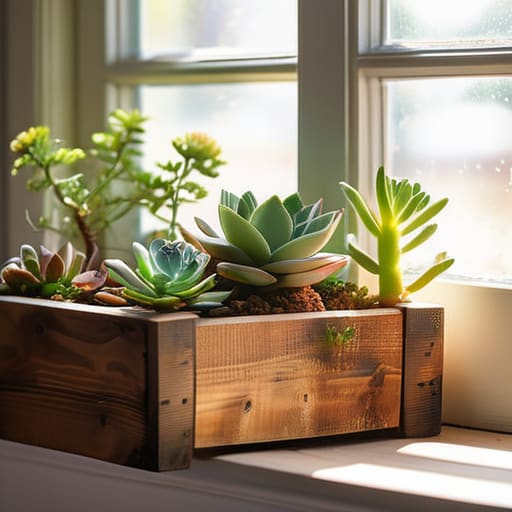
There is just something about the warmth of natural wood that instantly makes a room feel more “homey,” isn’t there? If you’re looking to lean into that cozy, farmhouse aesthetic, I can’t recommend rustic wooden planter boxes enough. Since I grew up around my family’s hardware store, I’ve always loved the tactile feel of cedar or pine, and they are incredibly forgiving for beginners. You don’t need a professional workshop to pull this off; a simple hand saw and some wood glue can go a long way. I personally love using reclaimed pallet wood for these projects—it adds so much character and keeps things incredibly budget-friendly.
If you’re working with a smaller space, like a sunny kitchen windowsill, an indoor herb garden DIY is a total game-changer. Not only do you get that gorgeous greenery, but having fresh basil or mint right at your fingertips makes cooking feel like a luxury. I like to build small, modular wooden crates that can be rearranged as your plant collection grows. Just remember to line your wooden boxes with a bit of landscape fabric to keep the soil from leaking through those beautiful grain patterns!
Pro Tips for Planter Success: My Little Secrets for Happy Plants
- Don’t skip the drainage! Whether you’re using a vintage tin or a wooden box, make sure you drill a few holes in the bottom. I learned that the hard way with a beautiful ceramic pot—trust me, nobody likes “wet feet” (or soggy roots!).
- Think about your light before you pick your spot. Before you commit to a gorgeous DIY setup, check how much sun that corner actually gets. There’s nothing more heartbreaking than building a stunning herb garden only to realize it’s in a permanent shadow.
- Size matters more than you think. It’s tempting to go small and cute, but remember that plants need room to stretch. Give those roots some breathing room so they can grow strong and healthy!
- Seal your wood if you’re going outdoors. Since I grew up around my dad’s hardware store, I can’t stress this enough: if you’re building wooden planters, use a good exterior-grade sealant. It keeps the moisture from rotting your hard work and makes your project last for seasons to come.
- Mix up your textures to add depth. I love pairing a smooth, painted metal container with a rugged, reclaimed wood box. It creates that layered, designer look that makes a room feel truly curated rather than just “decorated.”
Quick Tips to Keep Your Greenery Growing
Don’t be afraid to get a little messy with upcycling! Whether it’s an old tin can or a plastic bottle, giving a second life to “trash” is one of the most rewarding ways to add personality to your home.
Think about your light and space before you start building. A chunky wooden planter looks stunning on a sunny windowsill, but you’ll want something lighter and more breathable for those smaller, shaded corners.
Remember, it’s all about the process, not perfection. If your first wooden herb box has a slightly wonky edge, don’t sweat it—that’s just part of the handmade charm that makes your space uniquely yours!
Why I Love DIY Planters
“To me, a planter isn’t just a container for soil; it’s a chance to take something ordinary—maybe even something destined for the trash—and turn it into a living piece of art that tells a story in your home.”
Emily Carter
Bringing Your Vision to Life
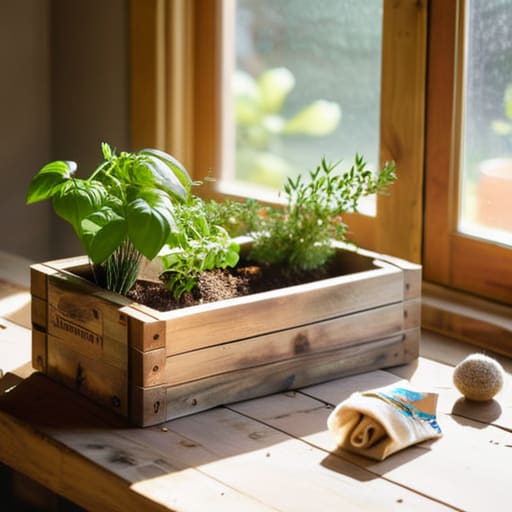
Whether you decided to go the eco-friendly route by breathing new life into old plastic bottles or opted for that classic, farmhouse feel with a custom-built wooden herb box, you’ve officially taken a huge step toward a more personalized home. We’ve covered everything from the magic of upcycling scraps to the satisfying grit of working with timber, and honestly, I am just so proud of you for jumping in. Remember, the most important part isn’t having a perfectly polished final product; it’s about the process of creating something that truly reflects your personality and fits your specific space.
As you head out to grab your supplies—or maybe just dig through your recycling bin—don’t be afraid to make a few mistakes along the way. That’s where the real learning happens, and sometimes those little imperfections are exactly what give a handmade piece its soul. I truly believe that once you see that first green sprout peeking out of a container you built with your own two hands, you’ll be hooked for life. So, grab your favorite hammer, clear off that workbench, and let’s keep making our homes absolutely beautiful together!
Frequently Asked Questions
How do I make sure my DIY planters have proper drainage so I don't accidentally rot my plants' roots?
Oh, I am so glad you asked! This is honestly the number one mistake I see, and trust me, I’ve learned it the hard way with a few sad, soggy succulents. To keep those roots happy, you absolutely need drainage holes at the bottom. If you’re using a container without them, grab a drill! If you can’t drill, layer some coarse gravel or charcoal at the bottom to help excess water escape. Let’s keep those roots breathing!
What kind of sealant or finish should I use on my wooden planter boxes to keep them from getting moldy or decaying?
That is such a smart question! Since your beautiful new planters will be dealing with moisture, you definitely want to protect that wood. I always recommend using an outdoor-rated, non-toxic wood sealer or a high-quality linseed oil. It soaks in deep to prevent rot and mold without making the wood look plasticky. If you’re going for a more natural look, a clear matte sealant is your best friend to keep that rustic charm alive!
Can I use these same planter designs for heavy succulents, or should I stick to lighter plants for the upcycled containers?
That is such a great question! I always tell my readers: weight matters more than you think. For those upcycled plastic bottles or lightweight scrap containers, I’d definitely stick to lighter plants like trailing ivy or small ferns. Heavy succulents can get a bit top-heavy and might tip things over! If you’re dreaming of a succulent garden, I’d recommend using the wooden planter boxes we talked about—they have the sturdiness to handle that extra weight perfectly.
