I still remember standing in my dad’s hardware store back in Ohio, clutching a tiny, crooked wooden box I’d tried to glue together when I was seven. I thought I was a master craftsman, but looking back, that little project was a total disaster! Most people think you need a professional-grade workshop or a degree in carpentry to successfully master how to build a birdhouse, but I’m here to tell you that’s a complete myth. You don’t need a garage full of expensive machinery; all you really need is a bit of patience, a few basic tools, and the courage to make a few mistakes along the way.
In this guide, I’m stripping away all the complicated jargon to give you a straightforward, stress-free roadmap. I’ll walk you through selecting the right wood, making clean cuts, and ensuring your new feathered friends actually feel safe inside. We aren’t just making a craft project; we are building a functional sanctuary for your backyard visitors. Grab your favorite hammer (I’ll be using one of my favorites!) and let’s get to work—we’re about to build something truly amazing together!
Table of Contents
- Step-by-Step Instructions
- Choosing the Best Wood for Birdhouses and Essential Tools
- Finding the Perfect Dimensions and Safe Entrance Hole Size
- Pro-Tips from My Workshop to Yours
- Quick Tips for Your Birdhouse Success
- ## A Little Piece of Heart for Your Backyard
- Bringing Your Birdhouse Home
- Frequently Asked Questions
Guide Overview
Tools & Supplies
- Handsaw or miter saw for cutting wood
- Hammer for assembling pieces
- Drill with small bits for entrance hole and pilot holes
- Measuring tape for accuracy
- Cedar or pine board (1" x 6" x 4')
- Galvanized nails (1.5 inch)
- Wood glue (waterproof)
- Sandpaper (medium grit)
Step-by-Step Instructions
- 1. First things first, let’s get our materials together! You’ll need a piece of untreated cedar or pine (about 1×6 inches is perfect), a saw, some galvanized nails or screws, a hammer, and a drill. I always recommend using untreated wood because we want our feathered friends to stay safe and healthy without any nasty chemicals leaching into their little home.
- 2. Once you’ve got your wood, it’s time to start measuring and marking. Grab your pencil and a square to layout your pieces: a floor, four walls, and a roof. I like to make the roof slightly wider than the base to create an overhanging eave, which helps keep the rain from splashing right into the entrance. Take your time here; a little precision now makes the assembly so much smoother later!
- 3. Now, let’s get to the fun part—the cutting! Carefully saw along your pencil lines to create your individual panels. If you’re a bit nervous about using a hand saw, don’t worry; just take it slow and keep your fingers well away from the blade. If you have a miter saw, that works too, but even a simple handsaw will do the trick for this project.
- 4. Next, we need to create the entrance hole. This is the most important part for determining which birds will move in! Using a drill with a spade bit or a hole saw, drill a hole into your front panel about two-thirds of the way up. I usually aim for a 1.5-inch hole, which is a sweet spot for many common backyard birds like bluebirds or chickadees.
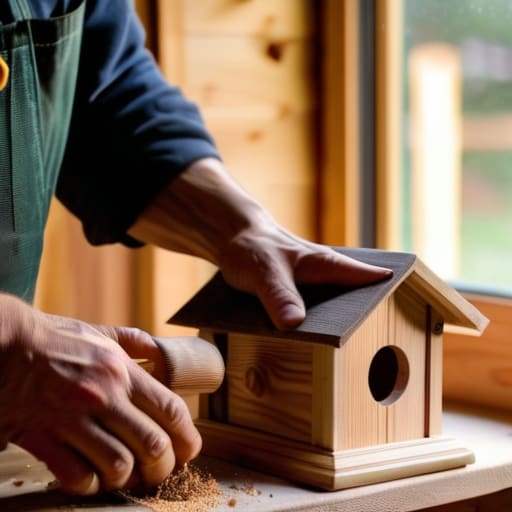
- 5. It’s time to start assembling! Start by nailing your side walls to the floor piece, then attach the front and back panels. I find it super helpful to use a little bit of wood glue along the edges before nailing; it adds that extra bit of durability that helps the birdhouse withstand the elements year after year.
- 6. Finally, let’s attach the roof. I actually prefer to attach one side of the roof with a hinge or just a few removable screws. This might seem a little extra, but it makes it so much easier to clean out the old nesting material once the birds have flown south for the winter.
- 7. Once everything is sturdy and secure, find a nice, quiet spot in your yard to hang it up. Make sure it’s at least five to ten feet off the ground and away from areas where predators might reach it. Now, grab a cup of coffee, sit back, and wait for your new neighbors to move in!
Choosing the Best Wood for Birdhouses and Essential Tools
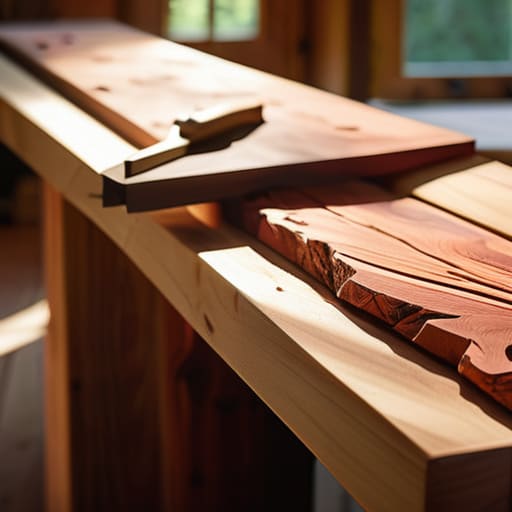
Before we dive into the sawdust, let’s talk about your materials. Choosing the right lumber is actually more important than most people realize! When I’m scouting for the best wood for birdhouses, I always steer clear of pressure-treated lumber or anything with nasty chemical stains. You want something natural and sturdy, like cedar or redwood. These woods are my absolute favorites because they have a natural resistance to rot, which is a total lifesaver when it comes to protecting birdhouses from weather extremes. Plus, they age so beautifully in the sunlight!
As for your toolkit, you don’t need a massive professional workshop to get this done. A simple hand saw, a hammer (I might be a little biased with my collection!), and some outdoor-rated wood glue will get you through most of the heavy lifting. When gathering your woodworking tools for birdhouses, just make sure you have a reliable drill with a spade bit. This is crucial because getting that safe birdhouse entrance hole size exactly right is the difference between a cozy home and a house that’s too risky for your feathered neighbors.
Finding the Perfect Dimensions and Safe Entrance Hole Size
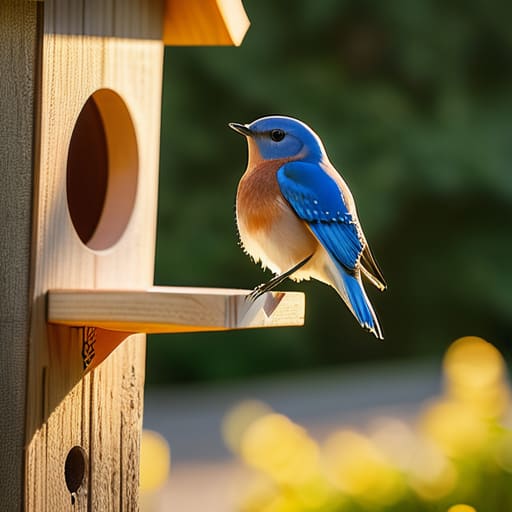
Now, this is where things get a little technical, but don’t let that intimidate you! Before you start sawing, you really need to think about who your tiny new neighbors are going to be. If you’re hoping to attract specific species, like the gorgeous bluebirds I see in my backyard all the time, you’ll want to follow specific birdhouse dimensions for bluebirds to ensure they feel right at home. A house that’s too big might feel drafty, while one that’s too cramped just won’t work. It’s all about creating that perfectly cozy atmosphere for them to raise their families.
The most critical part of this planning phase, though, is determining the safe birdhouse entrance hole size. This is a huge deal because the hole acts like a security gate; if it’s too large, unwanted predators or larger birds might try to move in and take over. I always tell my readers to measure twice and cut once when it comes to the entrance! Once you’ve nailed down those measurements, you’ll feel so much more confident moving on to the assembly.
Pro-Tips from My Workshop to Yours
- Skip the paint on the inside! While you might be tempted to give the birdhouse a bright, colorful makeover, I always recommend leaving the interior natural. Chemicals in paint can be tough on baby birds, so let’s keep their little nursery as clean and safe as possible.
- Give them a little “ladder.” Since most wood is pretty smooth, I like to take a piece of coarse sandpaper or even a small saw and make some shallow horizontal grooves just below the entrance hole. It helps the fledglings scramble out when they’re ready to take their very first flight!
- Drainage is your best friend. There is nothing worse than a soggy nest after a summer thunderstorm. Before you nail everything together, make sure you drill a few small holes in the bottom floor. This keeps the nesting material dry and the little ones cozy.
- Think about ventilation. It can get surprisingly warm in a wooden box once the sun hits it. I always drill a couple of tiny holes near the top of the side walls to let the breeze flow through. It’s like adding a little built-in air conditioning for your backyard guests!
- Mount it with intention. Don’t just slap it anywhere! I’ve learned through plenty of trial and error that placement is everything. Try to mount your birdhouse in a spot that’s protected from heavy winds and out of reach from curious neighborhood cats. A little bit of strategic positioning goes a long way.
Quick Tips for Your Birdhouse Success
Remember that safety and comfort come first—always double-check your entrance hole size and avoid using toxic paints or stains so your feathered friends stay healthy!
Don’t sweat the small stuff! If your cuts aren’t perfectly straight or your measurements are a tiny bit off, don’t worry; birds care much more about a sturdy, dry shelter than a Pinterest-perfect finish.
The best part is the anticipation! Once you hang your creation, grab a cup of coffee, head to the window, and enjoy the rewarding feeling of knowing you built a little piece of nature with your own two hands.
## A Little Piece of Heart for Your Backyard
“Building a birdhouse isn’t just about measuring wood and driving nails; it’s about creating a tiny, handcrafted sanctuary that invites nature right into your living space. There is something so incredibly rewarding about knowing that a little bit of sawdust and a lot of heart helped build a home for a new little neighbor!”
Emily Carter
Bringing Your Birdhouse Home
And just like that, you’ve gone from a pile of lumber to a functional, beautiful little sanctuary! We’ve covered a lot of ground today, from selecting the right weather-resistant wood and gathering your essential tools to nailing down those crucial dimensions and finding the perfect entrance hole size to keep our feathered friends safe. It might have felt a little daunting when we first started looking at those blueprints, but seeing it all come together is such a rush. Remember, the most important part of the process wasn’t just following the measurements perfectly, but actually trusting your hands and learning as you went along.
Now comes the best part: finding that perfect spot in your garden or hanging it from a sturdy branch where it can truly shine. As you sit back with a cup of coffee and watch the first family of birds move into their new home, I hope you feel that incredible sense of pride that comes with making something from scratch. Building this wasn’t just about the birdhouse; it was about proving to yourself that you can take an idea and turn it into something real. You’ve officially leveled up your DIY skills, and I honestly can’t wait to see what you decide to build next. Let’s keep creating!
Frequently Asked Questions
What kind of finish or paint is actually safe to use if I want to decorate my birdhouse without harming the birds?
This is such a great question! I get asked this all the time. When it comes to our feathered friends, we want to keep things as natural as possible. If you’re dying to add some color, stick to water-based, non-toxic paints and avoid anything with heavy solvents or strong odors. My golden rule? Keep the inside completely raw and unfinished. That way, the birds stay safe and healthy while your little sanctuary looks absolutely stunning!
Where is the absolute best spot in my yard to hang or mount the birdhouse once it's finished?
Now for the most important part: finding the perfect home for your new creation! You’ll want to pick a spot that feels safe and cozy, away from where cats or squirrels can easily reach. Aim for an area that offers a bit of natural cover—like near a leafy shrub—but make sure it’s not so crowded that it gets too damp. Ideally, mount it about five to ten feet up, facing away from prevailing winds. Let’s get it placed!
How often should I be cleaning out the old nesting material to make sure the birds stay healthy?
That is such a thoughtful question! Keeping things tidy is key to a happy, healthy backyard sanctuary. Generally, you’ll want to clean out the old nesting material once a year, ideally in late autumn after the birds have migrated for the season. This prevents parasites from hanging around for next spring. Just give it a quick rinse and a little scrub to make sure it’s fresh and ready for their next big adventure!