I was standing in my kitchen last Tuesday, staring at my backsplash, when it hit me: those dark, dingy lines between my tiles were making my whole renovated space look completely exhausted. I almost reached for one of those expensive, heavy-duty chemical cleaners I saw on a late-night infomercial, but then I remembered something my dad used to tell me back at his hardware store: you don’t always need the harshest chemicals to win the battle. Most people think you need a professional crew to fix stained lines, but I’m here to tell you that learning how to clean grout is actually much simpler—and way more satisfying—than you’ve been led to believe.
I know how frustrating it is to scrub for an hour only to see zero difference, so I’m stripping away the fluff and getting straight to the good stuff. In this guide, I’m sharing my tried-and-true, no-nonsense methods for lifting deep-seated grime without damaging your beautiful tile. We’re going to walk through the exact tools you’ll need, the best DIY solutions that actually work, and a few of my secret pro tips to ensure your grout stays bright for the long haul. Let’s get to work and make those tiles pop!
Table of Contents
- Step-by-Step Instructions
- Mastering Natural Grout Cleaning Solutions With Baking Soda and Vinegar
- Finding the Best Tools for Grout Scrubbing and Removing Stains
- My Pro-Tips for Keeping That Grout Sparkling
- Quick Tips to Keep Your Tile Looking Fresh
- ## A Little Perspective on the Dirty Work
- You’ve Got This: Bringing the Shine Back
- Frequently Asked Questions
Guide Overview
Tools & Supplies
- Stiff grout brush or old toothbrush for scrubbing
- Microfiber cloths or sponges for wiping
- Baking soda (1 cup)
- Warm water (as needed)
- White vinegar (1/2 cup)
- Mild dish soap (a few drops)
Step-by-Step Instructions
- 1. First things first, let’s clear the decks! Before we dive into the scrubbing, make sure to move any rugs, bath mats, or floor decor out of the way. I always like to give the floor a really good sweep or vacuum first to get rid of any loose dust or hair. If you try to clean grout while there’s still debris sitting on top of it, you’ll just end up creating a muddy mess that’s even harder to clean!
- 2. Now, let’s talk supplies. You don’t need a cabinet full of expensive, harsh chemicals to get this done. In my house, I usually reach for a simple mixture of warm water and a bit of mild dish soap, or if things are looking extra grimy, a splash of white vinegar. If you’re dealing with really stubborn stains in the kitchen, a paste made from baking soda and water works like an absolute dream.
- 3. Once your solution is ready, grab your favorite cleaning tool. While a big sponge works for a quick wipe-down, if you really want to see a transformation, you’ll want a stiff-bristled grout brush. If you’re on a budget and don’t want to run to the store, an old toothbrush works surprisingly well for those tiny, tight corners where dirt loves to hide.
- 4. It’s time to get to work! Dip your brush into your cleaning solution and apply it generously to the grout lines. I find it’s best to work in small, manageable sections rather than trying to tackle the whole bathroom at once. Scrub in a circular motion, applying just enough pressure to lift the dirt without being so aggressive that you damage the grout itself.
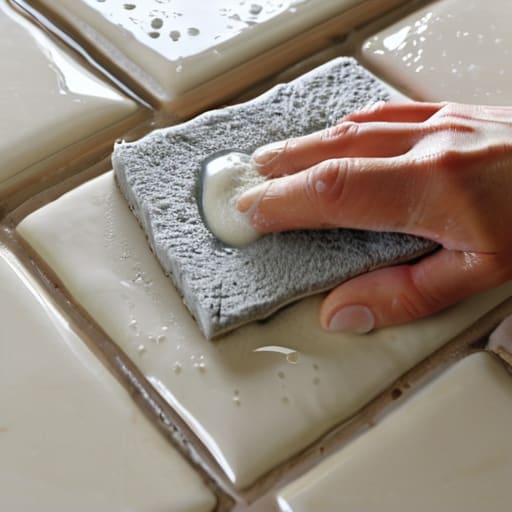
- 5. As you scrub, you’ll notice the dirty water starting to pool in the lines. This is where most people get frustrated, but don’t give up! Use a clean, damp microfiber cloth or a sponge to wipe away the dirty slurry as you go. You want to make sure you’re actually removing the grime, not just pushing it around the floor.
- 6. After you’ve scrubbed all the sections, give the entire floor one final rinse with a clean mop or a fresh cloth soaked in plain water. This is a super important step because you want to make sure every last bit of soap or baking soda is gone. If you leave any residue behind, it can actually attract more dirt once the floor dries!
- 7. Finally, let those floors dry completely before you walk on them or put your rugs back down. I usually like to crack a window or turn on a fan to speed up the drying process. There is nothing quite as satisfying as looking down at those crisp, clean lines and knowing you did it all yourself!
Mastering Natural Grout Cleaning Solutions With Baking Soda and Vinegar
Now, if you’re like me and prefer to keep as many harsh chemicals out of your home as possible, you are going to love playing with the classics. Using baking soda and vinegar for grout is one of my absolute favorite ways to tackle those stubborn, dingy lines without worrying about fumes. I remember watching my dad use similar tricks back at the family hardware store; there’s just something so satisfying about a solution that actually works using ingredients you already have in your pantry!
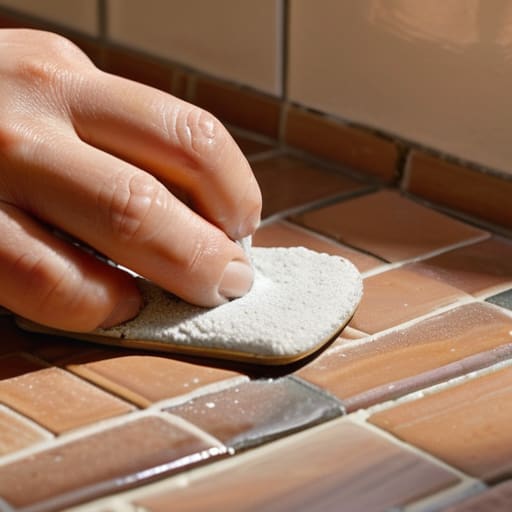
To get the best results, I recommend making a thick paste with the baking soda and just a splash of water first. Apply that paste directly to the lines, let it sit for about ten minutes, and then spray your vinegar over it. You’ll see that lovely fizzing reaction—that’s the magic happening! When it comes to removing grout stains, this duo is a total game-changer. Just be sure to use a stiff-bristled brush to work the mixture deep into the crevices. It might take a little bit of elbow grease, but seeing those lines brighten up is so incredibly rewarding.
Finding the Best Tools for Grout Scrubbing and Removing Stains
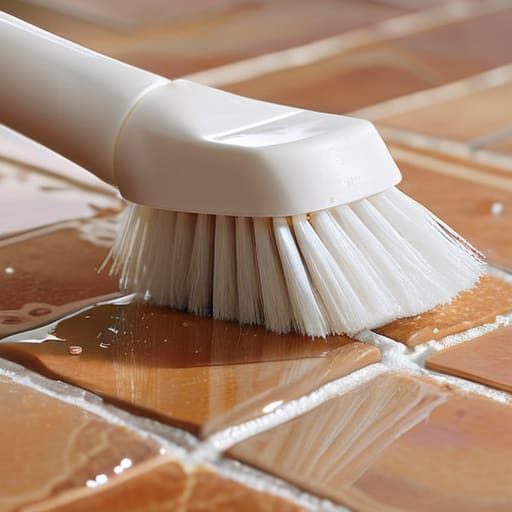
Now, let’s talk about the gear! While it’s tempting to just grab any old sponge and start scrubbing, having the right equipment makes all the difference between a frustrating afternoon and a satisfying transformation. If you’re serious about removing grout stains without wearing yourself out, I highly recommend investing in a dedicated grout brush. These usually have stiffer, slimmer bristles designed specifically to get deep into those tiny crevices where dirt loves to hide. If you’re on a tight budget, an old toothbrush works in a pinch, but a specialized brush will save your wrists a lot of grief!
For those of you tackling larger areas, like a kitchen backsplash or a full bathroom floor, a small handheld electric scrubber can be a total game-changer. It does much of the heavy lifting for you, allowing you to focus on the precision work. Also, don’t forget a high-quality microfiber cloth for the final wipe-down; it helps pick up any leftover residue from your natural grout cleaning solutions so your tiles look polished and bright. Remember, the goal isn’t just to clean, but to make the process something you actually enjoy doing!
My Pro-Tips for Keeping That Grout Sparkling
- Don’t wait for the grime to settle in! I’ve learned the hard way that a quick weekly sweep or a light wipe-down prevents those deep-seated stains from becoming permanent fixtures in your bathroom.
- Always test your cleaning solution on a tiny, inconspicuous corner first. Even with natural stuff like vinegar, you want to make sure it doesn’t react weirdly with your specific grout color or sealer.
- Invest in a good quality grout sealer once your tiles are clean and dry. It’s like putting a raincoat on your grout—it makes liquid and dirt bead up on the surface instead of soaking in!
- When you’re scrubbing, work in small sections rather than trying to tackle the whole floor at once. It’s much more manageable and keeps you from getting overwhelmed (and exhausted!).
- If you’re dealing with a particularly stubborn spot, let your cleaning mixture sit for about 10-15 minutes before you start scrubbing. Giving that solution a little “dwell time” lets it do the heavy lifting for you!
Quick Tips to Keep Your Tile Looking Fresh
Don’t wait for the grime to build up—a quick, regular scrub prevents those stubborn stains from becoming permanent fixtures in your home!
Trust the power of nature; a simple mix of baking soda and vinegar can do wonders without the harsh chemical smells.
Pick the right tool for the job, whether it’s a stiff brush for deep cleans or an old toothbrush for those tricky little corners.
## A Little Perspective on the Dirty Work
“I know it feels a little daunting when you’re staring down those dark, stained lines, but don’t let it get you down. Think of grout cleaning not as a chore, but as the final polish that makes all your hard work in the kitchen or bath truly shine!”
Emily Carter
You’ve Got This: Bringing the Shine Back
I know that looking at those stubborn, discolored lines can feel a little overwhelming at first, but look at how much we’ve covered! From harnessing the power of natural cleaning solutions like baking soda and vinegar to picking out the perfect scrubbing tool for the job, you now have a complete toolkit for success. Remember, the key is consistency; you don’t need to tackle the entire house in one afternoon. Just take it one section at a time, use a little bit of elbow grease, and don’t be afraid to let those cleaning agents sit for a few extra minutes to do the heavy lifting for you.
At the end of the day, cleaning your grout isn’t just about maintenance—it’s about showing your home a little extra love. There is something so incredibly satisfying about seeing those crisp, clean lines emerge from under the grime, and I promise that feeling of accomplishment is worth every minute of scrubbing. Your space is a reflection of your hard work and your unique style, so don’t let a few stains dim your sparkle. Grab your favorite brush, put on some good music, and let’s transform your space together. I can’t wait to see the beautiful results you achieve!
Frequently Asked Questions
Is it safe to use vinegar on my natural stone tiles, or will it damage the finish?
Oh, I am so glad you asked that! This is one of those “hold your horses” moments. If you’re working with natural stone—like marble, limestone, or travertine—you definitely want to keep the vinegar far away. Since vinegar is acidic, it can actually eat away at the stone’s surface and dull that beautiful finish you love. Stick to pH-neutral cleaners instead; your gorgeous floors will thank you!
How often should I actually be deep cleaning my grout to keep it looking fresh?
Honestly, there’s no one-size-fits-all answer, but I usually recommend a deep scrub every three to six months. If you’ve got a high-traffic area like a kitchen backsplash or a master shower that gets daily use, you might want to bump that up to once a month. My best advice? Don’t wait until it looks dingy! A quick monthly maintenance wipe-down makes those deep cleans so much easier and keeps your tiles looking gorgeous.
My grout is starting to crack or crumble—is that something I can fix with cleaning, or do I need to regrout entirely?
Oh, I’ve been there! It can be a little scary when you see those cracks appearing. Honestly, if it’s just surface discoloration, cleaning will do the trick. But if the grout is actually crumbling or falling out, cleaning won’t fix the structural issue—you’ll likely need to regrout. If it’s cracking, it means the bond is broken. Don’t panic, though! It’s a common project, and we can walk through the repair process together.