
Have you ever looked at those complicated, three-day dough recipes online and felt like you needed a culinary degree just to get through the weekend? I used to think that learning how to make homemade pizza required a professional-grade stone oven and a pantry full of exotic Italian flours that you can’t even find at your local grocery store. But honestly? After years of trial and error—and a few flour-covered kitchen disasters—I’ve realized that the secret isn’t in the fancy equipment, but in the simple, tactile joy of working with your hands.
I’m not here to give you a lecture or a list of intimidating, professional techniques that leave your kitchen looking like a construction zone. Instead, I want to share the practical, no-nonsense methods I learned growing up in my family’s hardware store, where we knew that the right tools and a little patience make all the difference. I promise to guide you through a process that is completely doable for anyone, ensuring you walk away with a crust that’s crispy, a sauce that’s bright, and the absolute confidence to host your own pizza night.
Table of Contents
- Recipe Instructions
- Unlocking the Best Pizza Dough Recipe and Yeast Dough Fermentation Tips
- Perfecting Crispy Pizza Crust Techniques and Baking Pizza in a Home Oven
- My Secret Sauce: 5 Pro-Tips for Pizza Perfection
- My Top Tips for Pizza Perfection
- The Magic in the Mess
- Bringing It All Together
- Frequently Asked Questions
Recipe Details
Ingredients
- 2 cups all-purpose flour
- 1 teaspoon active dry yeast
- 3/4 cup warm water
- 1 teaspoon salt
- 1/2 cup tomato sauce
- 1.5 cups shredded mozzarella cheese
- 1/4 cup sliced pepperoni
Recipe Instructions
Step 1
First things first, let’s get that dough moving! Grab a large mixing bowl and combine your warm water, yeast, and a pinch of sugar. Let it sit for about five to ten minutes until it gets all foamy and bubbly—that’s how you know your yeast is alive and ready to work its magic. Once that’s looking good, stir in your flour, olive oil, and a healthy pinch of salt until a shaggy dough forms.
Step 2
Now, it’s time for the part I find most therapeutic: the kneading. Turn your dough out onto a lightly floured surface and start pushing, folding, and turning. It might feel a bit stubborn at first, but keep at it for about 8 to 10 minutes until the texture becomes smooth and elastic. If you have a stand mixer, you can let it do the heavy lifting, but honestly, there’s something so satisfying about working the dough with your own hands.
Step 3
Once your dough is nice and supple, lightly grease a clean bowl with a bit of olive oil and tuck your dough inside. Cover it with a warm, damp kitchen towel and find a cozy, draft-free spot for it to rest. You’ll want to let it rise for about an hour, or until it has doubled in size. This is the perfect time to tidy up your workspace or maybe go hunt through my tool collection for the perfect pizza cutter!
Step 4
When the dough has puffed up beautifully, preheat your oven as high as it will go—usually around 475°F or 500°F. If you have a pizza stone, pop it in there now so it gets super hot. Punch the risen dough down to release the air and transfer it to a piece of parchment paper. Gently stretch it out into your desired shape; try to avoid using a rolling pin if you can, as you want to keep those lovely air bubbles intact for a better crust.
Step 5
Now comes the best part—the customization! Spread a thin layer of your favorite sauce over the dough, leaving a little border for that crust to rise. Layer on your cheese and all those delicious toppings you’ve been dreaming about. I personally love a bit of fresh basil or a drizzle of hot honey, but the sky is the limit here. Slide your masterpiece into the oven and bake for about 10 to 15 minutes, or until the crust is golden brown and the cheese is bubbling with joy.
Unlocking the Best Pizza Dough Recipe and Yeast Dough Fermentation Tips
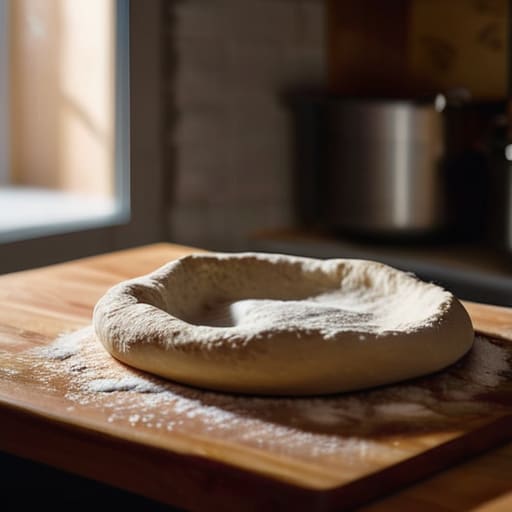
Now, if you really want to take your kitchen game to the next level, we need to talk about the science behind that perfect rise. I’ve spent countless afternoons in my kitchen experimenting, and I’ve learned that the secret to the best pizza dough recipe isn’t just about the flour—it’s all about time. If you have the patience, try letting your dough undergo a slow cold ferment in the fridge overnight. This is one of my favorite yeast dough fermentation tips because it develops those complex, slightly tangy flavors you usually only find in high-end artisanal pizzerias.
Don’t be discouraged if your first few tries aren’t quite “professional” grade. When you’re baking pizza in a home oven, remember that heat is your best friend! I always recommend preheating my stone or steel for at least forty-five minutes to ensure you get those crispy pizza crust techniques working in your favor. It’s all about building that foundation so your toppings have a sturdy, delicious home to sit on. Grab your flour, take a deep breath, and let’s get those bubbles forming!
Perfecting Crispy Pizza Crust Techniques and Baking Pizza in a Home Oven

Now, let’s talk about that crunch! We all crave that perfect bite, but getting a professional-grade finish can feel a bit intimidating when you aren’t working with a wood-fired oven. To master crispy pizza crust techniques at home, my biggest secret is using a pizza stone or a heavy baking steel. If you don’t have one, don’t sweat it! Just flip a baking sheet upside down and let it preheat in your oven for at least thirty minutes. This creates a much more stable heat source, ensuring your dough doesn’t get soggy in the middle.
When it comes to baking pizza in a home oven, heat is your best friend. Crank that dial as high as it will go! I always recommend positioning your rack in the lowest third of the oven to mimic that intense bottom heat you’d find in a pizzeria. While you wait for the oven to reach temperature, you can start brainstorming some easy pizza toppings ideas—maybe some fresh basil or a drizzle of hot honey? Just remember, less is usually more when you want to keep that crust from getting weighed down.
My Secret Sauce: 5 Pro-Tips for Pizza Perfection
- Don’t be afraid of the cold! If you have the time, let your dough ferment in the fridge overnight. It’s a total game-changer for developing those complex, sourdough-like flavors that make your kitchen smell like a real Italian pizzeria.
- Less is definitely more when it comes to toppings. I know it’s tempting to pile on everything in the pantry, but too much weight will turn your beautiful, crispy crust into a soggy mess. Keep it light so the dough can actually breathe!
- Get your oven as hot as it can possibly go. Most home ovens max out around 500°F or 550°F, and you want every bit of that heat to mimic a professional stone oven. If you have a pizza stone or steel, let it preheat for at least an hour!
- Give your dough some love, not just force. When you’re stretching it out, try to use your hands instead of a rolling pin. A rolling pin can knock out all those lovely air bubbles we worked so hard to create during the rise, leaving you with a flat, dense crust.
- Watch your moisture levels! If you’re using fresh mozzarella, pat it dry with some paper towels before it hits the dough. That extra water is the sneaky culprit behind a “soupy” pizza, and we want those slices to hold their shape when you lift them.
My Top Tips for Pizza Perfection
Don’t rush the rise—patience is your best friend when it comes to fermentation, as giving that dough time to develop flavor is what makes it taste professional!
Get that oven screaming hot; a high temperature is the secret to mimicking a stone oven and getting that gorgeous, crispy crust we’re all after.
Don’t be afraid to get your hands a little floury and experiment with your toppings, because the most rewarding part of DIY cooking is making it exactly how you love it!
The Magic in the Mess
“Honestly, the best part isn’t even the final slice—it’s that moment when your hands are covered in flour, the dough is finally behaving, and you realize you’ve built something delicious from scratch right in your own kitchen.”
Emily Carter
Bringing It All Together
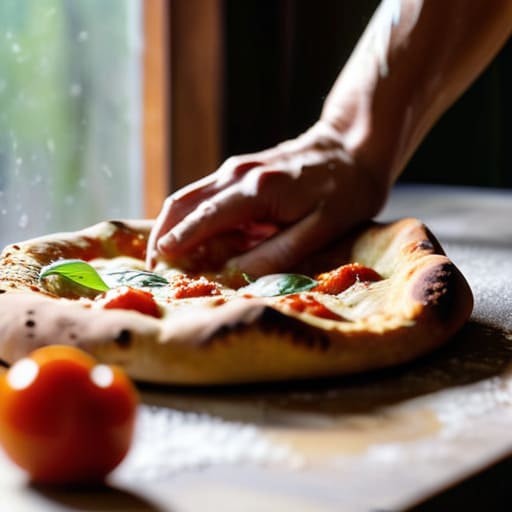
We have covered so much ground today, from mastering that elusive yeast fermentation to finally conquering the heat of your home oven for that perfect, golden crunch. Remember, the secret isn’t just in having the right flour or a high-quality stone; it’s about understanding how the dough responds to your touch and giving it the time it needs to rise. Whether you struggled a bit with the shaping or your first crust came out a little thicker than expected, don’t sweat the small stuff. Every single pizza you make is a stepping stone toward becoming a master of your own kitchen, and honestly, even a “failed” pizza usually tastes incredible when it’s fresh out of the oven and loaded with your favorite toppings!
At the end of the day, making homemade pizza is about so much more than just a meal—it’s about the joy of the process. There is something incredibly grounding about working with your hands, feeling the texture of the dough, and creating something delicious from scratch. I truly believe that once you taste that first slice of a crust you built yourself, you’ll realize that you are capable of anything. So, grab your apron, clear off the counter, and don’t be afraid to get a little flour on your face. I can’t wait to hear how your first batch turns out, so please come back and tell me all about it. Let’s keep creating!
Frequently Asked Questions
I noticed my dough isn't rising like yours did—could I be using too much flour or maybe my kitchen is just a little too chilly?
Oh, I have been there! Honestly, you’ve hit the nail on the head with both of those. If you add too much flour, the dough gets heavy and loses that airy lift we’re looking for. And a chilly kitchen? That’s a total momentum killer for yeast! Try moving your bowl to a warm spot, maybe near the oven or even inside a turned-off microwave with a mug of hot water. Let’s get that rise back!
What's the best way to store leftover dough if I don't want to use it all in one go?
Don’t you worry—leftover dough is actually a blessing in disguise! If you aren’t ready to bake right away, just lightly oil a bowl, tuck your dough inside, and cover it tightly with plastic wrap to keep it from drying out. Pop it in the fridge; it’ll stay happy for a few days. Just remember to let it come back to room temperature before you try to stretch it!
Can I swap out the standard bread flour for something else, like all-purpose or even a gluten-free blend, without ruining the texture?
That is such a great question! I get asked about flour swaps all the time. If you want to use all-purpose flour, go for it! Your crust might be a little softer and less “chewy” than using bread flour, but it’ll still taste delicious. However, I’d be careful with gluten-free blends; they behave quite differently and usually need a bit more moisture to avoid getting crumbly. Let’s keep experimenting!
