I was standing in my garage last Tuesday, staring at a beat-up, mid-century dresser I’d rescued from a curb, feeling that familiar wave of “can I actually do this?” creeping in. We’ve all been there—looking at a piece of furniture that has seen better days and thinking it’s destined for the landfill because you’re afraid of ruining it. But here’s the secret I learned growing up in my family’s hardware store: you don’t need a professional workshop or a degree in woodworking to master how to refinish furniture. You just need a little bit of grit, the right tools, and the realization that mistakes are just part of the process.
In this guide, I’m stripping away all the complicated jargon and fancy equipment lists to give you the real, honest truth. I’ll walk you through my personal, tried-and-true method for prepping, sanding, and staining so you can feel completely confident from the first grit of sandpaper to the final coat of wax. We aren’t going for perfection here; we’re going for soul and character. Let’s roll up our sleeves and turn those tired old pieces into something you’ll be incredibly proud to display in your home!
Table of Contents
- Step-by-Step Instructions
- Unlocking Potential With Essential Furniture Restoration Tools
- Mastering Wood Stripping Techniques to Reveal Hidden Beauty
- My Secret Sauce: 5 Pro-Tips for a Flawless Finish
- A Few Little Nuggets of Wisdom to Take With You
- Finding the Heart Beneath the Surface
- You Did It! Now Time to Celebrate
- Frequently Asked Questions
Guide Overview
Tools & Supplies
- Sandpaper (various grits for smoothing)
- Screwdriver (for removing hardware)
- Paintbrush or Foam roller (for applying finish)
- Tack cloth (for removing dust)
- Wood filler (small container for repairs)
- Degreaser or TSP (small bottle for cleaning)
- Paint or Stain (1 quart)
- Protective topcoat/Polyurethane (1 quart)
Step-by-Step Instructions
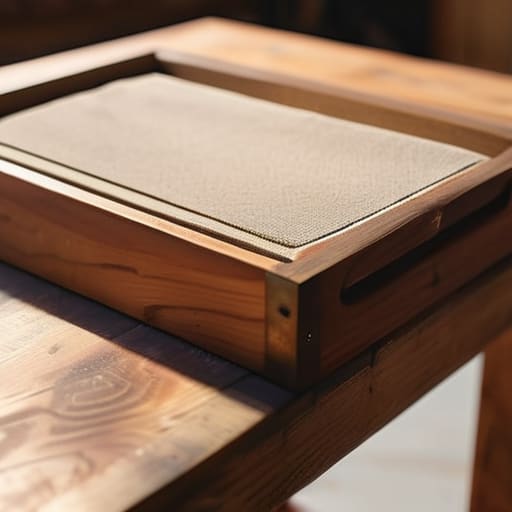
- 1. First things first, we need to clear some space and get organized. Grab a soft cloth and some mild soap to give your piece a good cleaning; you’d be surprised how much built-up dust and oils can hide in the corners of an old dresser! Once it’s clean and completely dry, go ahead and remove all the hardware—the knobs, the handles, even the hinges if you can. I always like to put all those little screws in a labeled jar so I’m not hunting for them later when I’m in the zone.
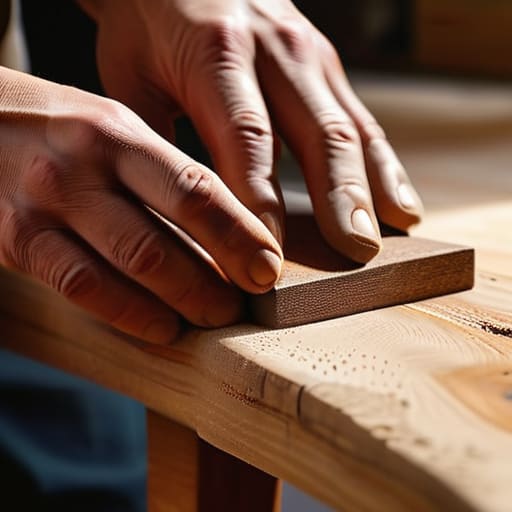
- 2. Now, it’s time to get a little bit messy with the sanding. If you’re working on a larger piece, I highly recommend renting an orbital sander to save your wrists, but for smaller details, your trusty sandpaper will do just fine. Start with a coarser grit to strip away that old, tired finish, and then move to a finer grit to get it silky smooth. Don’t rush this part; I know it’s tempting to jump straight to the pretty colors, but a smooth foundation is the secret to a professional-looking finish.
- 3. Once you’ve finished sanding, you’ll notice a layer of fine dust covering everything. This is super important: you have to get that dust off! I like to use a vacuum with a brush attachment first, followed by a tack cloth to pick up those tiny particles that seem to hide in the wood grain. If you skip this, your new finish might end up looking bumpy, and we definitely want that flawless glow we’re aiming for!
- 4. Next up is the fun part—priming! If you’re planning on painting your piece a bold color or if the wood is particularly blotchy, a good quality primer is your best friend. I usually opt for a stain-blocking primer to make sure any old wood tannins don’t bleed through your beautiful new color. Apply it in thin, even layers, and try to be as patient as possible; it’s much better to do two thin coats than one thick, gloppy one.
- 5. Now, let’s bring in the color! Whether you’re using a sophisticated chalk paint for that matte look or a sleek enamel for something more modern, take your time with the application. I find that using a high-quality brush or a small foam roller helps me achieve those dreamy, even strokes without leaving annoying marks. If you’re feeling a little nervous about streaks, just remember that consistency is key, and you can always add another layer once the first one is dry.
- 6. If you’ve chosen to stain the wood rather than paint it, this is where the magic really happens. After your surface is sanded and clean, apply the stain using a lint-free rag or a foam applicator. Work in the direction of the grain to keep things looking natural, and don’t be afraid to wipe away the excess if it starts looking too dark. It’s a bit of a balancing act, but watching that natural wood grain pop is one of my favorite parts of the whole process!
- 7. Finally, we need to protect all your hard work with a topcoat. This is what makes your piece durable enough to actually use! Depending on the look you want, you can go with a clear wax for a vintage feel or a polycrylic for a more heavy-duty, wipeable surface. Apply it carefully in thin layers, letting each one dry completely before moving to the next. Once it’s all set, go ahead and reattach your hardware, and voila—you’ve just breathed new life into a piece of history!
Unlocking Potential With Essential Furniture Restoration Tools
Before we dive into the actual work, I want to talk about my favorite part: gathering your supplies! Growing up in my family’s hardware store, I learned early on that having the right furniture restoration tools makes all the difference between a frustrating afternoon and a total success. You don’t need a professional workshop, but having a solid furniture sanding grits guide on hand is a lifesaver. I always tell my readers: don’t rush the sanding process! Starting with a coarser grit to level things out and slowly moving to a finer one ensures you get that silky-smooth finish we’re all dreaming of.
Another thing that can feel a little intimidating is the cleanup phase. If you’re dealing with a piece that has layers of heavy, old-school finishes, you might need to explore different wood stripping techniques before you even touch a sander. Whether you prefer chemical strippers or a more manual approach, the goal is removing old varnish completely so your new stain can actually soak into the wood. It’s all about preparation, my friends—once you have your foundation set, the fun part truly begins!
Mastering Wood Stripping Techniques to Reveal Hidden Beauty
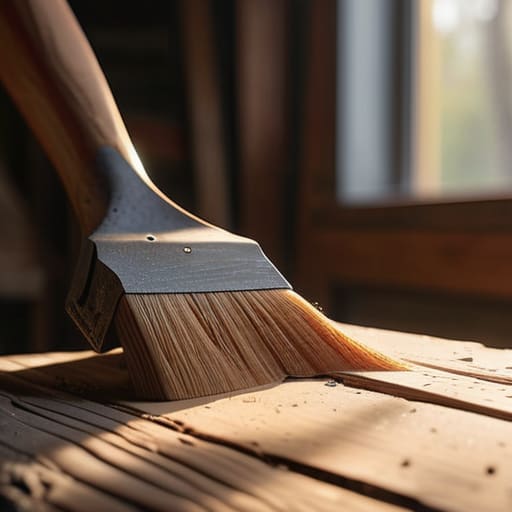
Now, let’s talk about one of the most intimidating—but honestly, most rewarding—parts of the process: getting rid of that old, tired finish. When it comes to removing old varnish or layers of thick paint, I always tell my readers that patience is your absolute best friend. I remember one of my first big projects back in Ohio; I tried to rush through the stripping process, and I ended up gouging the wood! Now, I swear by using a high-quality chemical stripper paired with a dull putty knife. It’s much gentler on the wood grain than aggressive scraping, and it really helps you reveal the true character hidden beneath those decades of grime.
If you’re feeling a bit overwhelmed by the different wood stripping techniques, don’t sweat it! The key is to work in small, manageable sections rather than trying to tackle the whole tabletop at once. If you notice the stripper isn’t biting into a particularly stubborn patch, just let it sit for a few extra minutes. It might feel like you’re taking forever, but I promise, taking your time here will save you so much heartache when we get to the staining phase later on!
My Secret Sauce: 5 Pro-Tips for a Flawless Finish
- Don’t rush the sanding phase! I know it’s tempting to jump straight to the staining once the wood looks clean, but taking that extra time to move through your grits—starting coarse and working up to fine—is what makes the difference between a bumpy finish and a surface that feels like silk.
- Always test your stain on a hidden spot first. I’ve learned the hard way that what looks gorgeous on a tiny scrap of wood can sometimes look totally different on your actual piece, so give it a little “test drive” on the back or underside to be sure.
- Keep your workspace dust-free as much as possible. There is nothing more heartbreaking than spending hours on a perfect coat of lacquer only to find a tiny speck of dust stuck in it; try to wipe everything down with a tack cloth right before you start applying your finish.
- Listen to your wood. Every piece of furniture has its own personality and history, so if you notice a weird patch or a stubborn bit of old finish, don’t just power through it—stop, reassess, and give it a little extra love until it’s ready for the next step.
- Patience is your best friend when it comes to drying times. It’s so easy to think, “Oh, it looks dry enough,” and go for it, but if you apply a second coat too early, you might end up with a sticky mess that’s a nightmare to fix!
A Few Little Nuggets of Wisdom to Take With You
Remember, patience is your absolute best friend in this process; it’s much better to take an extra hour sanding or stripping than to rush and end up frustrated with the finish!
Don’t be afraid to embrace the imperfections—sometimes the little character marks on a piece of vintage wood are exactly what make it feel soulful and special in your home.
Always invest in a few quality tools early on, because having the right gear in your hands makes the whole experience so much more fun and way less of a headache.
Finding the Heart Beneath the Surface
Refinishing a piece of furniture isn’t just about stripping away old paint or smoothing out scratches; it’s about uncovering the soul of something that was once forgotten and proving that with a little patience and a lot of heart, anything can be made beautiful again.
Emily Carter
You Did It! Now Time to Celebrate
I know, I know—looking at that pile of sanding supplies and chemical strippers can feel a little overwhelming at first, but look at how far you’ve come! We’ve walked through everything from selecting the right tools to the delicate art of stripping away those old, tired layers of paint to find the gorgeous wood hiding underneath. Remember, the secret to a professional finish isn’t about having a fancy workshop; it’s really just about patience and persistence throughout the process. Whether you hit a little snag with your sanding or found the stripping process took a bit longer than expected, you stuck with it, and that is exactly how you build those valuable maker skills that stay with you for life.
As you take a moment to step back and admire your handiwork, I hope you feel that same rush of excitement I get every single time I finish a project. There is something truly magical about taking something forgotten and giving it a brand-new purpose in your home. Don’t be afraid to make mistakes or try a bold new stain on your next piece; that’s just part of the journey! You have officially proven that you can transform your space one project at a time. I am so incredibly proud of you for diving in, and I can’t wait to see what you decide to bring back to life next!
Frequently Asked Questions
I’m a little worried about the mess—how do I keep all that dust and chemical smell from taking over my entire house?
Oh, I hear you! I remember being so nervous about that the first time I tackled a big project in my living room. My first tip? Set up a “project zone” in a garage or a well-ventilated room if you can. If you’re working inside, grab a heavy-duty tarp and some painter’s tape to seal off doorways. And please, don’t skip the mask and open those windows—letting the fresh air in makes a world of difference!
What should I do if I realize the wood underneath the old finish is actually damaged or has deep scratches?
Oh, don’t panic! I’ve definitely been there, staring at a deep gouge and feeling my heart sink a little. First, take a deep breath—it’s totally fixable. For those pesky scratches, a little wood filler or even some beeswax can work wonders. If it’s a deeper wound, you might need to sand a bit more carefully around the area or use a wood epoxy. We’ll get it smooth together, I promise!
Is it better to go with a traditional oil-based stain, or are those newer water-based options actually good enough for a professional look?
That is such a great question, and honestly, it’s one I debated for ages! If you’re looking for that deep, rich, classic glow, you can’t beat a traditional oil-based stain—it really penetrates the wood beautifully. However, don’t sleep on those newer water-based options! They’ve come such a long way; they dry faster and have way less of that heavy chemical smell. For a professional look, just pick the one that fits your patience level!