I was halfway through refinishing a gorgeous mid-century sideboard last summer when my chisel suddenly gave up the ghost, tearing a jagged chunk right out of the walnut. I stood there, staring at the damage, feeling that familiar surge of frustration because my project had gone from smooth sailing to a total mess in a single second. It’s a heartbreak I know all too well, but here is the truth: you don’t need a fancy, expensive machine to fix it. Learning how to sharpen tools is honestly one of the most empowering skills you can master, and it’s the secret ingredient to making your DIY projects feel less like a struggle and more like a joy.
I’m not here to overwhelm you with complicated industrial techniques or high-tech gadgets that take up too much space in your workshop. Instead, I’m going to walk you through my tried-and-true, no-nonsense methods for getting those edges back to a razor-sharp finish using simple tools you probably already have. We’ll cover everything from selecting the right stones to the actual hand movements that make all the difference. Let’s get those blades ready so you can get back to creating something beautiful!
Table of Contents
- Step-by-Step Instructions
- Mastering Whetstone Sharpening Techniques for Beautiful Results
- Finding the Perfect Sharpening Angle for Different Tools
- Pro-Tips from My Workbench: Little Secrets for a Razor-Sharp Edge
- Quick Tips to Keep Your Tools in Top Shape
- ## Why a Sharp Edge Matters
- Final Thoughts Before You Get Back to the Bench
- Frequently Asked Questions
Guide Overview
Tools & Supplies
- Garden shears (standard bypass pruners)
- Kitchen knives (stainless steel blades)
- Dual-grit whetstone (1x)
- Honing rod (1x)
- Lubricating oil or water (1x)
- Microfiber cloth (1x)
Step-by-Step Instructions
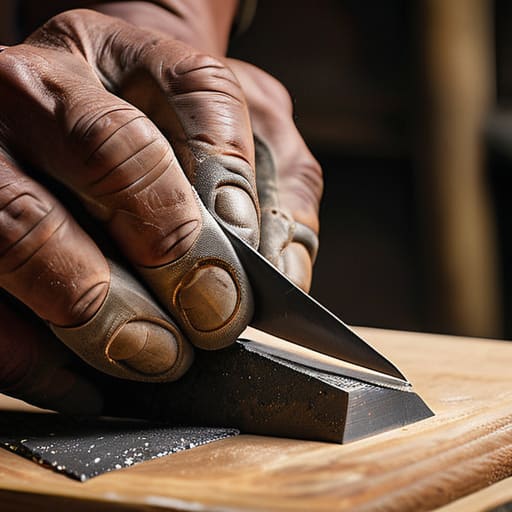
- 1. First things first, let’s get your workspace set up so you aren’t fighting against your tools while you work. Grab a sturdy workbench or a flat table, and I highly recommend using a bench vise to hold your tool firmly in place. If you don’t have one, even a couple of heavy-duty clamps can do the trick, but the goal is to make sure that tool isn’t going anywhere while you’re applying pressure.
- 2. Next, let’s talk about choosing your sharpening medium. Depending on what you’re working with, you might want to reach for a whetstone, a fine-grit sandpaper, or even a dedicated diamond file. I personally love using a combination of grits—starting with something a bit coarser to reshape the edge and finishing with a super fine grit to get that polished, razor-sharp feel.
- 3. Now, it’s time to find that perfect angle. This is usually the part that makes people a little nervous, but I promise you’ve got this! Most garden tools or chisels have a specific bevel, and your job is to mimic that exact angle as you move the stone along the edge. If you’re working on a knife or a small carving tool, try to keep your wrist steady and maintain a consistent tilt throughout the entire stroke.
- 4. Once you’ve found your angle, start the actual sharpening process with light, sweeping motions. You’ll want to move the stone across the metal, pulling it towards you or pushing it away, depending on what feels most natural for your specific tool. You’ll actually start to see a slurry forming on the stone—don’t worry, that’s not a mess, it’s actually a sign that the process is working its magic!
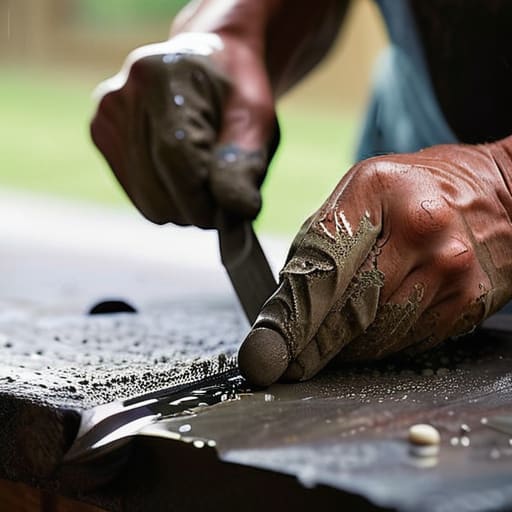
- 5. As you work, pay close attention to the “burr”—that tiny, rough lip of metal that starts to form on the opposite side of the edge. When you feel that little ridge with your thumb (be careful, though!), it’s a clear signal that you’ve successfully ground down the metal to the center. This is the ultimate indicator that you’re on the right track to a truly sharp edge.
- 6. Now for the fun part: the honing stage! Switch over to your finest grit stone or a leather strop to smooth out that burr and polish the edge. This step is all about refinement rather than heavy lifting. Use very light pressure here, almost like you’re stroking a piece of silk, to ensure the edge is smooth enough to glide through wood or fabric without any resistance.
- 7. Finally, let’s give everything a good clean and a little bit of TLC. Wipe away any metal filings or stone slurry with a clean rag, and I always suggest applying a light coat of mineral oil to prevent any rust from creeping in while the tool sits in your kit. Now, grab a scrap piece of wood and give it a test cut—there is honestly no better feeling than seeing a tool perform exactly the way it was meant to!
Mastering Whetstone Sharpening Techniques for Beautiful Results
Now, if you really want to take your skills to the next level, we need to talk about the art of the stone. While a quick pass with a rod works in a pinch, mastering specific whetstone sharpening techniques is where the real magic happens. I remember watching my dad at the hardware store use a fine-grit stone to bring an old chisel back to life; the way the metal caught the light was just stunning. When you’re working with a stone, the secret is all about consistency. You aren’t just grinding metal; you’re sculpting an edge.
One thing that tripped me up early on was figuring out the sharpening angle for different tools. You wouldn’t use the same angle for a delicate paring knife that you would for a heavy-duty garden hoe! A common mistake I see is confusing honing steel vs sharpening stone; remember, the steel realigns the edge, while the stone actually removes metal to create a new one. Take your time, find that sweet spot, and I promise your tools will feel like brand-new extensions of your own hands.
Finding the Perfect Sharpening Angle for Different Tools
One thing I learned quickly back when I was helping out at my family’s hardware store is that not all edges are created equal. If you try to sharpen a delicate carving knife with the same heavy-handed angle you’d use for a garden spade, you’re going to end up with a mess! Finding the right sharpening angle for different tools is really the secret sauce to a professional finish. For your everyday kitchen knives, you’ll usually want to aim for about 15 to 20 degrees, but if you’re working on something beefier like a wood chisel, you might want to bump that up to 25 or even 30 degrees to ensure the edge can actually handle the pressure of your project.
It can feel a little intimidating at first, but I promise it gets much easier with practice. Think of it like finding the perfect drape for a window—it’s all about the precision. While you might wonder about honing steel vs sharpening stone, remember that a honing steel is fantastic for maintaining blade edge longevity between deep sessions, but it won’t actually fix a dull edge. For true restoration, you’ve got to get back to that steady, angled stroke on your stone.
Pro-Tips from My Workbench: Little Secrets for a Razor-Sharp Edge
- Always keep your tools clean before you start; you don’t want any old sawdust or dried wood glue getting trapped in your sharpening stone and scratching up that beautiful new edge!
- Don’t rush the process—I know it’s tempting to get straight to the fun part, but patience is your best friend when you’re working with a whetstone.
- Listen to the sound of the metal; as you get closer to that perfect edge, you’ll actually hear a subtle change in the “swish” of the blade against the stone.
- Test your edge on a piece of scrap wood rather than your thumb (trust me on this one!) to see if you’ve achieved that smooth, clean slice we’re looking for.
- Remember to oil or water your stones regularly; a dry stone is a grumpy stone, and we want everything moving smoothly while we work!
Quick Tips to Keep Your Tools in Top Shape
Don’t rush the process; sharpening is more about patience and finding that perfect rhythm than it is about speed.
Always keep your tools clean and dry after sharpening to prevent rust from creeping in and ruining your hard work.
Listen to your tools—if they aren’t slicing through material like butter, it’s time to head back to the whetstone for a little extra love!
## Why a Sharp Edge Matters
“Sharpening your tools isn’t just about maintenance; it’s about showing respect for your craft. When you take that extra moment to hone a blade or refine an edge, you’re not just preparing for a project—you’re setting the stage for the confidence and precision that turn a simple DIY into a true work of art.”
Emily Carter
Final Thoughts Before You Get Back to the Bench
We’ve covered a lot of ground today, from selecting the right grit on your whetstone to finding that elusive, perfect angle for your specific blades. Remember, sharpening isn’t just a chore to check off your list; it’s about respecting your equipment and ensuring that every cut, shave, or scrape is as precise as possible. Whether you’re working with a vintage chisel you rescued from a flea market or a trusty chisel from my family’s old hardware store, taking those extra few minutes to hone the edge will save you so much frustration in the long run. Don’t be afraid to take your time—patience is your best tool when you’re working toward that razor-sharp finish.
At the end of the day, I want you to remember that every master craftsman started exactly where you are right now. There might be a few slips or a bit of unevenness at first, but that’s just part of the beautiful process of learning. When you pick up a tool that you’ve sharpened with your own two hands, you’ll feel a different kind of connection to your work. You aren’t just preparing for a project; you are building your confidence one stroke at a time. So, grab your stones, clear off your workbench, and let’s go make something incredible!
Frequently Asked Questions
I've accidentally dulled a blade way too much—is it possible to actually fix it, or is it time to head to the hardware store for a replacement?
Oh, don’t panic! I have been there more times than I’d like to admit (usually involving a rogue chisel and a very stubborn piece of oak). In most cases, a heavily dulled blade is definitely salvageable! It just means you’ll need to spend a little extra time working through the coarser grits on your whetstone to reset that edge. Unless the metal is chipped or physically bent, don’t head to the hardware store just yet—let’s try saving it first!
How can I tell if I'm actually getting a sharp edge or if I'm just sliding the tool around on the stone?
I totally get it—I’ve definitely had those “am I actually doing anything here?” moments at my workbench! The best way to tell is by feeling for that “burr.” As you sharpen, run your thumb very carefully (and I mean gently!) across the edge at a right angle. If you feel a tiny, microscopic ridge of metal curling over, you’re doing it! If it feels smooth and nothing is catching, you’re likely just sliding around.
Do I really need to oil my tools after sharpening them, or will they stay protected enough if I just wipe them down?
Oh, I am so glad you asked! While a quick wipe-down is a great start, I highly recommend taking that extra minute to apply a light coat of oil. Think of it like skincare for your tools—it creates a protective barrier against moisture and prevents those pesky rust spots from creeping in. Since we’ve just exposed fresh, raw metal by sharpening, they’re extra vulnerable. A little oil goes a long way in keeping your favorites beautiful!