
I still remember standing in my dad’s hardware store back in Ohio, staring at a dusty, chipped wooden chair and thinking there was absolutely no way I could save it without it looking like a total mess. I used to think that you needed a professional booth and a fancy air compressor to get a smooth finish, but let me tell you a little secret: that is a total myth! Learning how to spray paint is actually much more about your technique and patience than the expensive gear you own. Once I realized that a little bit of steady handwork could replace a professional setup, I finally felt like I could truly transform any thrift store find into a high-end designer piece.
In this guide, I’m stripping away all the intimidating jargon to give you the real, no-nonsense truth about getting that flawless, factory-smooth look at home. I’ll walk you through everything from prepping your surfaces to mastering those perfect, sweeping motions, ensuring you avoid those dreaded drips and runs. We are going to tackle this together, step-by-step, so you can walk away with the confidence to create something absolutely beautiful. Let’s get started!
Table of Contents
- Step-by-Step Instructions
- Mastering Spray Paint Surface Preparation for a Flawless Finish
- Choosing the Best Spray Paint for Diy Projects Youll Love
- Pro Tips from My Toolbox: Little Secrets for a Professional Look
- Quick Tips to Keep in Your Toolbox
- My Golden Rule for Spray Painting
- You’ve Got This: Final Thoughts Before You Spray
- Frequently Asked Questions
Guide Overview
Tools & Supplies
- Spray paint cans (the primary coloring agent)
- Drop cloths (to protect surfaces from overspray)
- Sandpaper (to smooth the surface before painting)
- Masking tape (to define edges and protect areas)
- Surface cleaner or degreaser (1 bottle)
- Primer (1-2 cans depending on surface size)
- Painter's tape (1 roll)
- Sandpaper assortment (1 pack)
Step-by-Step Instructions
- 1. First things first, we need to get our workspace ready! Grab some old newspapers or a drop cloth—I usually go for the heavy-duty canvas ones—and cover everything in the area. You’d be surprised how far a tiny mist of paint can travel, so you want to make sure your floors and surrounding furniture are completely protected before we even crack open a can.
- 2. Next up is the most important part: cleaning your piece. If you’re working on something vintage like one of my favorite thrift store finds, it likely has years of dust or even a bit of grease on it. Grab a damp cloth with some mild soap and really get into those nooks and crannies, because paint just won’t want to stick to a dirty surface. Once it’s clean, let it dry completely so no moisture gets trapped under your new finish.
- 3. Now, let’s talk prep work and masking. If your project has parts that shouldn’t be painted—like brass handles or a beautiful wooden inlay—you’ll want to cover them up with painter’s tape. I always recommend being a little extra thorough here; it’s much easier to tape a spot off now than it is to try and scrape dried paint off later!
- 4. Before you even touch your project, give that spray can a good, vigorous shake. You’ll hear the little mixing ball rattling around inside, which is exactly what we want to hear. I like to test my first spray on a piece of cardboard first to check the spray pattern and make sure the nozzle isn’t clogged. It’s a tiny step that saves so much heartache!
- 5. When you’re ready to paint, the secret is all in the movement. Hold the can about 8 to 12 inches away from your object and start your spray just outside the edges of the piece. Sweep your hand in a steady, even motion across the surface, making sure you don’t stop moving while the paint is actually hitting the item. This prevents those annoying drips and runs that we’re all trying to avoid.
- 6. Here is where patience really pays off: do multiple light coats rather than one heavy one. I know it’s tempting to want that instant coverage, but if you go too thick, you’ll end up with a gummy mess. Aim for a thin, misty layer each time. Let the piece dry for a few minutes between coats, and you’ll find that the color builds up beautifully and looks much more professional.
- 7. Finally, once the last coat is on, the hardest part begins—waiting! Resist the urge to touch it or move it around too soon. Let it dry completely according to the instructions on the can. If you’re feeling extra careful, you can even let it “cure” for a day or two before you start using it again. Trust me, that extra bit of patience will make your finished project look absolutely stunning!
Mastering Spray Paint Surface Preparation for a Flawless Finish
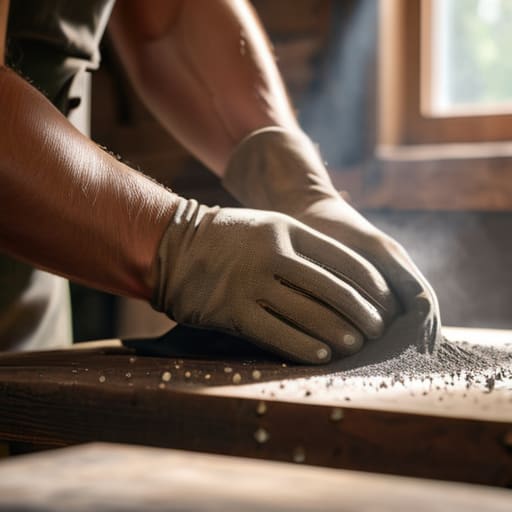
Now, if there’s one thing I learned growing up in my dad’s hardware store, it’s that the magic isn’t just in the can—it’s in the prep! I know, I know, cleaning and sanding might not sound as glamorous as the actual painting part, but trust me, thorough spray paint surface preparation is the absolute secret to avoiding a DIY disaster. If you skip the cleaning, you’re basically inviting dust and oils to ruin your hard work. I always grab a microfiber cloth and a bit of degreaser to make sure every nook and cranny is spotless before I even think about touching that nozzle.
Once your surface is clean, don’t forget about the foundation! Depending on what you’re working on, using a high-quality spray paint primer and sealer can make a world of difference, especially if you’re transforming something porous like wood or metal. It helps the color grab onto the surface evenly and prevents that dreaded texture issues later on. Think of it as giving your project a smooth, even canvas so your final color can really shine!
Choosing the Best Spray Paint for Diy Projects Youll Love
Now, let’s talk about the fun part: picking out your colors! I know, walking down the hardware aisle can feel a little overwhelming with all those options, but finding the best spray paint for DIY projects really comes down to what you’re actually working on. If you’re breathing new life into a vintage wooden dresser, you’ll want something with a durable enamel finish. However, if you’re just refreshing some plastic decor, a specialized plastic-bonding spray will save you a massive headache later on.
One thing I learned the hard way back in my family’s hardware store days is that you can’t skip the prep work in the can. I always recommend grabbing a high-quality spray paint primer and sealer to use alongside your color coat. Using a primer not only helps the pigment stick like crazy, but it also acts as a shield, preventing those dreaded chips and scratches that can happen over time. It’s that extra little bit of effort that separates a “quick fix” from a professional-looking transformation you’ll be proud to show off!
Pro Tips from My Toolbox: Little Secrets for a Professional Look
- Mind the weather, friends! I can’t stress this enough—try to avoid spray painting on super humid or windy days. High humidity can make your paint take forever to dry or even leave it looking cloudy, and a gust of wind is just an invitation for dust and debris to ruin your hard work!
- Get that rhythm down! Instead of trying to cover the whole area in one go, think of it like a steady dance. Start your spray just off to the side of your object, sweep across in a smooth motion, and stop once you’ve passed the other side. This keeps those annoying drips and runs at bay.
- Don’t be afraid of the “ugly” stage. When you’re doing those first few light coats, it might look a little patchy or uneven, and honestly? That’s totally okay! It’s much better to have a thin, slightly uneven layer that dries quickly than to go heavy and end up with a gooey mess.
- Keep those cans moving! One of the biggest mistakes I see (and I’ve definitely made more than once!) is holding the can too close to the surface. Keep a consistent distance—usually about 8 to 12 inches—to ensure the paint atomizes perfectly and settles beautifully.
- Give it some breathing room. Once you think you’re done, resist the urge to touch it! Even if it feels dry to the touch, let it cure for as long as the can recommends. I’ve learned the hard way that a little extra patience goes a long way in getting that smooth, professional-grade finish we’re all after.
Quick Tips to Keep in Your Toolbox
Remember, the secret is all in the prep work; taking that extra time to clean and sand your surface now will save you so much heartache (and extra coats!) later on.
Don’t rush the process—it’s much better to apply several light, misty layers than to try and cover everything in one heavy go and end up with those annoying drips.
Always trust your environment, so try to find a spot with good airflow and low humidity to make sure your beautiful new finish sets perfectly every single time.
My Golden Rule for Spray Painting
“I always tell my friends: don’t let the fear of a drip or a missed spot stop you from starting. Spray painting isn’t about being perfect on the first pass; it’s about finding your rhythm, staying patient with those light coats, and realizing that every little mistake is just part of the magic of making something beautiful with your own two hands.”
Emily Carter
You’ve Got This: Final Thoughts Before You Spray
I know it can feel like a lot to take in, but remember that a successful spray paint project really boils down to the basics. From that crucial first step of thoroughly cleaning and sanding your surface to selecting the perfect type of paint for your specific material, every little detail makes a massive difference in your final result. Don’t forget that patience is your absolute best friend here; it’s much better to apply a few thin, even coats than to rush in with one heavy layer and end up with those dreaded drips. If you take the time to prep well and respect the drying times, you are going to be so incredibly proud of the professional-looking finish you’ve achieved!
At the end of the day, I want you to remember that DIY is all about the journey and the joy of making something your own. Don’t let the fear of a little mess or a small imperfection hold you back from trying something new. Even if your first attempt isn’t absolutely perfect, every project is just another chance to refine your skills and grow your confidence. You have the vision and the tools to transform your home, one can of paint at a time. So, grab your mask, find a well-ventilated spot, and let’s bring that vision to life together!
Frequently Asked Questions
How do I know if I've applied too much paint and am at risk of getting those annoying drips or runs?
Oh, I have been there! It’s such a heart-sinking feeling when you see a drip starting to form. Honestly, the biggest giveaway is if the surface starts looking “wet” or shiny in one specific spot rather than having a consistent, soft sheen. If you see the paint pooling or if it looks heavy and thick, you’re definitely pushing it! Just remember: it’s much better to do three whisper-light coats than one heavy, gloopy one.
Can I spray paint something that’s already been painted, or do I need to strip it down to the bare wood first?
Oh, I get this question all the time, and honestly, the best part is that you usually don’t have to go through the headache of stripping everything down! You can definitely spray paint over an existing finish. Just make sure you give it a good sanding first to scuff up that old surface—it helps the new paint really grab on. As long as the original layer is stable and clean, you’re good to go!
What's the best way to deal with the smell and fumes if I'm working in a smaller space like a garage or a porch?
Oh, I hear you! That “new paint” smell can get overwhelming fast, especially in a cozy garage. First things first: ventilation is your best friend. Even if you’re on a porch, try to set up a fan to keep the air moving. Most importantly, please don’t skip the mask! A good respirator makes a world of difference. Just take it slow, keep those windows open, and breathe easy while you create!
