Have you ever spent an entire evening huddled under a fuzzy blanket in your own living room, wondering why your heater is working overtime but your toes are still freezing? I’ve been there, more times than I’d like to admit! Growing up in my family’s hardware store back in Ohio, I used to think that a drafty entryway was just an inevitable part of owning an older home. But let me tell you a secret: most people think weatherstripping a door is some high-level construction project that requires a contractor and a massive budget, when really, it’s one of the simplest ways to reclaim your comfort.
In this guide, I’m stripping away the confusion and giving you my tried-and-true, no-nonsense approach to sealing those pesky gaps. We aren’t going to get bogged down in overly technical jargon; instead, I’ll walk you through exactly how to pick the right materials and get the job done with confidence. Whether you’re dealing with a stubborn front door or a sliding patio entrance, we’re going to tackle this together so you can finally enjoy a home that feels as cozy as it looks!
Table of Contents
- Step-by-Step Instructions
- Choosing Your Perfect Match Foam vs Rubber Weatherstripping
- Simple Steps for Preventing Air Leaks Around Doors
- Pro-Tips from My Toolbox: Making Your Weatherstripping Last
- Quick Wins for a Cozy, Draft-Free Home
- The Heart of a Cozy Home
- You've Got This!
- Frequently Asked Questions
Guide Overview
Tools & Supplies
- Tape measure for measuring door perimeter
- Utility knife for trimming excess material
- Screwdriver for securing door sweeps or jamb seals
- Cleaning cloth and mild detergent to prep surface
- Weatherstripping roll (adhesive or tension-based)
- Door sweep (for the bottom of the door)
- Caulking (optional, for gaps around the frame)
Step-by-Step Instructions
- 1. Before we even touch the new materials, we have to get that door frame absolutely spotless. Grab a damp cloth with some mild soap and some rubbing alcohol to wipe down the door edges and the frame where the seal will sit. If there’s old, crusty adhesive or gunk left behind from a previous project, the new weatherstripping just won’t want to stick, and we definitely don’t want it peeling off halfway through the winter!
- 2. Once everything is dry, it’s time to do a little bit of “detective work” to find where the drafts are actually sneaking in. I like to grab a heavy flashlight and have a friend shine it from the other side of the door while I’m in the dark; any light that peeks through the cracks is a guaranteed draft. Take a little note of these spots—usually it’s the bottom or the corners—so we know exactly where to focus our energy.
- 3. Now, let’s measure! Grab your measuring tape and carefully measure the length of the door jamb (the sides) and the top of the door. I always recommend adding an extra inch or two to your measurements just to be safe. It is much, much easier to trim a little bit of excess off at the end than it is to realize you’re an inch short when you’re right in the middle of the job!
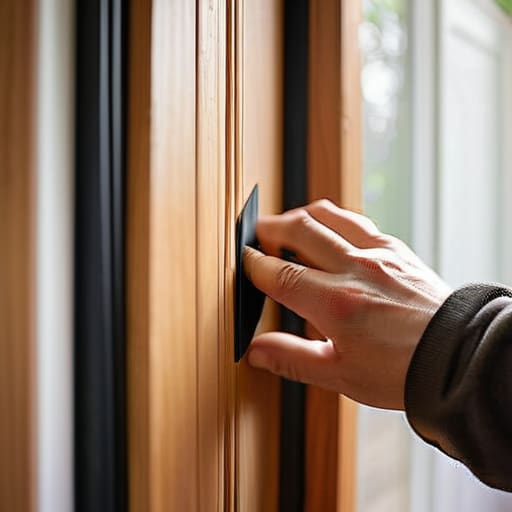
- 4. If you’re using the adhesive-backed foam or rubber strips, peel the backing off slowly as you work your way down the frame. I find it super helpful to start at the top corner and work my way down one side, then across the top, and finally down the other side. Try to press firmly as you go to make sure that adhesive really bites into the wood, but don’t rush it—take your time to keep those lines straight.
- 5. If you’ve decided to go with a more heavy-duty door sweep for that gap at the bottom, this is where you might need to grab your drill. Position the sweep against the bottom of the door and mark your holes with a pencil. I usually like to double-check the alignment one last time before I start driving those screws in, because once they’re in, they’re in!
- 6. After the strips are in place, it’s time for the most satisfying part: the test run! Close the door slowly and feel for any resistance. You want the door to feel snug and secure, but you shouldn’t have to shoulder-charge it just to get it to latch. If it’s too tight, we might need to trim a tiny bit of the material; if it’s too loose, we might need a slightly thicker strip.
- 7. Finally, take a moment to celebrate your hard work! Walk around the room and feel the difference. If you can’t feel that annoying chill hitting your ankles anymore, then you’ve done it. You’ve just made your home cozier and more efficient, and you did it all with your own two hands!
Choosing Your Perfect Match Foam vs Rubber Weatherstripping
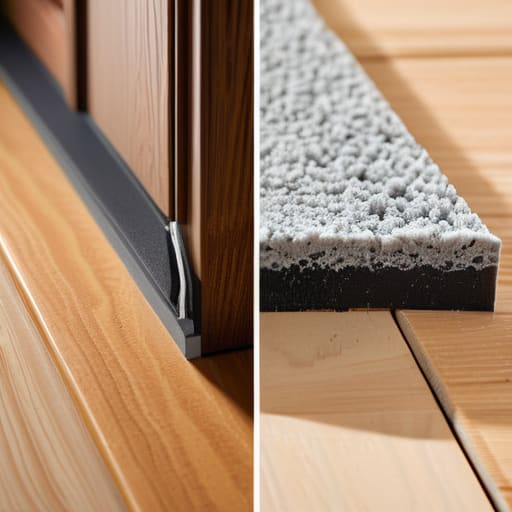
Now, before you head down to the hardware store (or dive into your local shop’s website), we need to talk about the “big debate”: foam vs rubber weatherstripping. Growing up in my family’s hardware store, I saw people grab whatever was cheapest, but I’ve learned the hard way that the material makes all the difference in how long your project lasts! Foam is super budget-friendly and incredibly easy to peel and stick, making it a fantastic choice for small gaps or a quick weekend fix. However, if you’re looking for long-term energy efficient door solutions, rubber is your best friend. It’s a bit more durable and holds up much better against the heavy slamming of a door or the changing seasons.
When you’re deciding, think about where exactly the air is sneaking in. If you’re focusing on the very bottom of the door where it meets the threshold, you might actually want to look into a door bottom seal installation rather than just a strip of foam. Rubber tends to handle that high-traffic, high-pressure area much more gracefully. Choosing the right material is one of the smartest ways of preventing air leaks around doors, so take a second to feel the gap and pick the one that feels most substantial!
Simple Steps for Preventing Air Leaks Around Doors

Before you even pick up your adhesive or tools, I want you to do one quick “sanity check” to see where the trouble is really hiding. Grab a flashlight and a piece of incense or a candle on a breezy day; if the flame flickers when you hold it near the door edges, you’ve found your culprit! While we’ve talked about the sides and top, don’t forget that preventing air leaks around doors often requires looking at the very bottom. This is where most of that pesky, expensive air escapes, and it’s often the trickiest part to get right.
If you notice a massive gap between your door and the threshold, you might need to look beyond just simple strips. I always recommend checking if a door bottom seal installation is necessary to create a truly airtight barrier. Sometimes, a simple sweep won’t cut it, and you might need a more robust solution to keep that cozy feeling inside. Think of it as adding a final layer of protection to your home’s comfort—it’s all about those little details that make a massive difference in how your space feels!
Pro-Tips from My Toolbox: Making Your Weatherstripping Last
- Before you even think about sticking that new foam down, grab a damp cloth and some rubbing alcohol to give the door frame a good wipe. If there’s any lingering dust or old residue, your new seal won’t want to play nice, and we definitely don’t want it peeling off halfway through winter!
- Don’t be afraid to get a little “extra” with your measurements. I always like to cut my strips just a tiny bit longer than the actual gap—maybe a sixteenth of an inch—to ensure a nice, snug squeeze when the door shuts. It’s much better to have a tight seal than to leave a little gap for the draft to sneak through.
- Check your door’s alignment before you start. Sometimes, that pesky draft isn’t just a weatherstripping issue; it might be that your door has sagged a bit over the years. If the door isn’t hitting the frame squarely, no amount of rubber strip is going to fix the problem, so a quick hinge adjustment might be your best friend here.
- Test your work with the “light trick.” Once you’ve finished installing everything, turn off the lights in your hallway and have someone stand on the other side with a flashlight. If you see any pinpricks of light peeking through the edges, you know you’ve got a little spot that needs a bit more love and attention.
- Remember that weatherstripping isn’t a “set it and forget it” kind of thing. Since I grew up around my family’s hardware store, I learned early on that materials age! I like to do a quick little check every autumn to make sure the rubber hasn’t become brittle or compressed too much, so you’re always ready for the cold.
Quick Wins for a Cozy, Draft-Free Home
Don’t sweat the small stuff—even a tiny gap can let in a huge amount of cold air, so take your time inspecting every nook and cranny around your door frame!
Whether you go with flexible rubber or easy-to-use foam, the “right” material is simply the one that creates a snug, seamless seal for your specific door.
Remember, this isn’t just about saving on energy bills; it’s about making your home feel like a warm, inviting sanctuary where you can truly relax.
The Heart of a Cozy Home
“Weatherstripping isn’t just about sealing out a draft; it’s about reclaiming the comfort of your sanctuary and proving to yourself that no small fix is too minor to make a massive difference in how a house feels like a home.”
Emily Carter
You've Got This!
And just like that, you are officially a master of the draft! We’ve walked through everything from picking out the right materials—whether you went with that trusty foam or a more durable rubber—to the actual nitty-gritty of sealing those pesky gaps around your door frame. It might have felt a little intimidating when we first started, but by taking the time to clean your surfaces and measure carefully, you’ve ensured that your home is going to be significantly more comfortable for months to come. Remember, it’s all about those small, intentional details that prevent those annoying air leaks and keep your energy bills from skyrocketing.
I know that sometimes these little home maintenance tasks can feel like just another item on a never-ending to-do list, but I want you to take a second to really appreciate what you just accomplished. You didn’t just seal a door; you took a piece of your environment and made it better with your own two hands. That is exactly what it’s all about! Every time you walk through that door and feel that steady, cozy warmth, I want you to feel a sense of true DIY pride. Keep experimenting, keep tinkering, and never forget that you have the power to transform your space one project at a time. Let’s keep building something amazing together!
Frequently Asked Questions
I’ve noticed some gaps even after adding the new strips—could the door itself be warped or misaligned?
Oh, I hear you! That is so frustrating when you feel like you’ve done everything right and those pesky drafts still creep in. And honestly? You hit the nail on the head—it’s very possible. Doors can definitely warp over time or shift in their frames. Before we panic, let’s check if the door is sitting level. If it’s misaligned, we might need to tweak those hinges rather than adding more foam!
How often should I actually be replacing my weatherstripping to make sure it's still doing its job?
That is such a great question! Honestly, there isn’t a strict “set it and forget it” rule, but I usually recommend doing a quick little inspection every spring and fall. If you notice the material feels brittle, looks cracked, or if you can actually see light peeking through the edges, it’s definitely time for a refresh. It’s much better to swap it out early than to deal with a chilly draft all winter!
Is it worth it to weatherstrip the bottom of the door too, or should I just stick to the sides and top?
Oh, that is such a great question! Honestly, if you want to see a real difference in how your home feels, you absolutely have to tackle the bottom too. That’s usually where the biggest culprits—like drafts and even little critters—try to sneak in! Think of it like sealing a gift; you want to make sure it’s airtight all around. It’s a little extra work, but I promise it’s so worth it!